
-
Using
- Importing Services & APIs
- Comparison to alternatives
- OpenAPI Mocking and Testing
- Swagger Mocking and Testing
- AsyncAPI Mocking and Testing
- Postman usage for Microcks
- gRPC Mocking and Testing
- GraphQL Mocking and Testing
- SoapUI Mocking and Testing
- Http Archive usage for Microcks
- Using exposed mocks
- Getting direct API
- Testing with Microcks
- Advanced topics
- Organizing repository
- Templating mock responses
- Dispatcher & dispatching rules
- Microcks APIMetadata
- Monitoring & Observability
- Installing
- Automating
- Administrating
- Guides
Postman usage for Microcks
🗓️ Last updated on February 23, 2023 | 6 | Improve this pageOverview
Pre-requisites
Microcks has been tested with latest version of Postman and uses the Collection v2 format as input artifacts holding all your API mocks and tests definitions. Version 1 of the Collection format is actually not supported because it is not extensible and it is simply not where the community is heading.
Steps for creating a repository
In order to create a tests and mocks repository using Postman, you’ll need to follow the steps below:
- Initialize a Postman collection that will hold the repository,
- Create Examples and fill request parameters, headers and body,
- Describe associated response in terms of status, headers and body,
and then:
- Either export the result as a JSON file using the Collection v2 format before saving the file into your SCM repository.
- Or, if you have used the online workspace features of Postman, get the API Collection link that will allow Microcks to directly fetch your collection in worksapce.
Conventions
In order to be correctly imported and understood by Microcks, your Postman collection should follow a little set of reasonable conventions and best practices.
- Your Postman collection may contain one or more API definitions. However, because it’s a best practice to consider each API as an autonomous and isolated software asset, we’d recommend managing only one API definition per Postman collection and not mixing requests related to different APIs within the same Collection,
- Your Postman collection description should hold a custom property named
versionthat allows tracking of API version. It is a good practice to change this version identifier for each API interface versioned changes. As of writing, Postman does not allow editing of such custom property although the Collection v2 format allow them. By convention, we allow setting it through the collection description using this syntax:version=1.0 - Here is now the full description of my collection....
We recommend having a look at our sample Postman collection for Test API to fully understand and see in action those conventions.
Collection initialisation
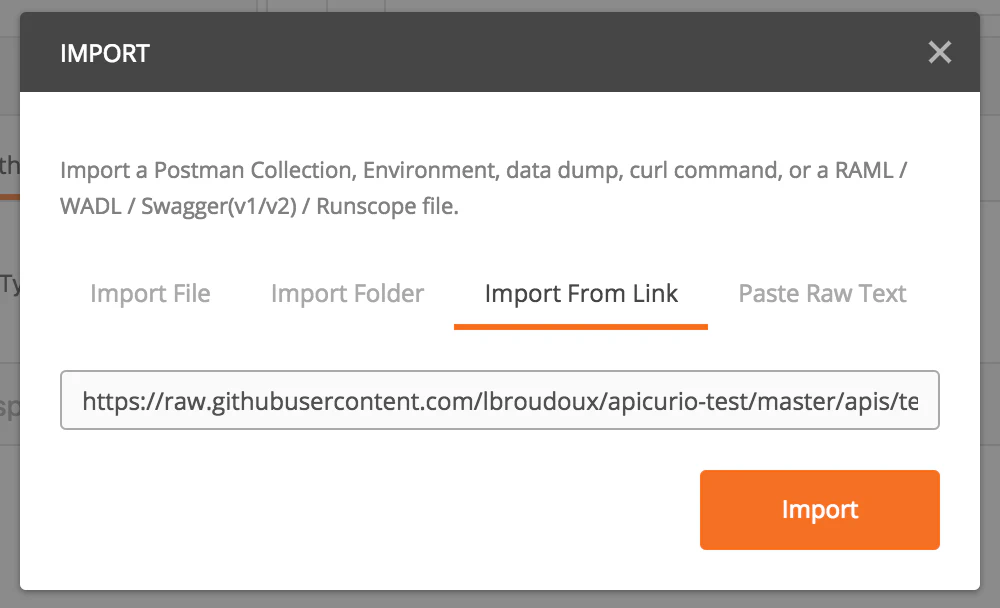
Collection initialization is done through Import of an existing resource into Postman. A best practice being using a “contract first” approach for API definition and management, you’ll typically choose to Import File or Import From Link referencing a Swagger or OpenAPI contract definition.
The screenshot below shows how to create a new collection from a Swagger file. We are using here the Test API Swagger file.
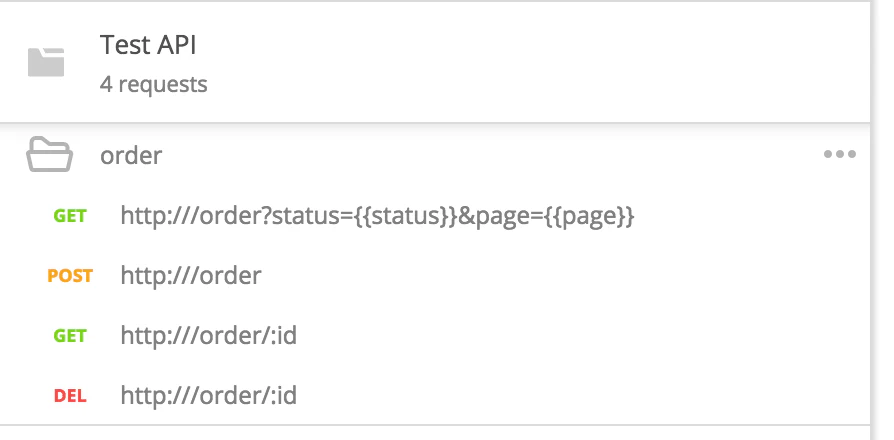
After successful import and collection creation, you should get the following result into Postman: a valid Collection with a list of default requests created for your API paths and verbs. Elements of this list will be called Operations within Microcks. Here’s the result for our Test API:
Defining Examples
As stated by Postman documentation :
Developers can mock a request and response in Postman before sending the actual request or setting up a single endpoint to return the response. Establishing an example during the earliest phase of API development requires clear communication between team members, aligns their expectations, and means developers and testers can get started more quickly.
The next step is now to create a bunch of examples for each of the requests/operations of your Collection as explained by the Postman documentation . You’ll give each example a meaningful name regarding the use-case it supposed to represent. Do not forget to save your example!
In contrary to SoapUI usage , you will not need defining mapping rules between sample requests and responses : example are perfectly suited for that.
Defining Test Scripts
This is an optional step that is only required if you also want to use Microcks to test your Service or API implementation as the development process progresses.
Postman allows to attach some test scripts defined in JavaScript to a request or Operation. Contrary to SoapUI usage
where different tests assertions can be put on each test request, Postman only allows you to attach scripts to the request level and not to examples. Such scripts should then be written so that they can be applied to the different examples but Microcks offers some way to ease that. For a global view of tests in Postman and their capabilities, we recommend reading the Introduction to Scripts
.
As an illustration to how Microcks use Postman and offers, let’s imagine we are still using the Test API
we mentioned above. There’s an Operation allowing to retrieve an order using its unique identifier. We have followed the previous section and have defined 2 examples for the corresponding request in Collection. Now we want to write a test that ensure that when API is invoked, the returned order has the id we specified into URI. We will write a test script that way:
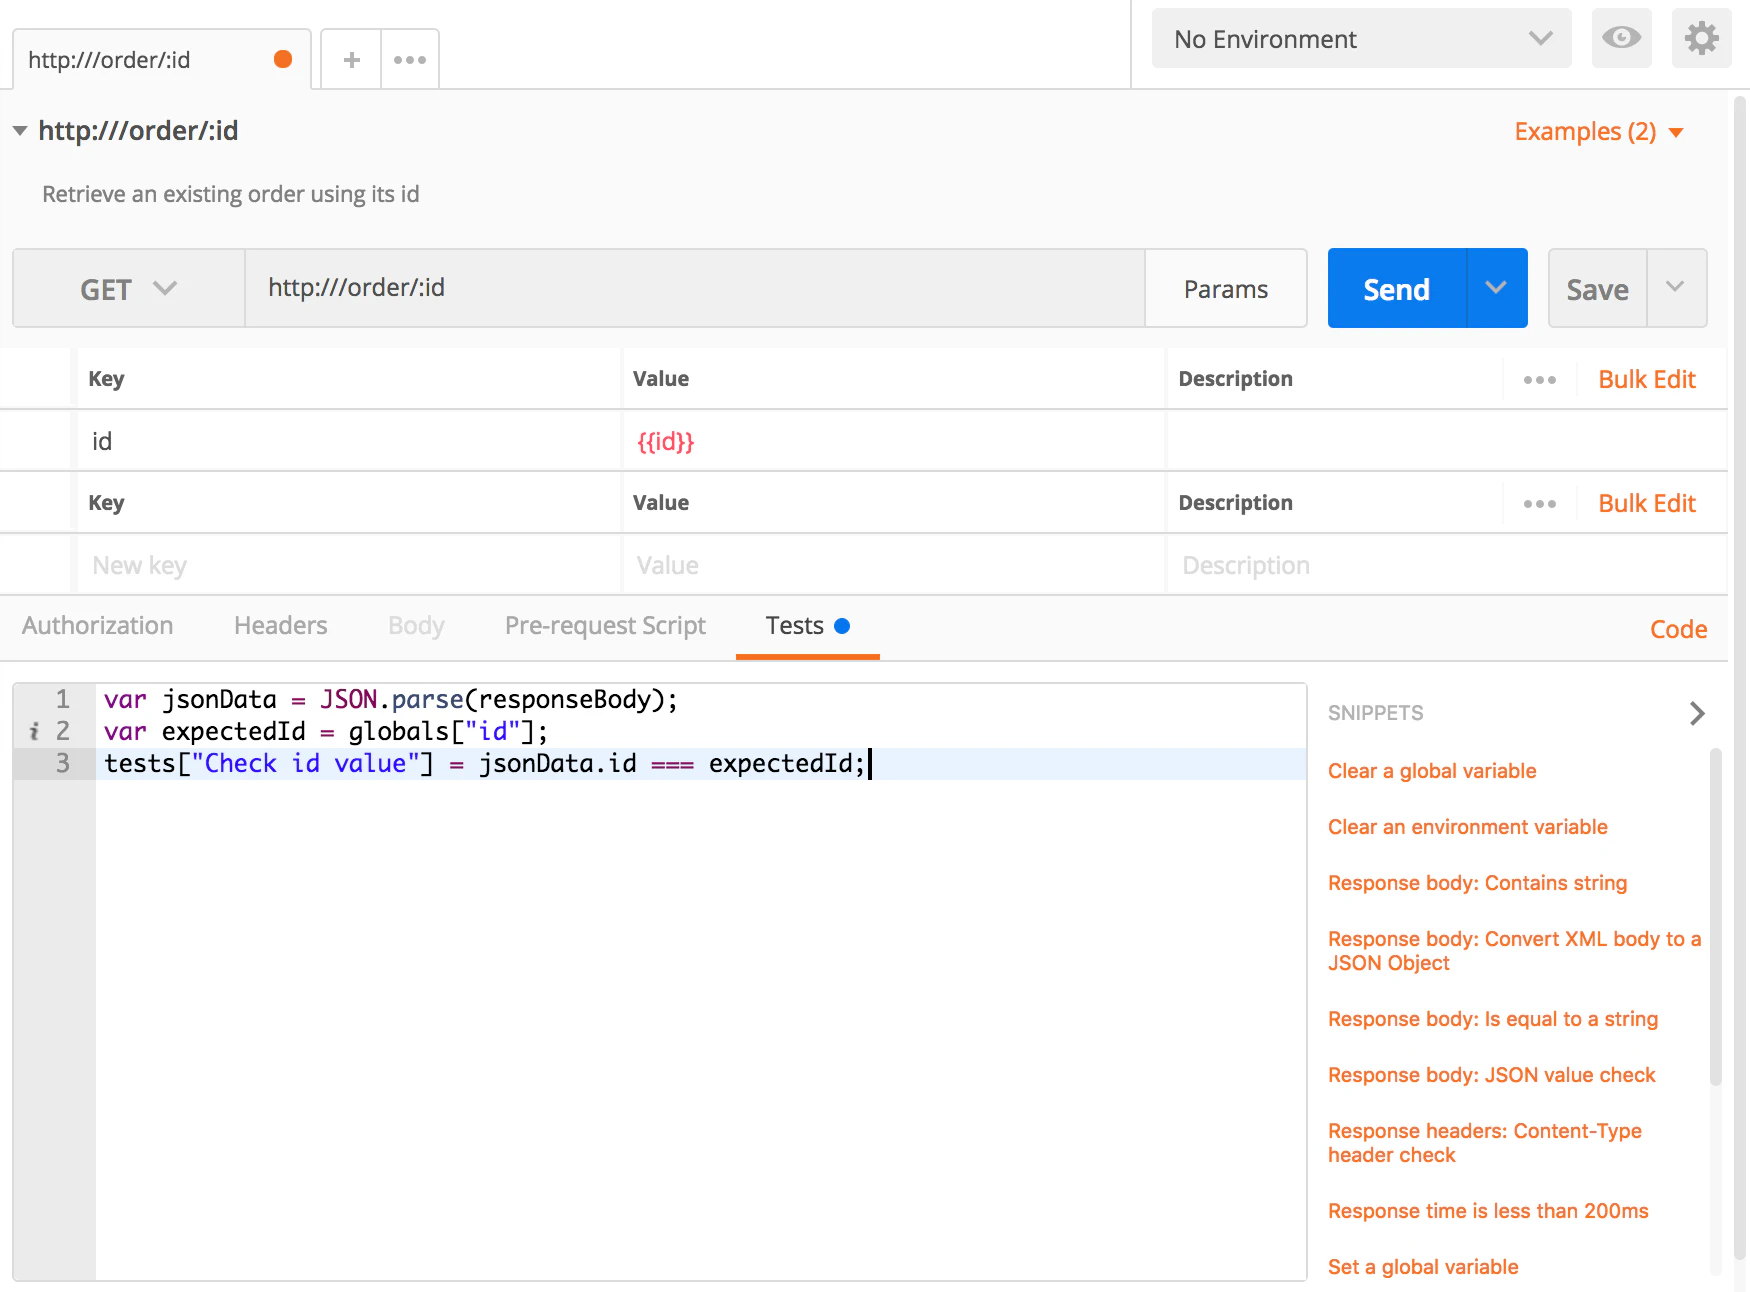
You will notice the usage of following JavaScript code: var expectedId = globals["id"];. What does that mean? Indeed, globals is an array of variables managed by the Postman runtime. Usually, you have to pre-populate this array using Pre-request script. When running this test in Microcks, such pre-request initialization is automatically performed for you! Every variable used within your request definition (URI parameters or query string parameters) are injected into the globals context so that you can directly used them within your script.
The execution of Postman tests using Microcks follows this flow:
- for each example defined for a request, collect URI and query string parameters as key/value pairs,
- inject each pair within
globalsJavaScript array, - invoke request attached script with the
globalsinjected into runtime context, - collect the results within
testsarray to detect success or failure.
Here is another example of such a generic script that validates the received JSON content:
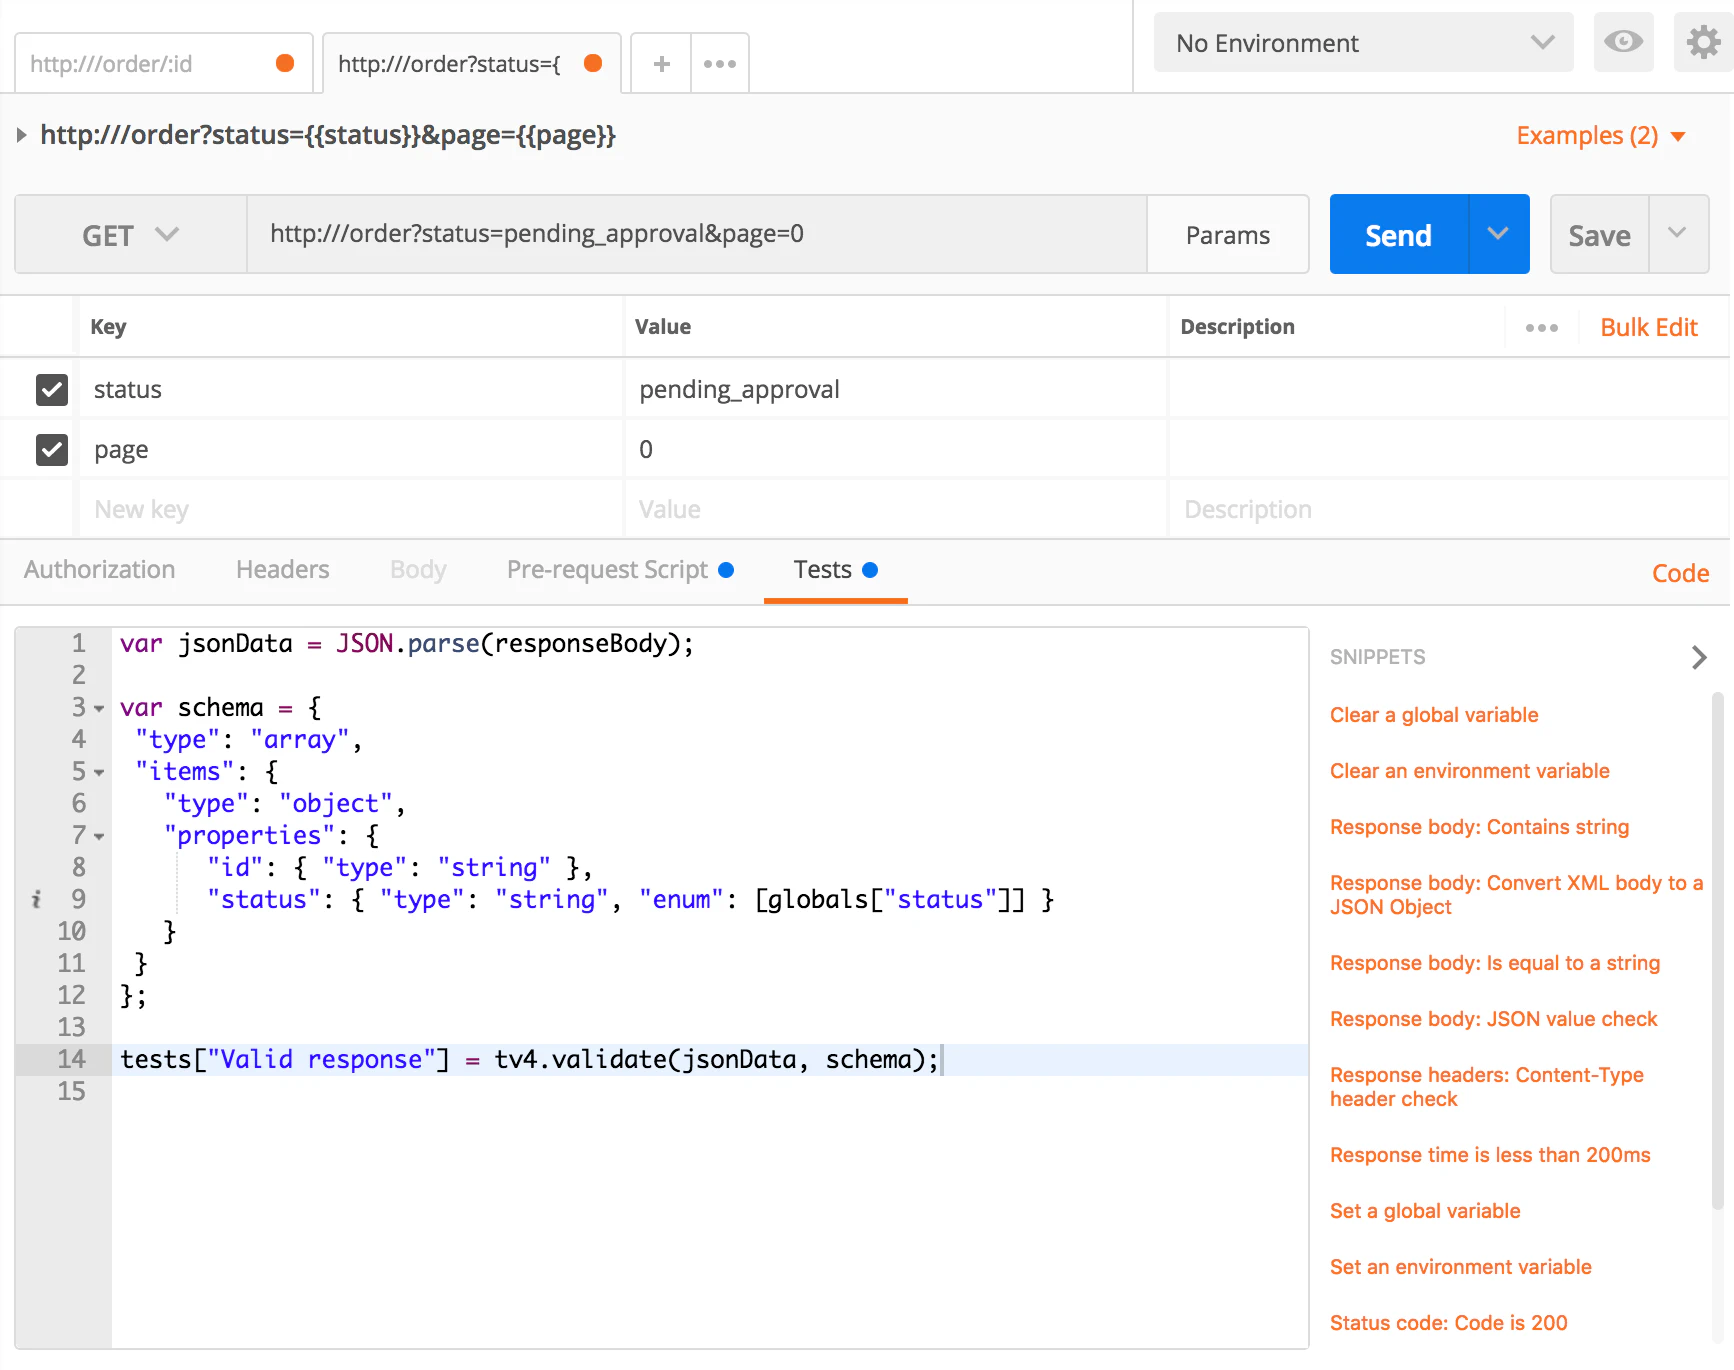
This script validates that all the JSON order objects returned in response all have the status that is requested using the query parameter status value. Otherwise, a Valid response assertion failure is thrown and stored into the tests array.
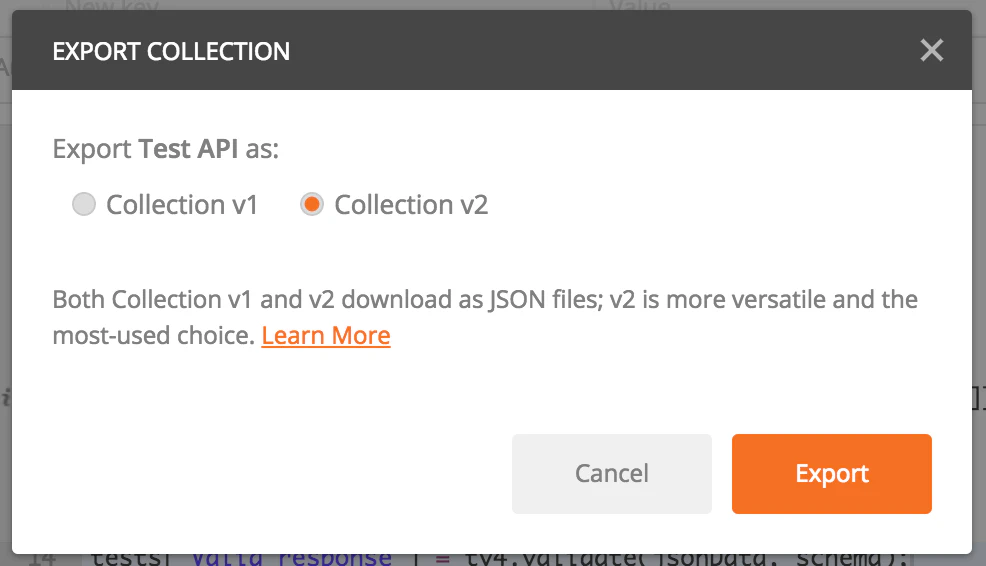
Export Postman collection
Finally, when you have defined all examples and optional test scripts on your requests, you may export your Collection as a JSON file using the Collection v2 format like shown below. Just put the result JSON file into your favorite Source Configuration Management tool for an easy integration with Microcks.
Retrieve Collection workspace API link
Another option available since version 1.7.0 of Microcks is to directly access your Collection defined into a Postman Workspace through its Collection API link. For that, you have to go through the Share button and select the Via API thumbnail as illustrated in the picture below:
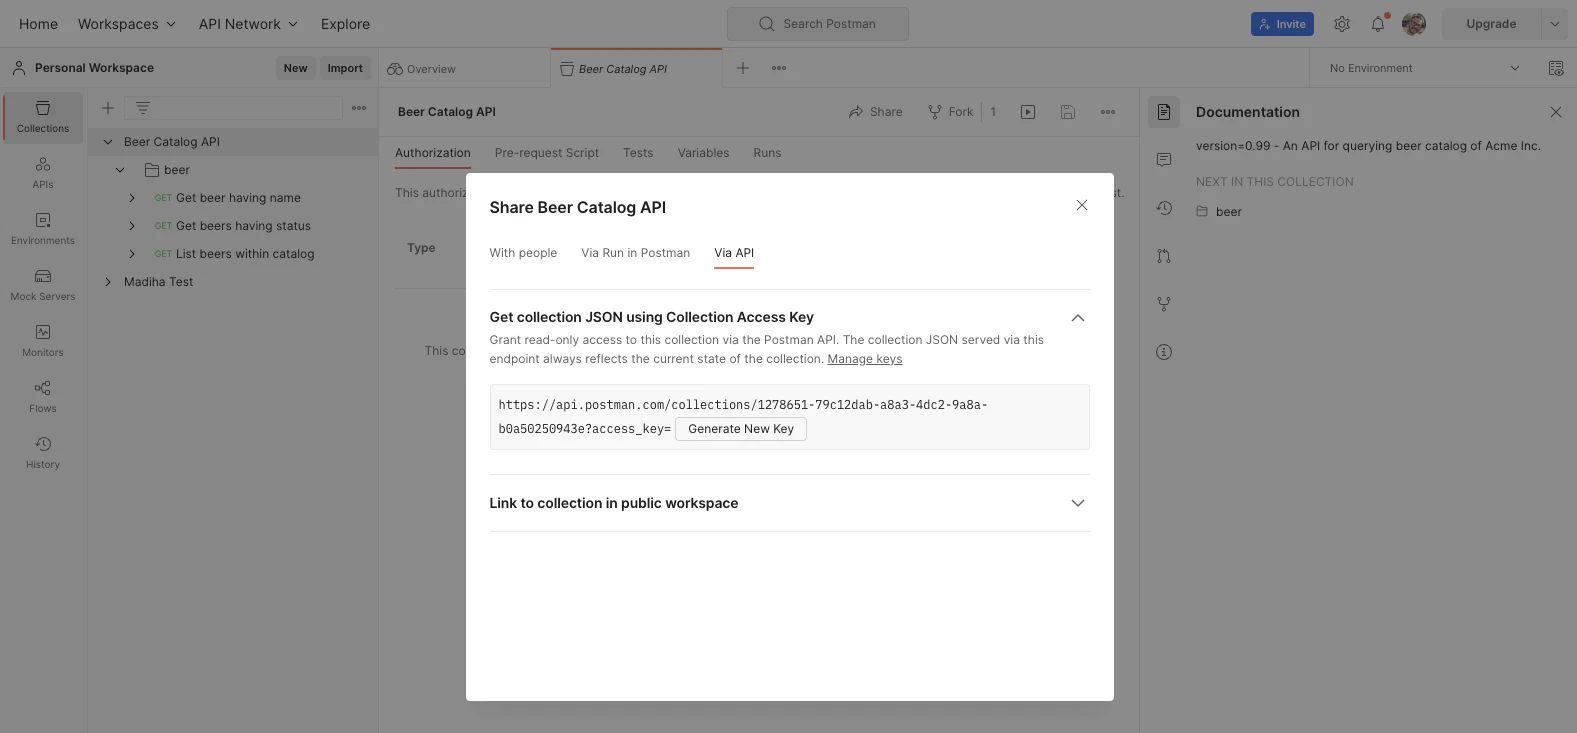
You can then copy this URL (ending just before the ?) and use it directly as an importer URL when creating your scheduled import
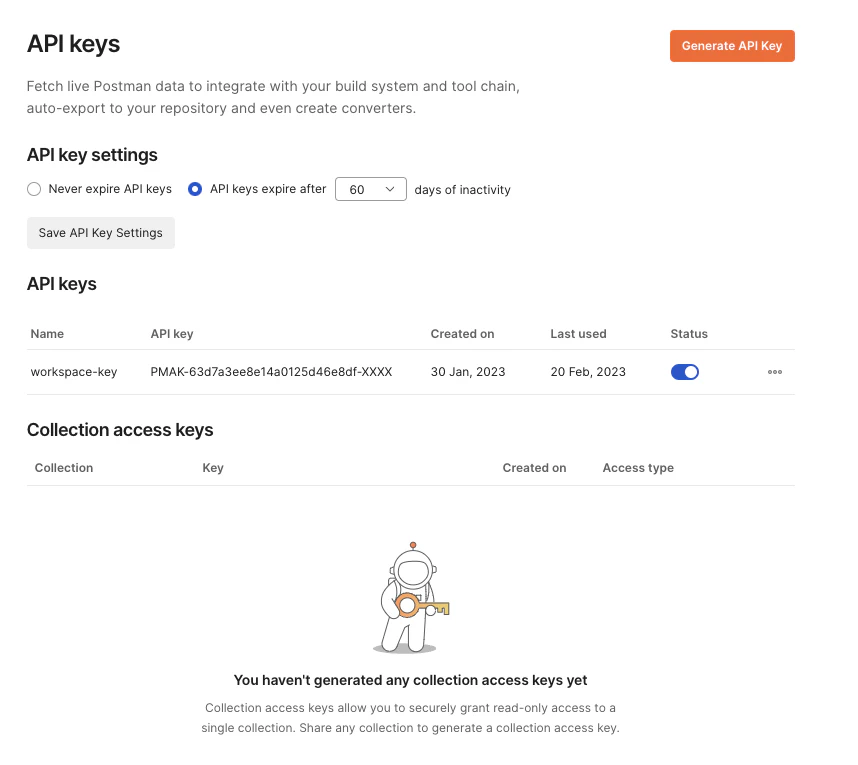
. Obviously you’ll need an API Access Key so that Microcks will be able to authenticate while fetching your Collection. In order to do that, you’ll need to generate an API Key from Postman workspace as illustrated below:
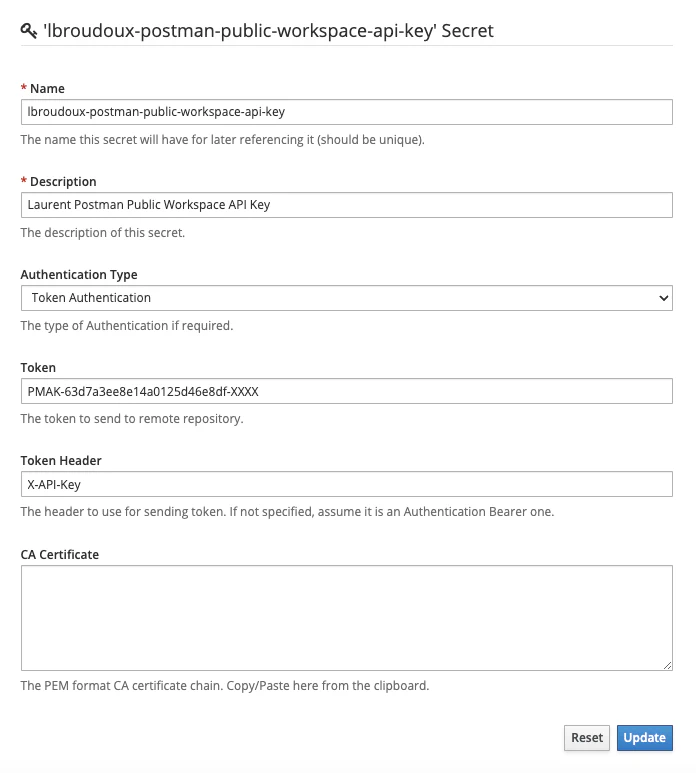
This API Key must then be saved as an authentication Secret in Microcks
so that your importer will be able to reference it and supply it to Postman API using the X-API-Key header. Here’s below the definition of such a secret in Microcks:

Still Didn’t Find Your Answer?
Join our community and get the help you need. Engage with other members, ask questions, and share knowledge to resolve your queries and expand your understanding.
Join the community