
-
Using
- Importing Services & APIs
- Comparison to alternatives
- OpenAPI Mocking and Testing
- Swagger Mocking and Testing
- AsyncAPI Mocking and Testing
- Postman usage for Microcks
- gRPC Mocking and Testing
- GraphQL Mocking and Testing
- SoapUI Mocking and Testing
- Http Archive usage for Microcks
- Using exposed mocks
- Getting direct API
- Testing with Microcks
- Advanced topics
- Organizing repository
- Templating mock responses
- Dispatcher & dispatching rules
- Microcks APIMetadata
- Monitoring & Observability
- Installing
- Automating
- Administrating
- Guides
Importing Services & APIs
🗓️ Last updated on March 7, 2023 | 8 | Improve this pageIntroduction
Once you get your Microcks instance up and running, the next step is to start adding some Services or APIs into its internal repository. We’ve seen in this Getting Started section how to quickly load samples into the repository. This page will take you through a complete explanation of supported formats and the import mechanisms present in Microcks.
Supported formats
As previously introduced, Microcks “turns your API contract into live mocks in seconds” - the noticeable part of this sentence being API contract. The cool thing here is that it does not require you to produce another document: it is able to reuse existing artifacts that you simply import into Microcks. In order to be usable by Microcks, such artifacts just need to hold syntactical contracts together with full samples of how your Service is expected to work - and you do this by just embedding complete pairs of requests and responses.
Microcks supports the following editing tools and export/import formats as artifacts formats:
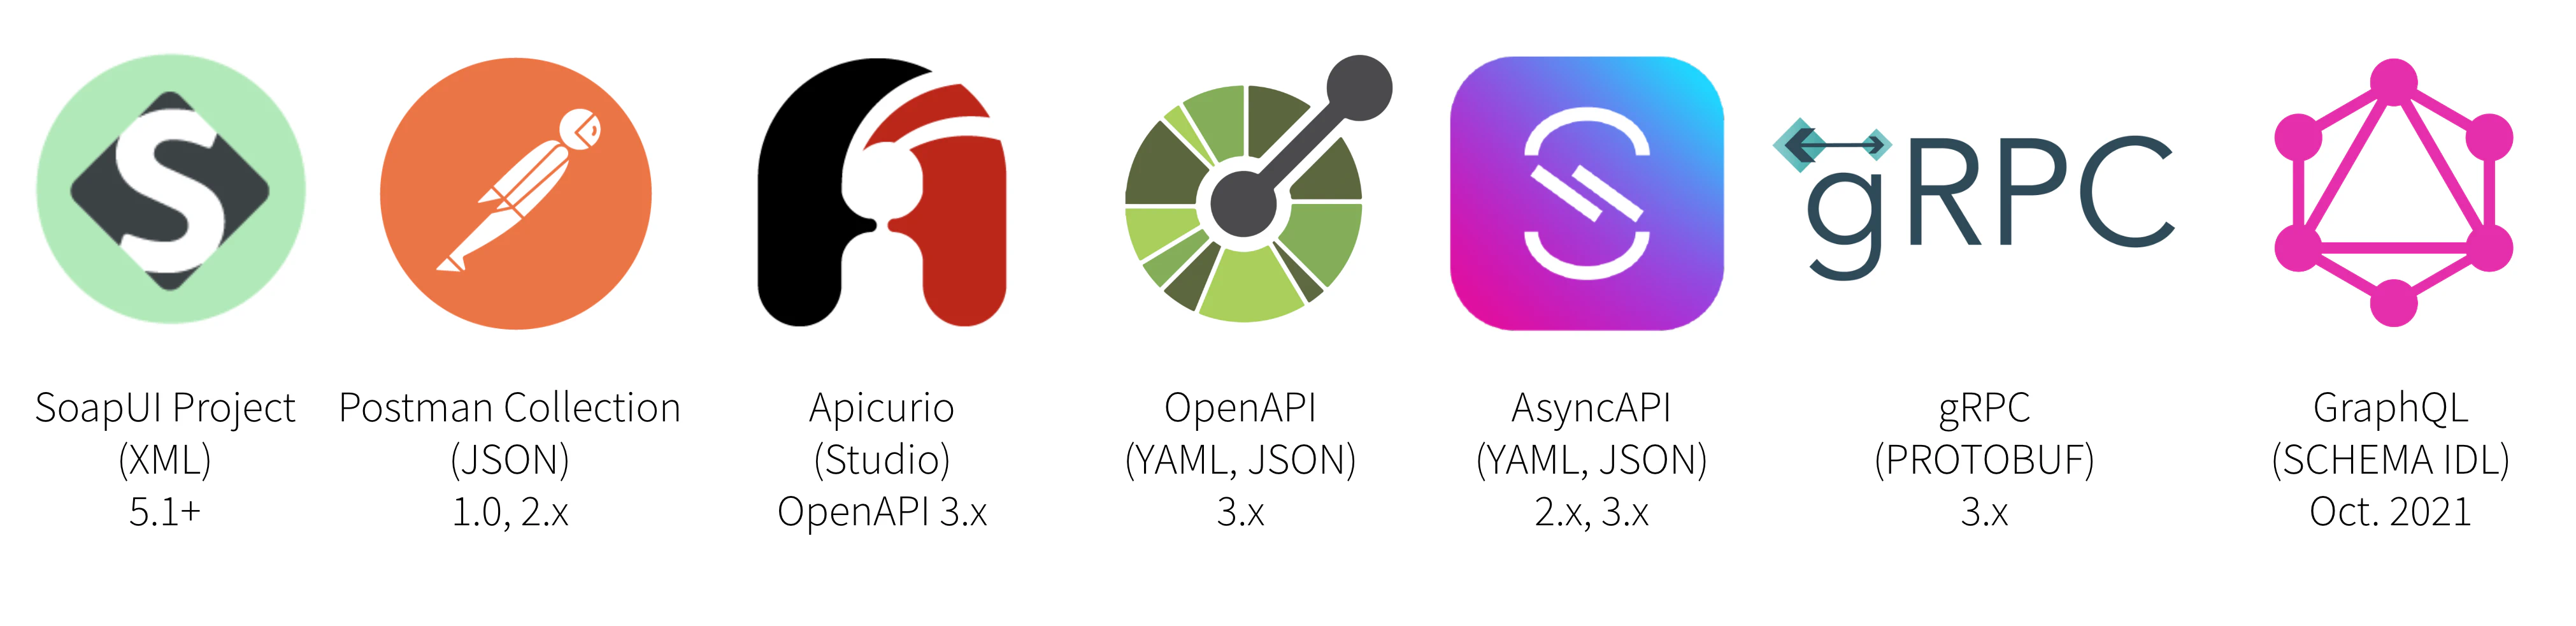
We provide built-in parsers and importers for the following formats:
- SoapUI projects files starting with version 5.1 of SoapUI. See our documentation on some conventions you should follow for this project structure,
- Postman collections files with v1.0 or v2.x file format. See our documentation on some conventions you should follow for this collection structure,
- Apicurio Studio direct integration when working on OpenAPI 3.x API specifications,
- OpenAPI v3.x files in either YAML or JSON format. See our documentation on some conventions you should follow for this specification,
- AsyncAPI v2.x and AsyncAPI v3.x files in either YAML or JSON format. See our documentation on some conventions you should follow for this specification,
- gRPC / Protocol buffers v3
.protofiles. See our documentation on some conventions you should follow for this specification, - GraphQL Schema
.graphqlfiles. See our documentation on some conventions you should follow for this specification.
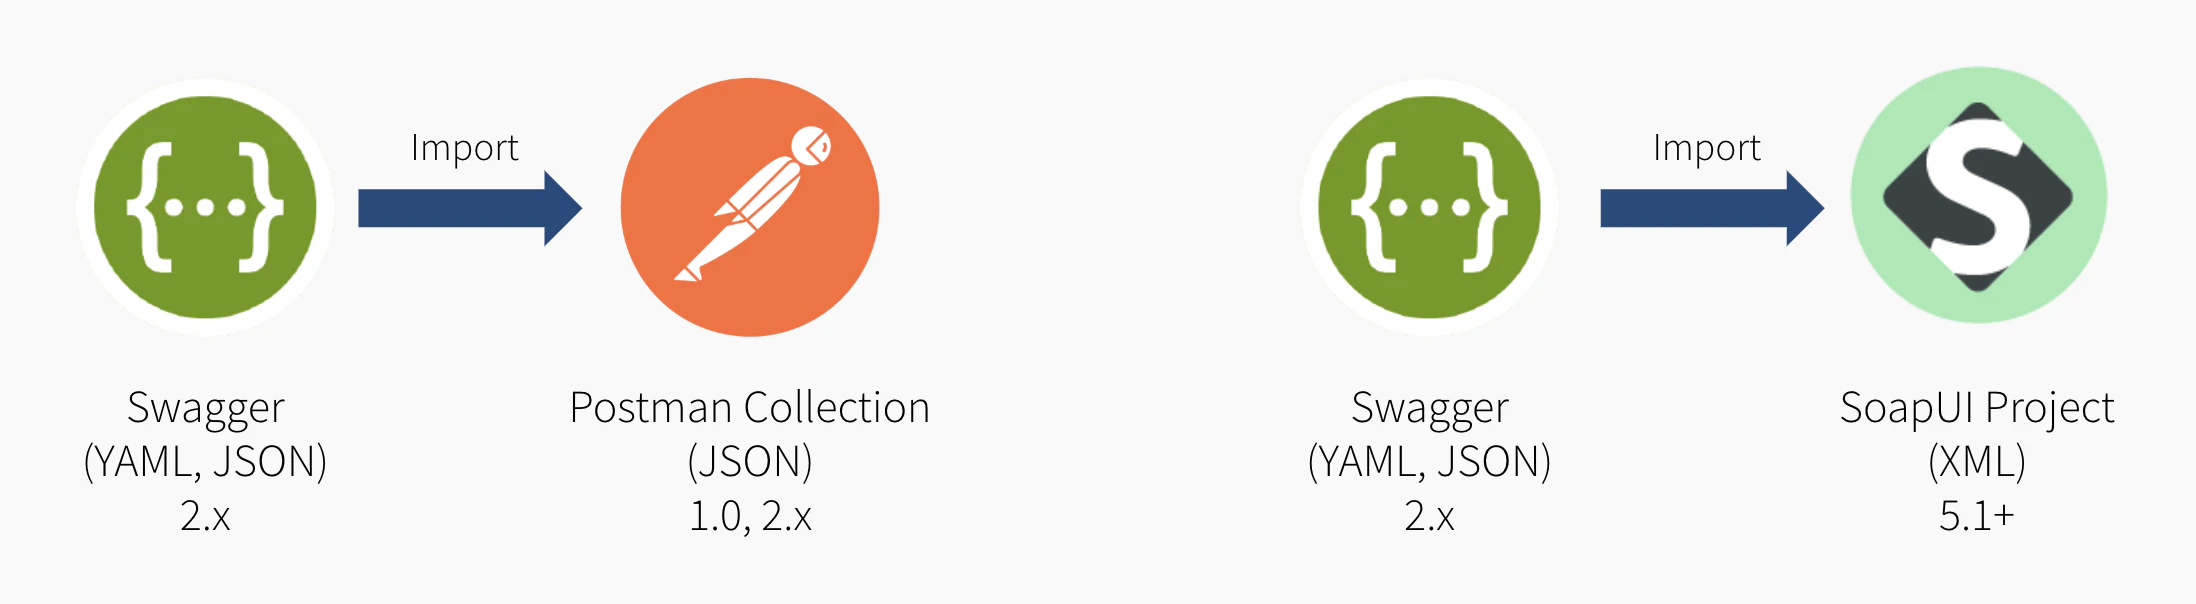
People very often ask “Why isn’t the Swagger format - aka OpenApi 2.0 - supported by Microcks?”. This is because Swagger is incomplete for specifying mocks as it does not allow full specification of examples. Sure, the Swagger spec allows you to illustrate responses with samples but it does not allow you to do so with request or request parameters (whether in path, query or headers). And if some tools - like Swagger UI - seem to compose sample requests, they’re only doing this using schema information with random generated values…
If you own a bunch of Swagger specifications, you won’t be able to directly import them into Microcks - see the above note on the reason why. Don’t give up though! You just need an extra step involving a wrapper tool (Postman or SoapUI) for adding complete request / response pairs that will be used as the basis of your API’s real-life mocks.
Please notice that the same issue and workaround may apply to some others API specification formats like WADL or RAML . They’ve got really good importers for Postman or SoapUI that offer you a very easy way to complete your syntactic specification with some real life samples that can make the foundation of some useful mocks 😉
Multi-artifacts support
From Microcks release 1.3.0, we introduced a new feature called multi-artifacts support.
When we set out, Microcks followed the 1 artifact == 1 API mock definition principle. However we did get feedback from the community and now are convinced that this approach can be too restrictive sometimes. A use-case that is emerging is that some people may have a single OpenAPI file containing only base/simple examples but are managing complementary/advanced examples using, for example, a Postman Collection.
This base use-case is extended to implement some variations:
- Different Postman Collections for different lifecycle environments, maintained in coordination with reference datasets,
- Different Postman Collections for different API providers implementing a shared industrial standard (think of IoT Fiware implementation but for different industry vertical),
- Different Postman Collections for different API consumers that will allow consumer-driven contract testing.
So from 1.3.0, Microcks is now able to have multiple artifacts (one primary and some secondary) mapping to one API mock definition. The primary one will bring Service and operation metadata as well as examples. The secondary ones will only enrich existing operations with new non-conflicting request/responses and event samples.

If not explicitly identified as primary or secondary, the default is to consider an imported artifact as the primary one.
A typical setup with secondary artifact could allow you to test your own mocks to comply to your OAS:
- Import an OpenAPI Secification (OAS) as the main artifact
- Import a Postman Collection as a secondary artifact (this artifact will only contribute mocks/examples to the main artifact/spec - Note: API name and version are the two attributes used as keys to merge primary and secondary artifacts)
- Launch an
OPENAPI_SCHEMAtest on Microcks own endpoints. This allows to check that the request/responses comply to the OpenAPI schema of the OAS artifact.
Direct upload
The most simple way of adding new Services or APIs mocks to your Microcks instance is by directly uploading the artifact. From the left vertical navigation bar, just select the Importers menu entry and then choose Upload. You’ll then see a dialog window allowing you to browse your filesystem and pick a new file to upload.
From Microcks release 1.3.0, you can also specify whether this artifact should be considered as
primaryorsecondaryper the multi-artifacts support .
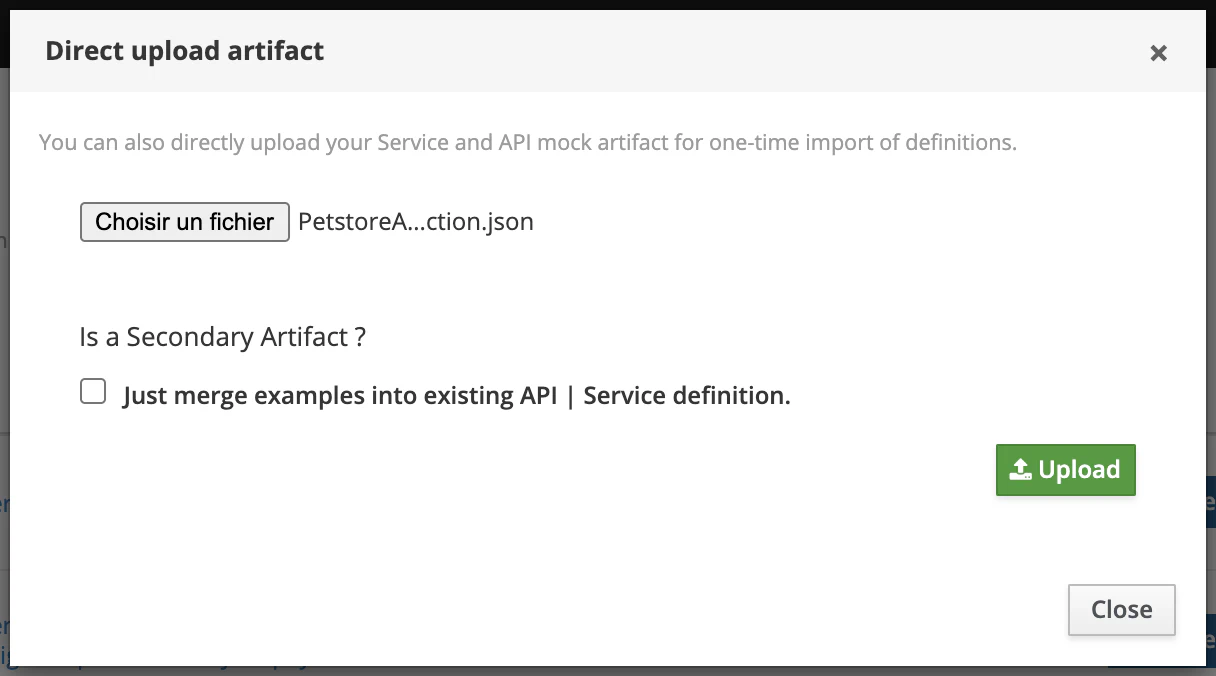
Hit the Upload green button. An upload followed by an artifact import should occur with notification messages appearing on the top right corner. Newly discovered Services and APIs can be found into the APIs | Services repository.
While this method is very convenient for a quick test, you’ll have to re-import your artifact file on every new change…
Scheduled import
Another way of adding new Services or APIs mocks is by scheduling an Importer Job into Microcks. Actually we see this as the best way to achieve continuous, iterative and incremental discovery of your Services and APIs mocks and tests. The principle is very simple: you save your artifact file into the Git repository of your choice (public or private) and Microcks will take care of periodically checking if changes have been applied and new mock or services definitions are present in your artifact.
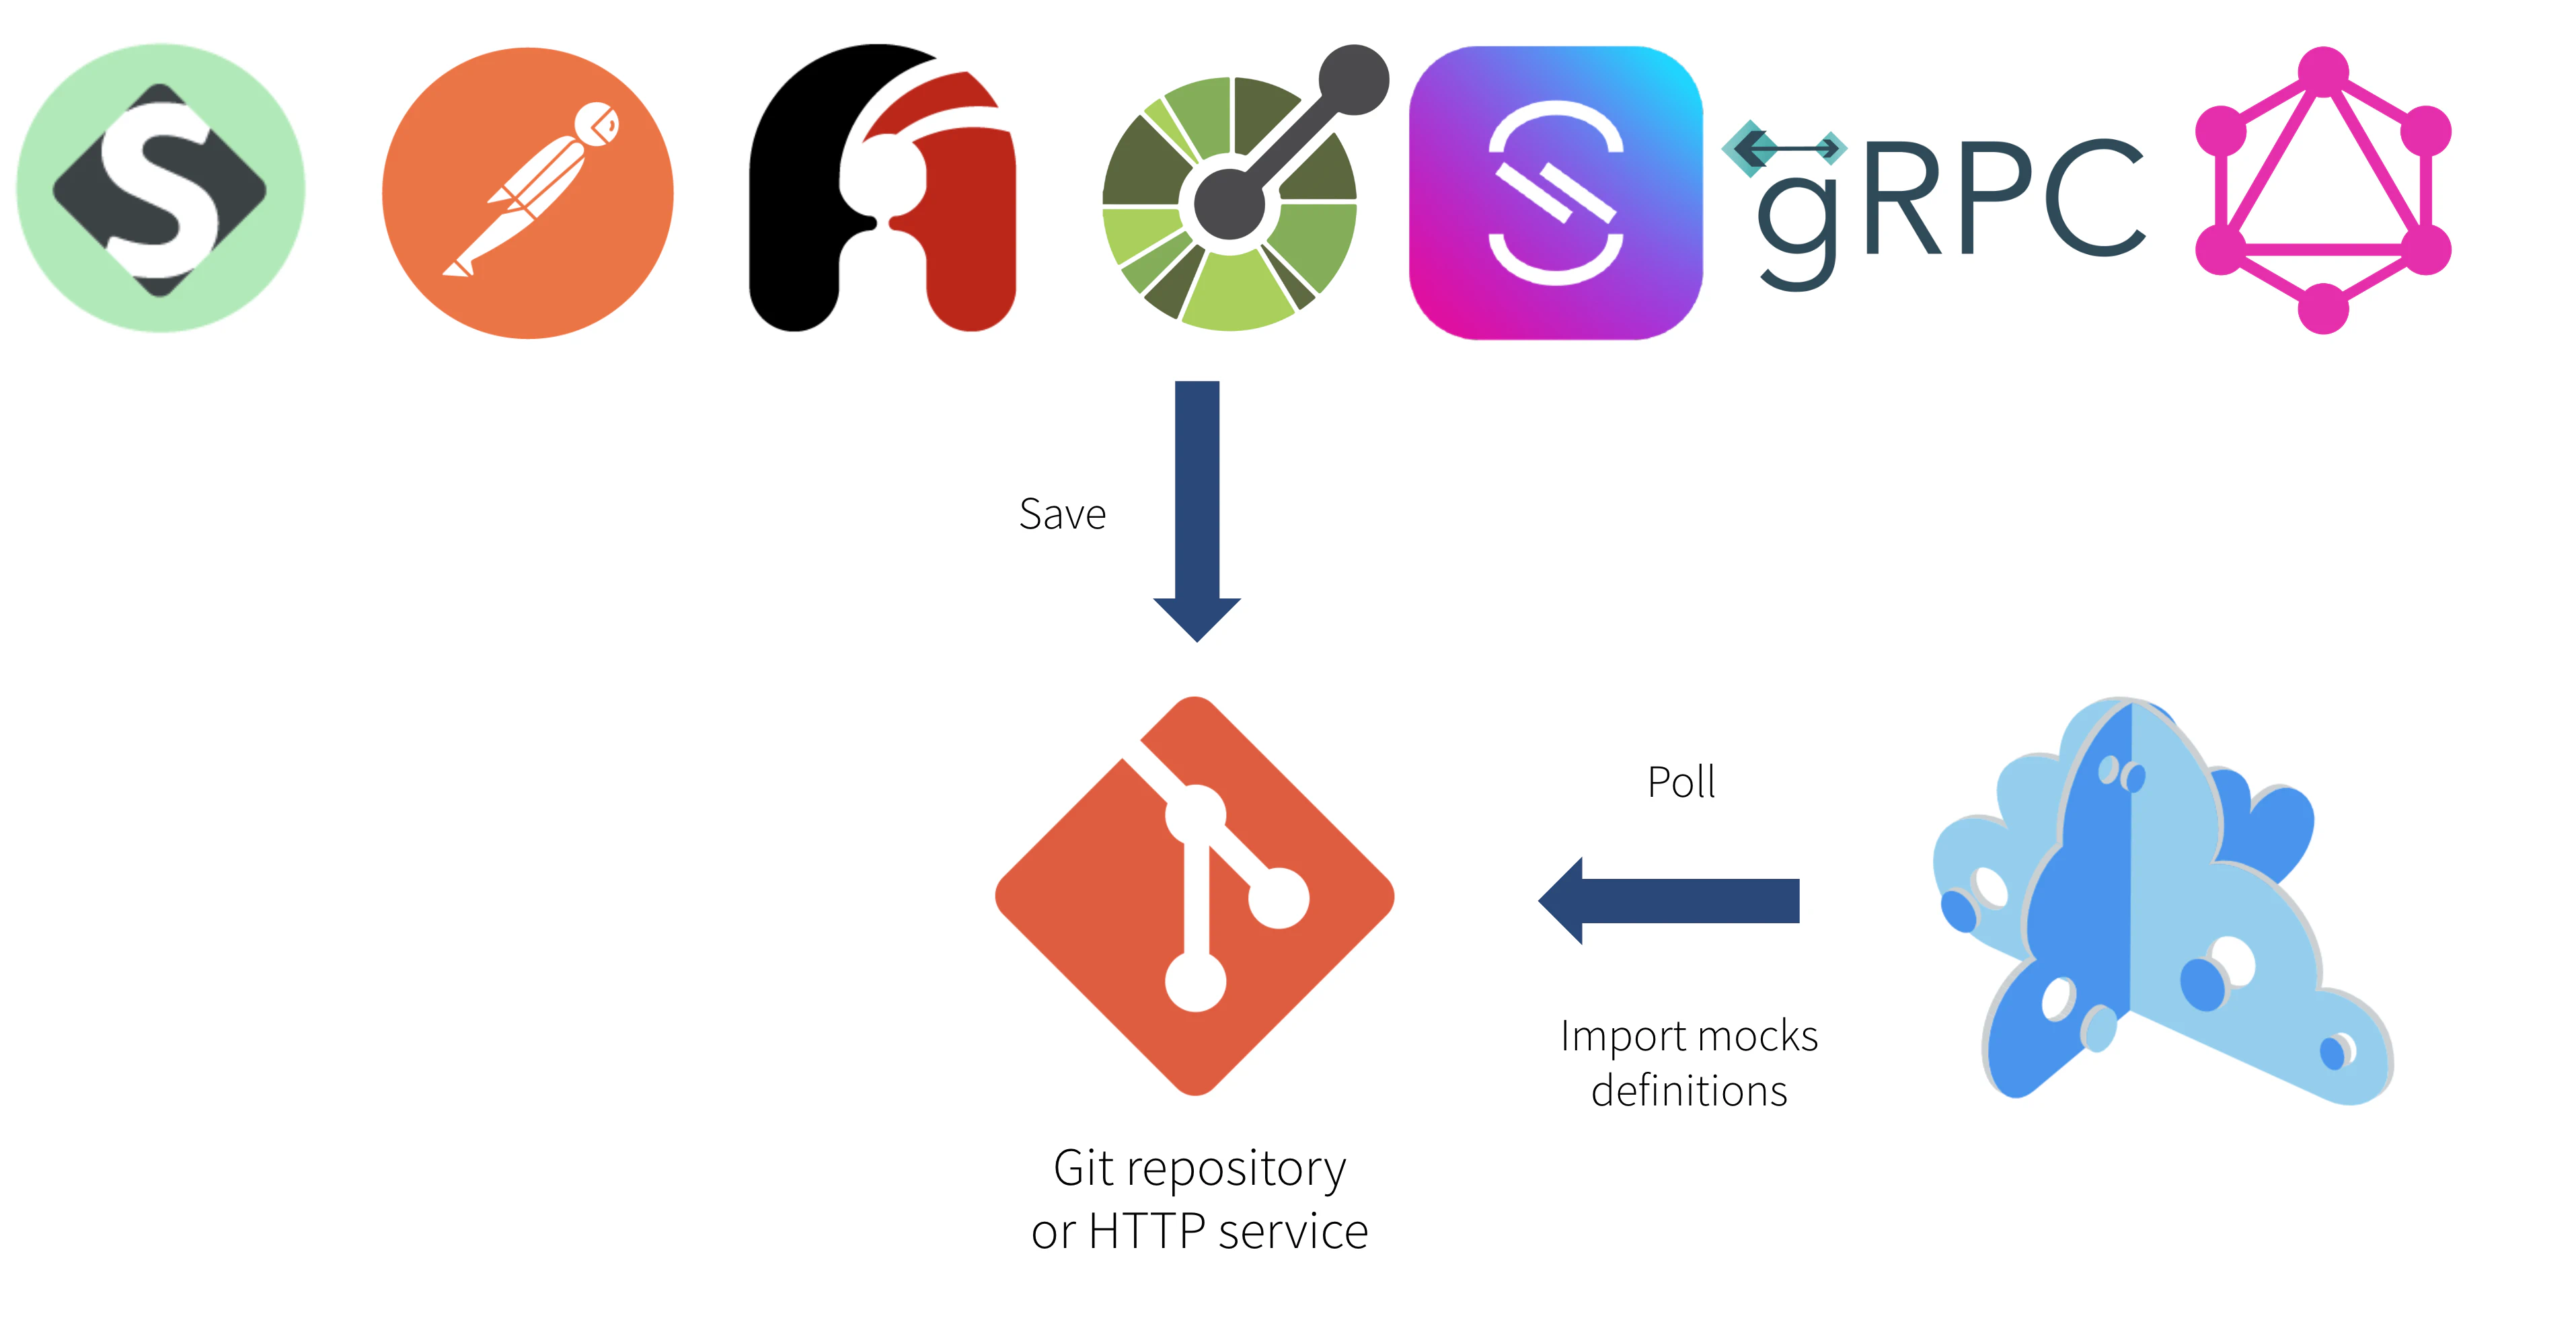
Though we think that Git repositories (or other version control systems) are the best place to keep such artifacts, Microcks only requires a simple HTTP service. So you may store your artifact on a simple filesystem as long as it is reachable using HTTP.
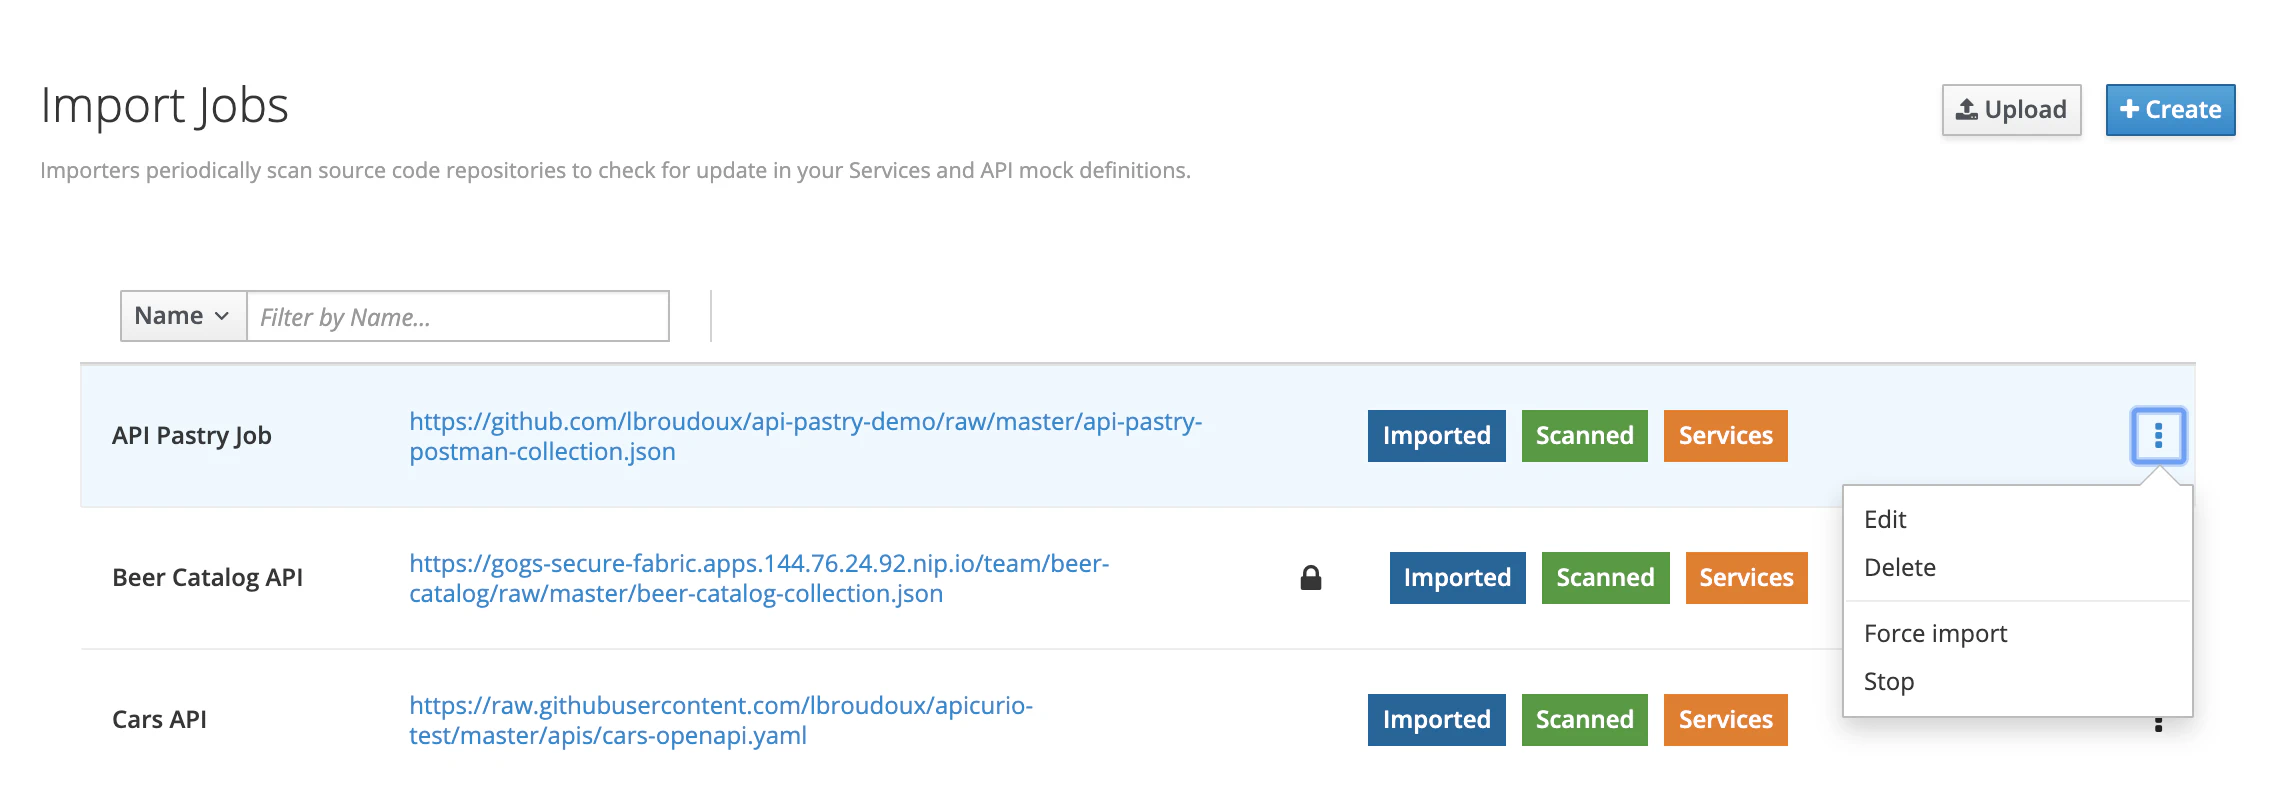
Still from the left vertical navigation bar, just select the Importers menu entry to see the list of existing importers.
Once created, importer jobs can be managed, activated or forced through this screen. You’ll see colored marker for each job line:
Scannedmeans that the job is actually scheduled for next importation run. OtherwiseInactivewill be displayed.Importedmeans that the job has been successfully imported on previous run. OtherwiseLast import errorswill be displayed with a popup showing the last error,Servicesis a shortcut to access the services definitions discovered by this job.
Using the 3-dotted menu, you can easily enable/disable or force the job.
Creating a new scheduled import
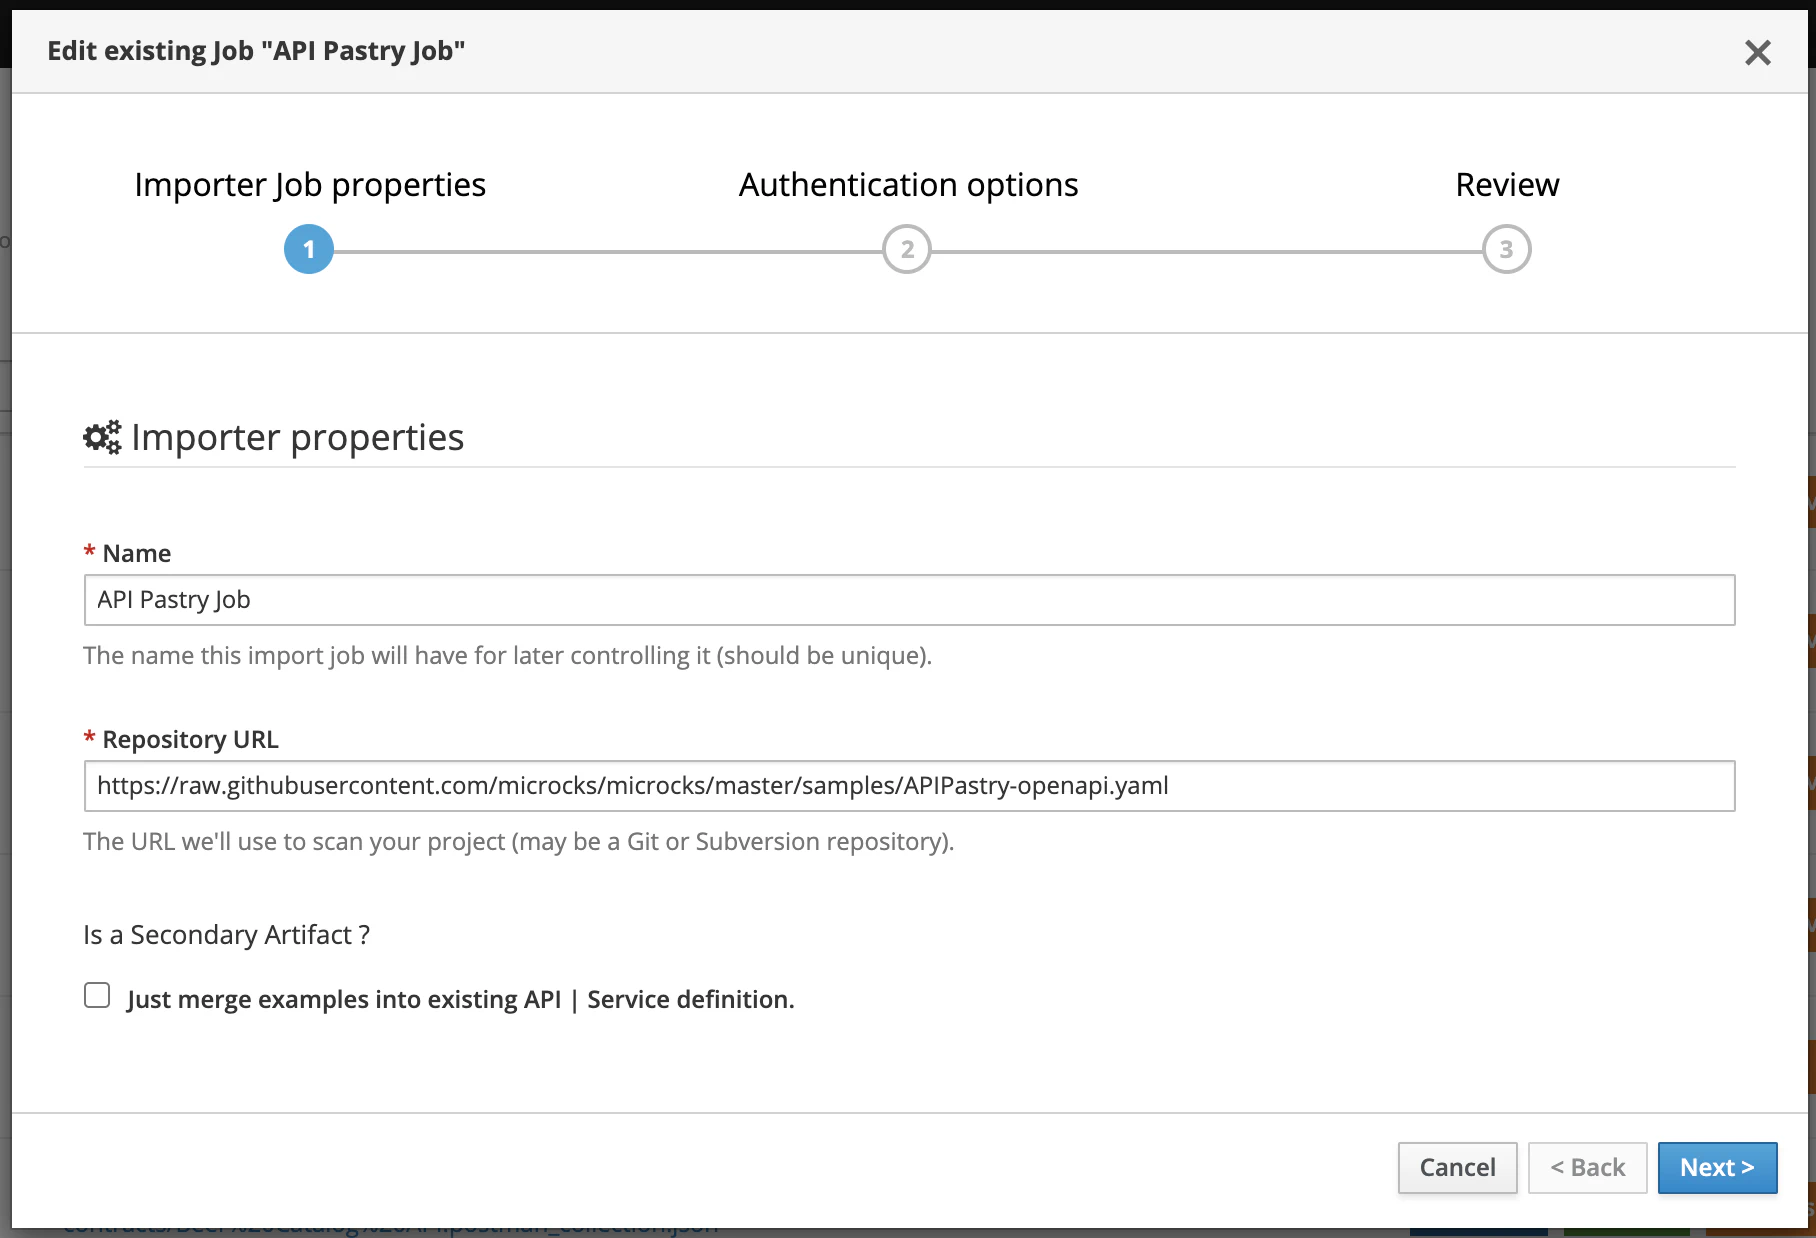
You may declare a new Importer job by hitting the Create button.
A wizard modal then appears as creating an Importer is a 2-step process. The first step is about mandatory basic properties such as the name of your Importer and the repository URL it will use to check for discovering API mocks.
From Microcks release 1.3.0, you can also specify if this artifact should be considered as
primaryorsecondaryper the multi-artifacts support .
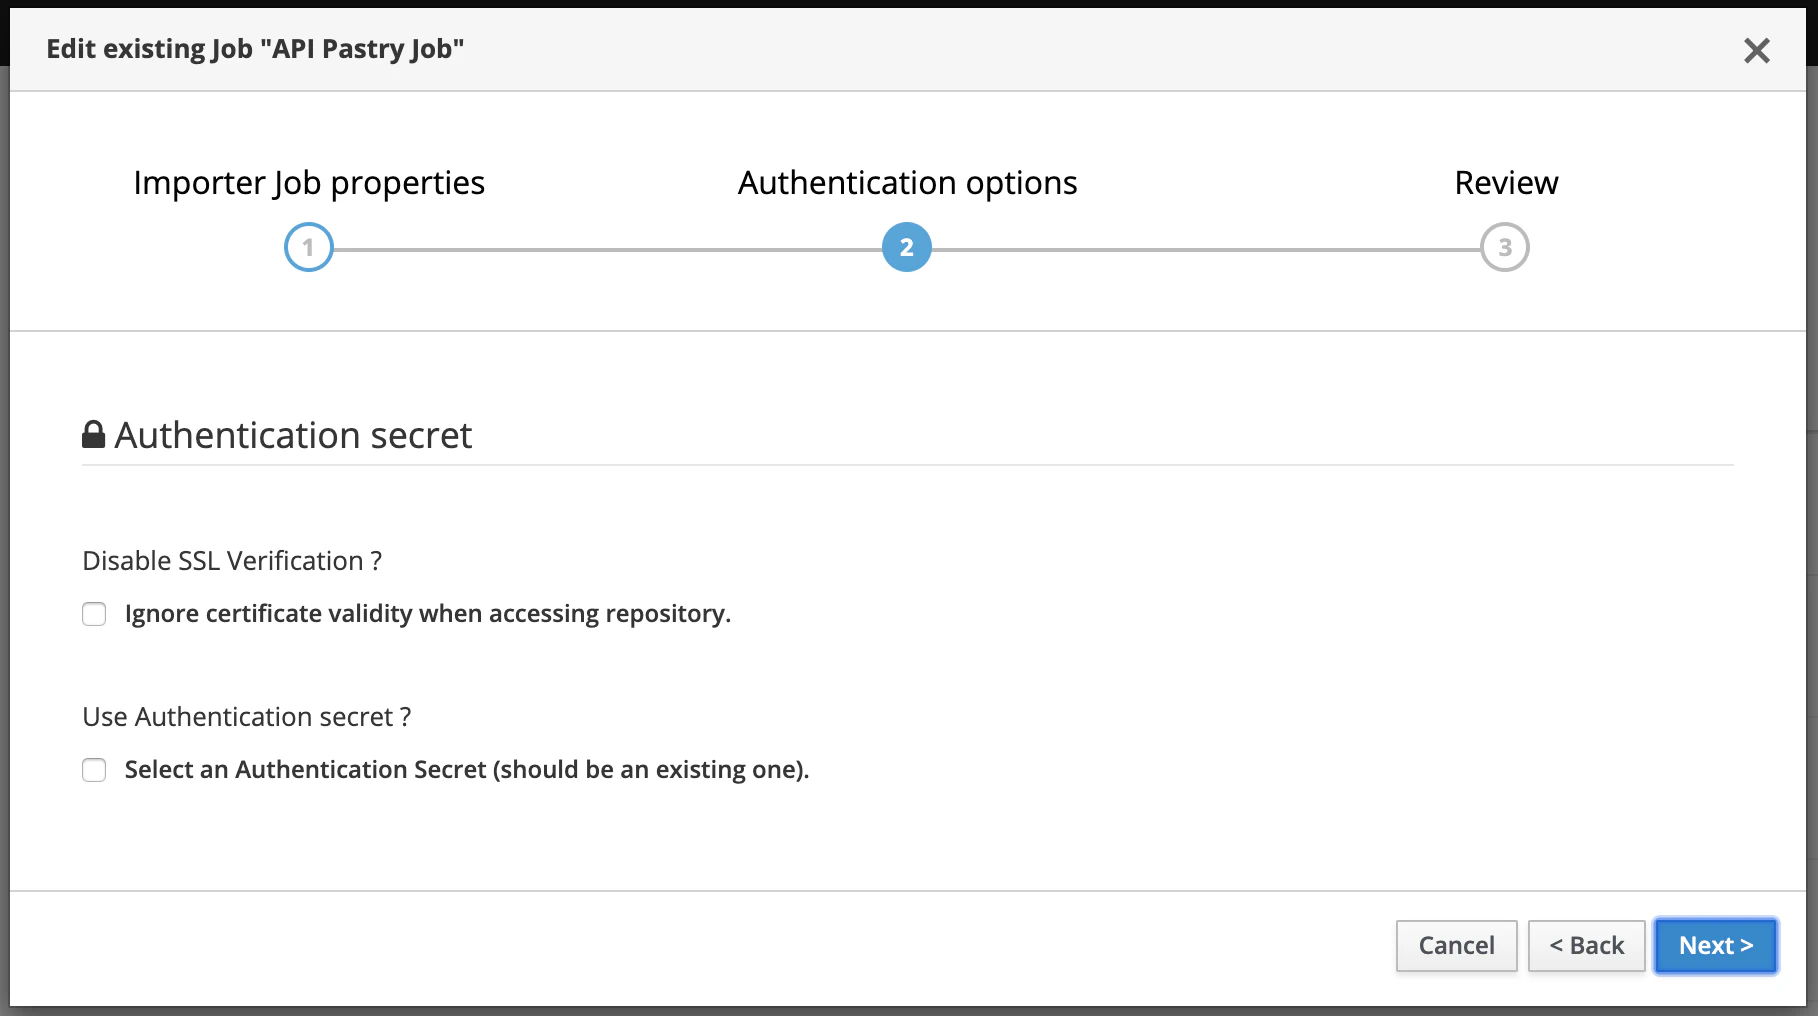
The second step is about authentication options for accessing the repository. Depending on the type of repository (public or private) you may need to enable/disable certificate validation as well as manage an authentication process through the usage of a Secret. See more on Secrets here .
Finally the review displays a summary before creating the Importer Job.
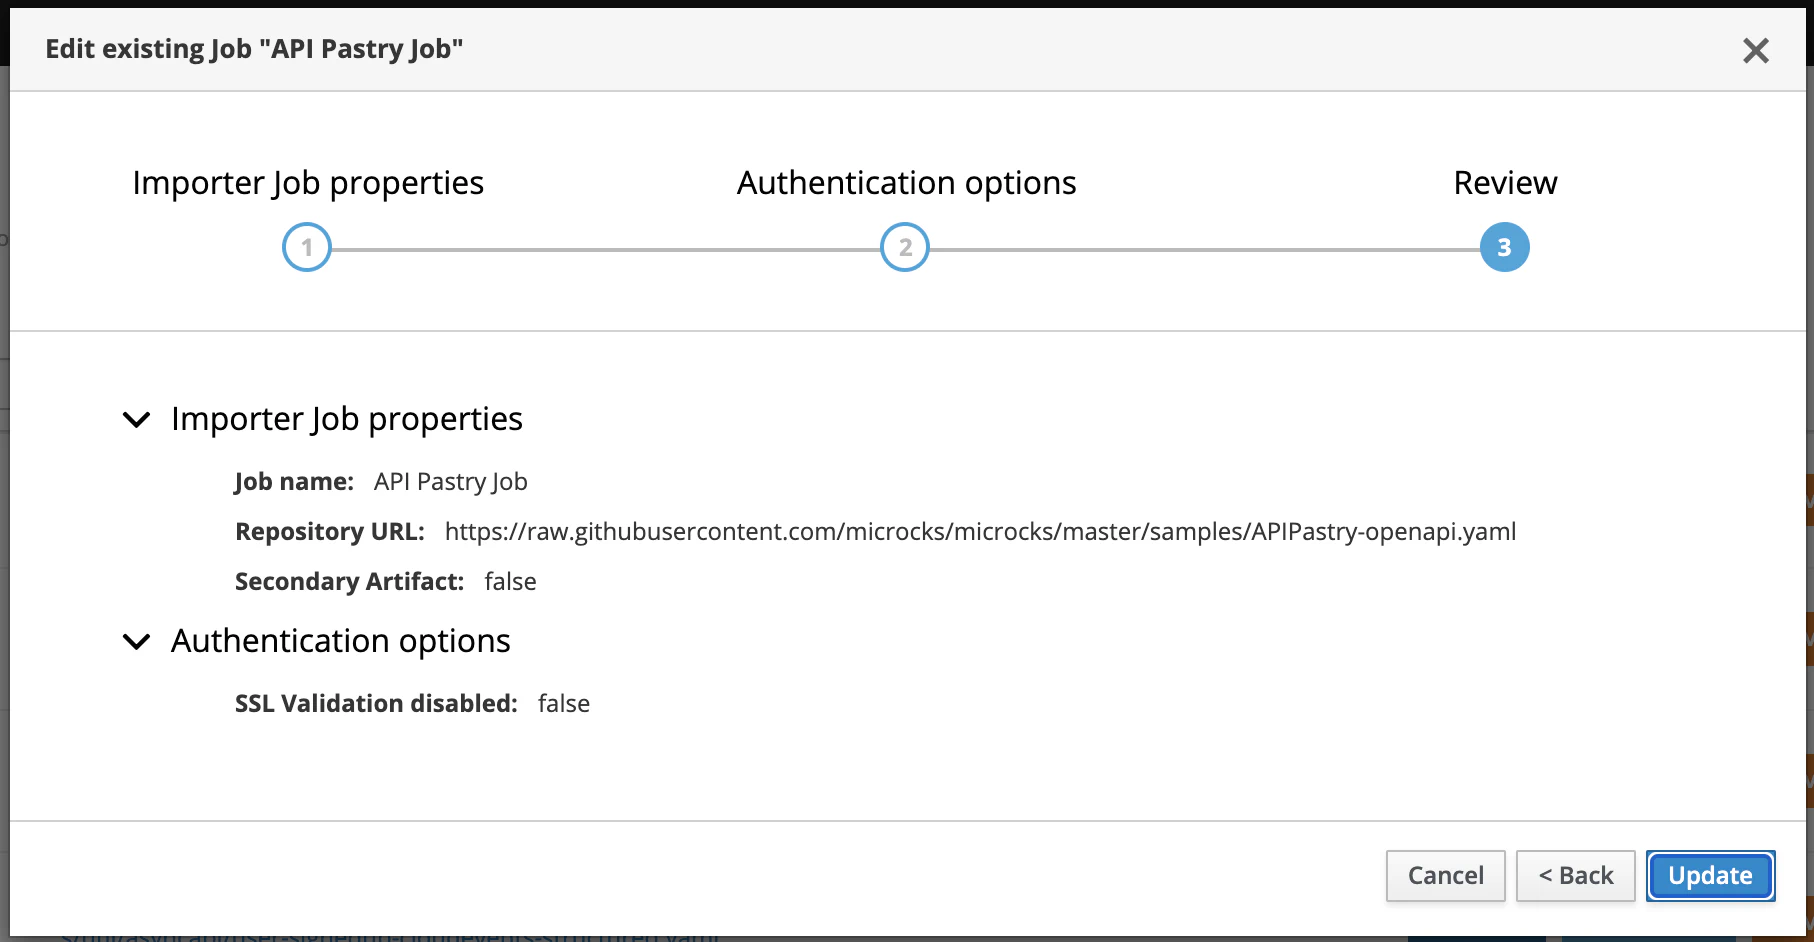
On first time creation the Job is automatically Scanned and Imported.
Configure scheduling interval
The scheduling interval can be globally configured for all the Jobs. It is a global setting and not a per-Job one. This is achieved through the services.update.interval property in the application.properties configuration file that takes the value of SERVICES_UPDATE_INTERVAL environment variable. The value should be set to a valid CRON expression
; default is every 2 hours.
services.update.interval=${SERVICES_UPDATE_INTERVAL:0 0 0/2 * * *}
Error management
As an import can be scheduled and can take a little time, it is done asynchronously regarding the human interaction that has triggered it. We choose not to have a blocking process for error management: Microcks importers will try to discover and import services but will die silently in case of any failure. We also think that this also promotes iterative and incremental way of working: you know that your job will gracefully fail if your new samples are not yet complete.
Some of the error messages will be reported through the Last import errors status but some not… We try to make the logged information clear regarding these types of error but we recommend you have a look at the Troubleshooting section of each specific importer’s documentation if the discovered services information isn’t sufficiently insightful.
We hope to release in the near future some kind of linter that may help with analyzing your artifact to check compliance with recommended practices and conventions.

Still Didn’t Find Your Answer?
Join our community and get the help you need. Engage with other members, ask questions, and share knowledge to resolve your queries and expand your understanding.
Join the community