
-
Using
- Importing Services & APIs
- Comparison to alternatives
- OpenAPI Mocking and Testing
- Swagger Mocking and Testing
- AsyncAPI Mocking and Testing
- Postman usage for Microcks
- gRPC Mocking and Testing
- GraphQL Mocking and Testing
- SoapUI Mocking and Testing
- Http Archive usage for Microcks
- Using exposed mocks
- Getting direct API
- Testing with Microcks
- Advanced topics
- Organizing repository
- Templating mock responses
- Dispatcher & dispatching rules
- Microcks APIMetadata
- Monitoring & Observability
- Installing
- Automating
- Administrating
- Guides
SoapUI Mocking and Testing
🗓️ Last updated on February 23, 2023 | 5 | Improve this pageOverview
Pre-requisites
Microcks has been developed and tested with SoapUI version 5.x. It is recommend that you use a compatible version of this tool for editing your tests and mocks repository.
Steps for creating a repository
In order to create a tests and mocks repository using SoapUI, you’ll need to follow the steps below:
- Initialize a SoapUI project that will hold the repository,
- Create sample Tests Requests (and optionally the associated tests assertions),
- Create sample Mocks Responses,
- Define dispatching rules that describe how requests and responses are associated together,
- Save the project into your SCM repository.
Conventions
In order to be correctly imported and understood by Microcks, your SoapUI project should follow a little set of reasonable conventions and best practices.
- Your SoapUI project may contain one or more Service definitions. However, because it’s a best practice to consider each Service or API as an autonomous and isolated software asset, we’d recommend managing only one Service definition per SoapUI project,
- Your SoapUI Mock Service should define a custom property named
versionthat allows tracking of Service(s) version. It is a good practice to change this version identifier for each Service or API interface versioned changes, - The name of Tests Requests should be something like
"<sample_id> Request". For example:"Karla Request", - The name of Mock Responses should be something like
"<sample_id> Response". For example:"Karla Response", - The name of matching rules should be something like
"<sample_id>". For example:"Karla",
We recommend having a look at our sample SoapUI projects for SOAP WebServices and for REST APIs to fully understand and see in action those conventions.
Project initialization
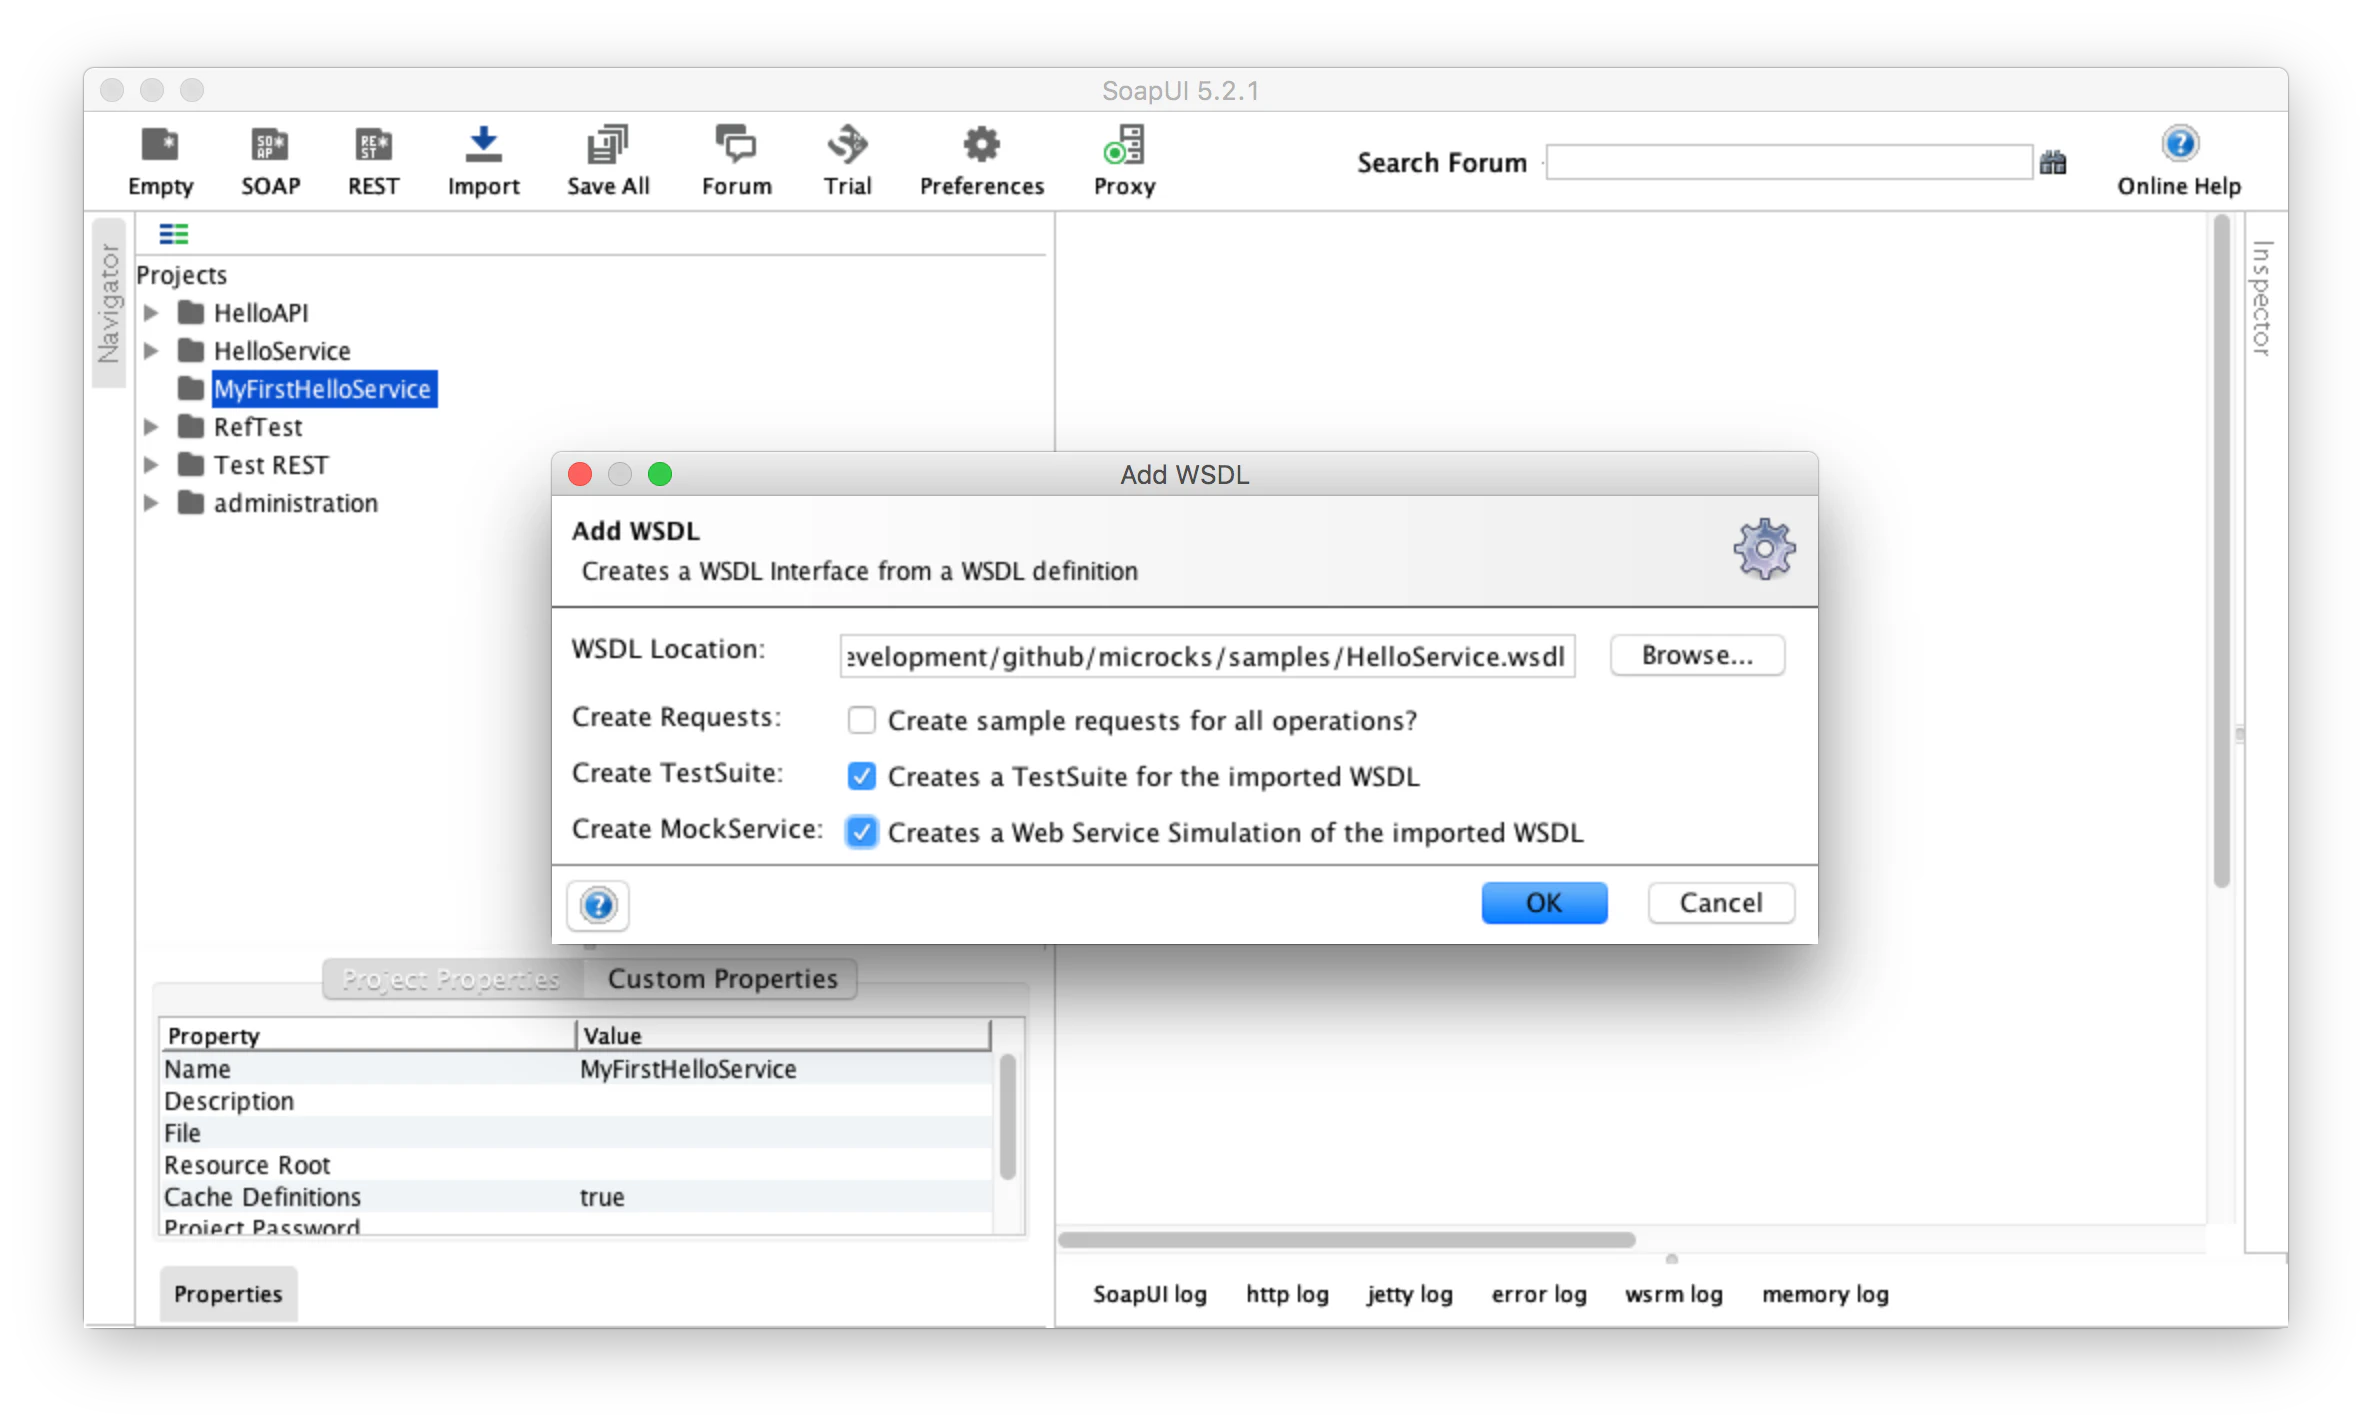
Project initialization is as simple as creating a new Empty Project in SoapUI. The Tests Request you will need to define later will be defined through a SoapUI TestSuite ; the Mock Responses you will need to define later will be defined through a SoapUI ServiceMock. So when using a “contract first” approach for Services - approach that is required for SOAP WebServices in SoapUI - it is a better choice to directly create those items through the wizard when choosing the Add WSDL or Add WADL actions once project has been created.
The screenshot below shows how to add a WSDL to an existing empty project :
Defining Test Requests
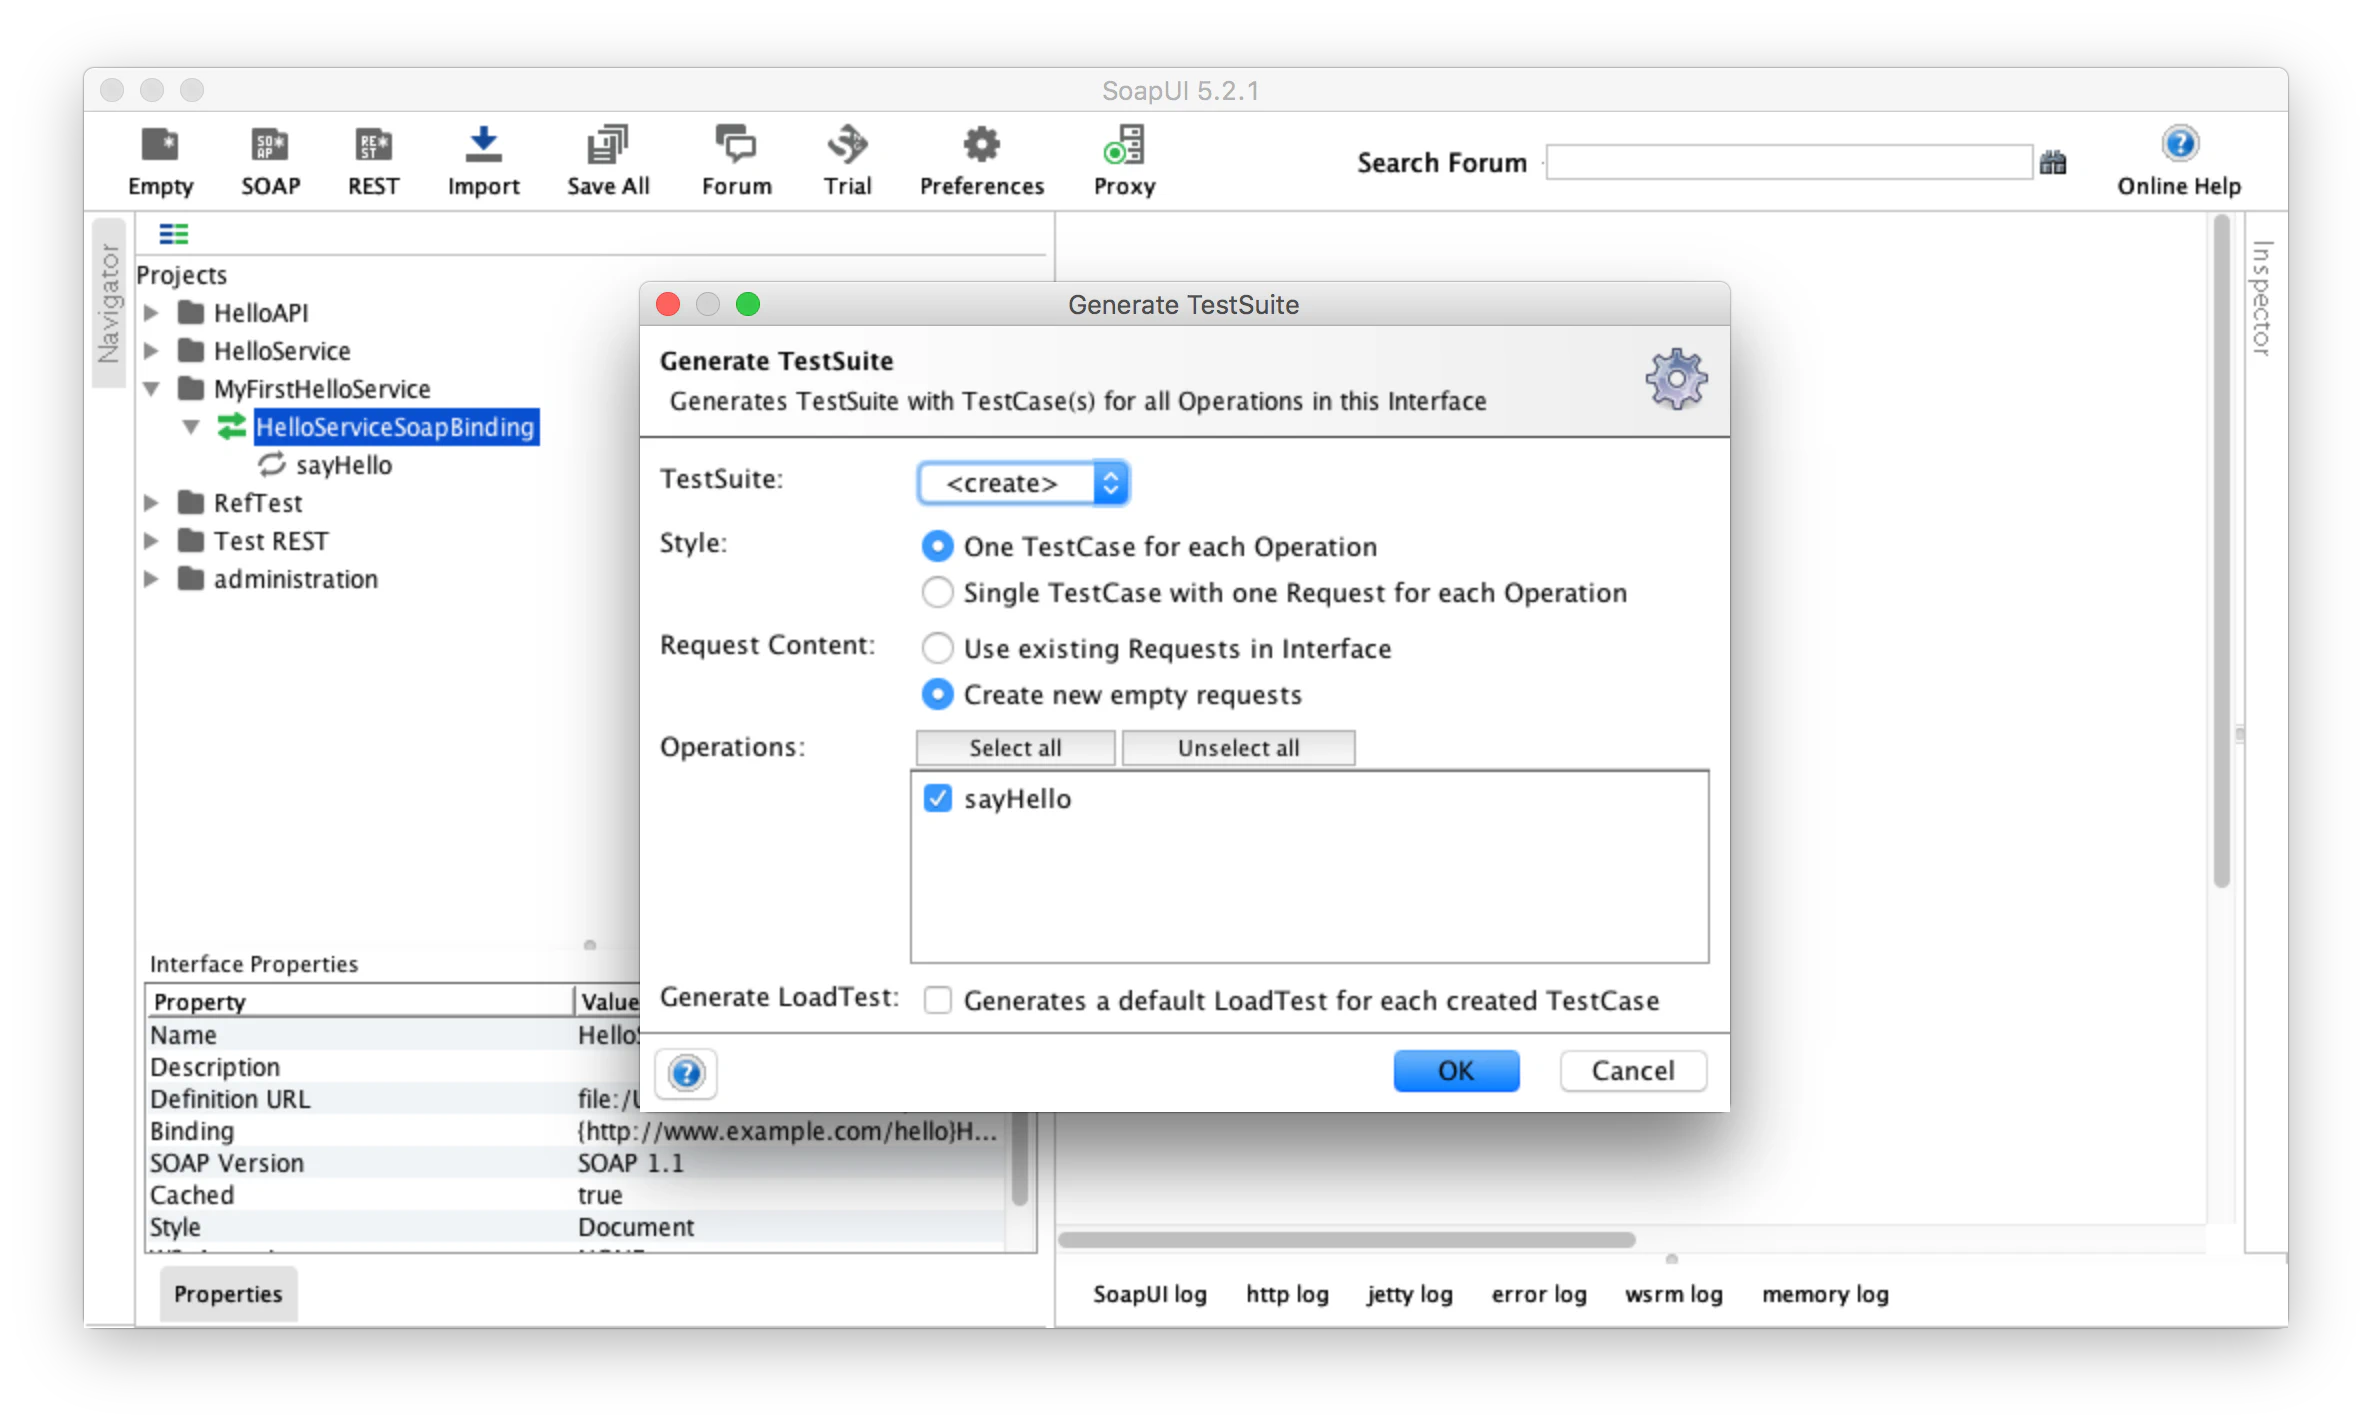
The sample requests that are used by Microcks are indeed SoapUI TestSuite requests. So select the newly imported Service, right-click and choose Generate TestSuite. You should get this following screenshot where you select these options, validate and then give your TestSuite a name like "<Service> TestSuite" or something:
You are now free to create as many TestSteps as you want within the TestCases. TestCases represents the Operation level and TestSteps represents the request sample level. The screenshot below shows how we have created 2 sample requests (Andrew and Karla) for the sayHello operation of our WebService:
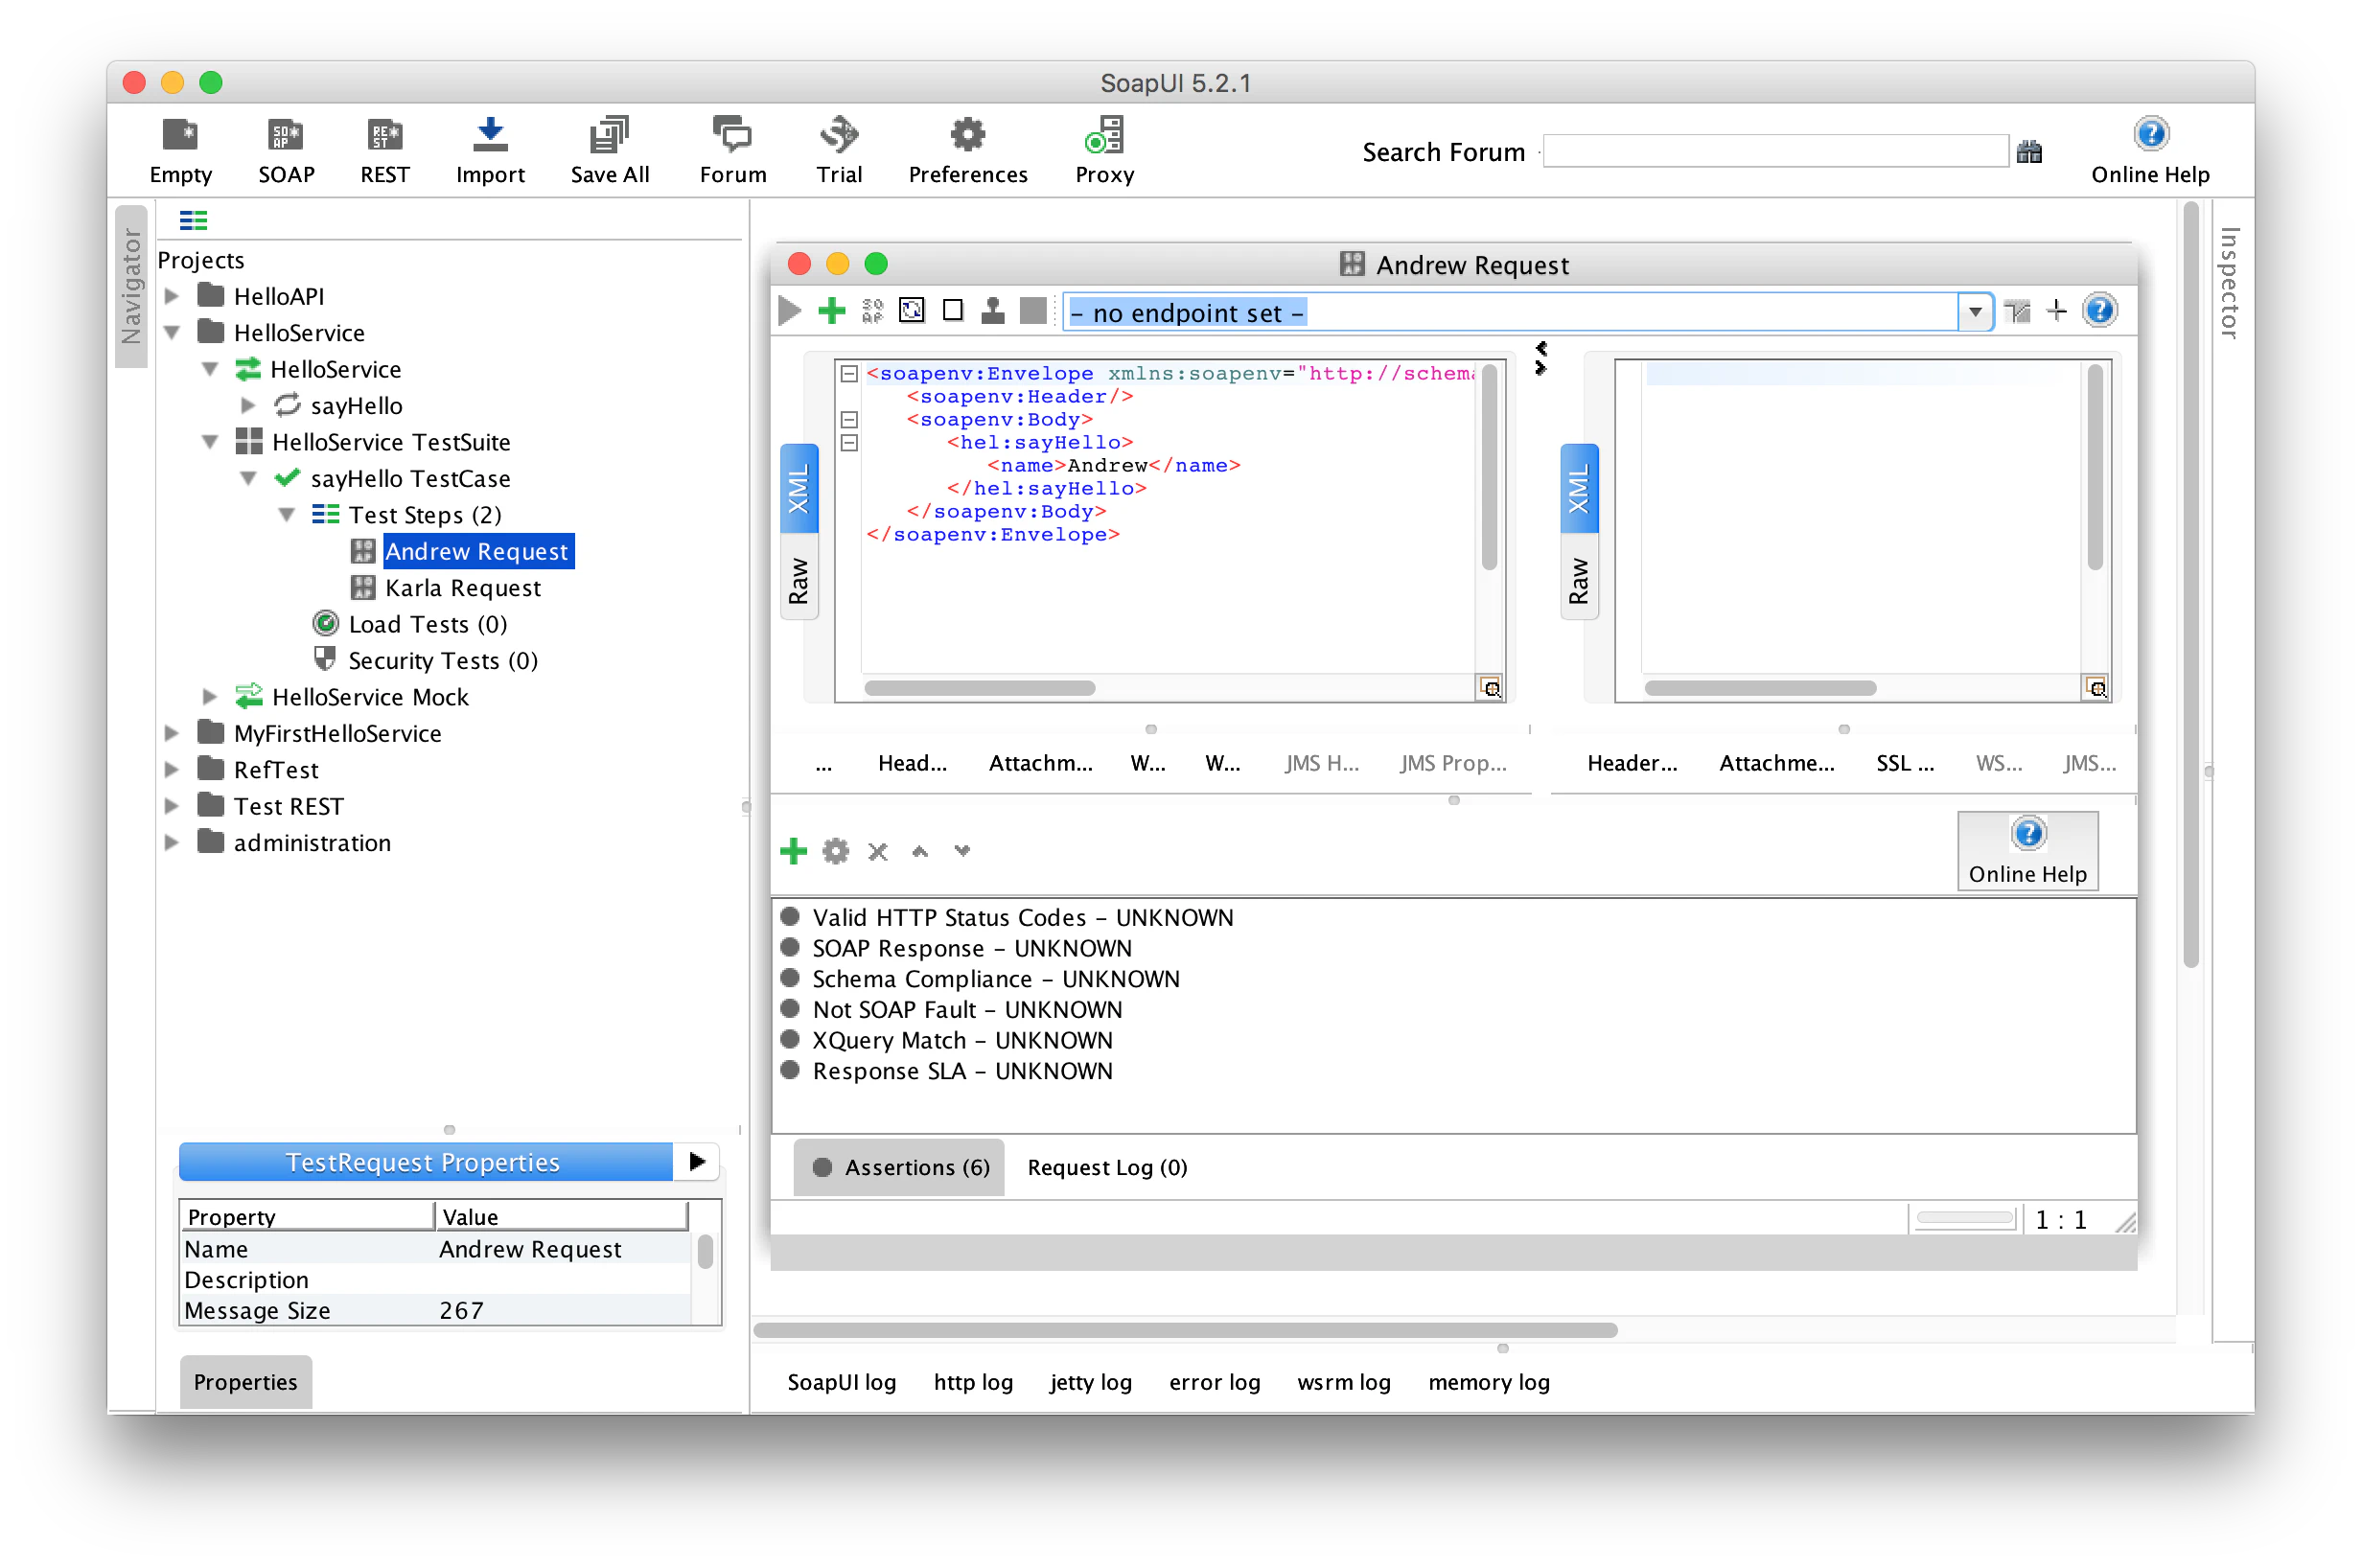
As shown above, you are also free to add some assertions within your TestStep requests. The SoapUI documentation introduces the assertion concept on this page . Assertions in TestSteps can be later reused when wanting to use Microcks for Contract testing of your Service.
Defining Mock Responses
Mock Responses you will need to define later will be defined through a SoapUI ServiceMock. You have to select the newly imported Service, right-click and choose Generate MockService. You can let the default options as shown below and give your MockService a name like "<Service> Mock":

You will now be able to create as many Responses attached to Operation as you’ve got samples requests defined in previously created TestSteps. As introduced into the naming conventions, your responses must have the same "<sample_id> radix that the associated requests so that Microcks will be later able to associate them.
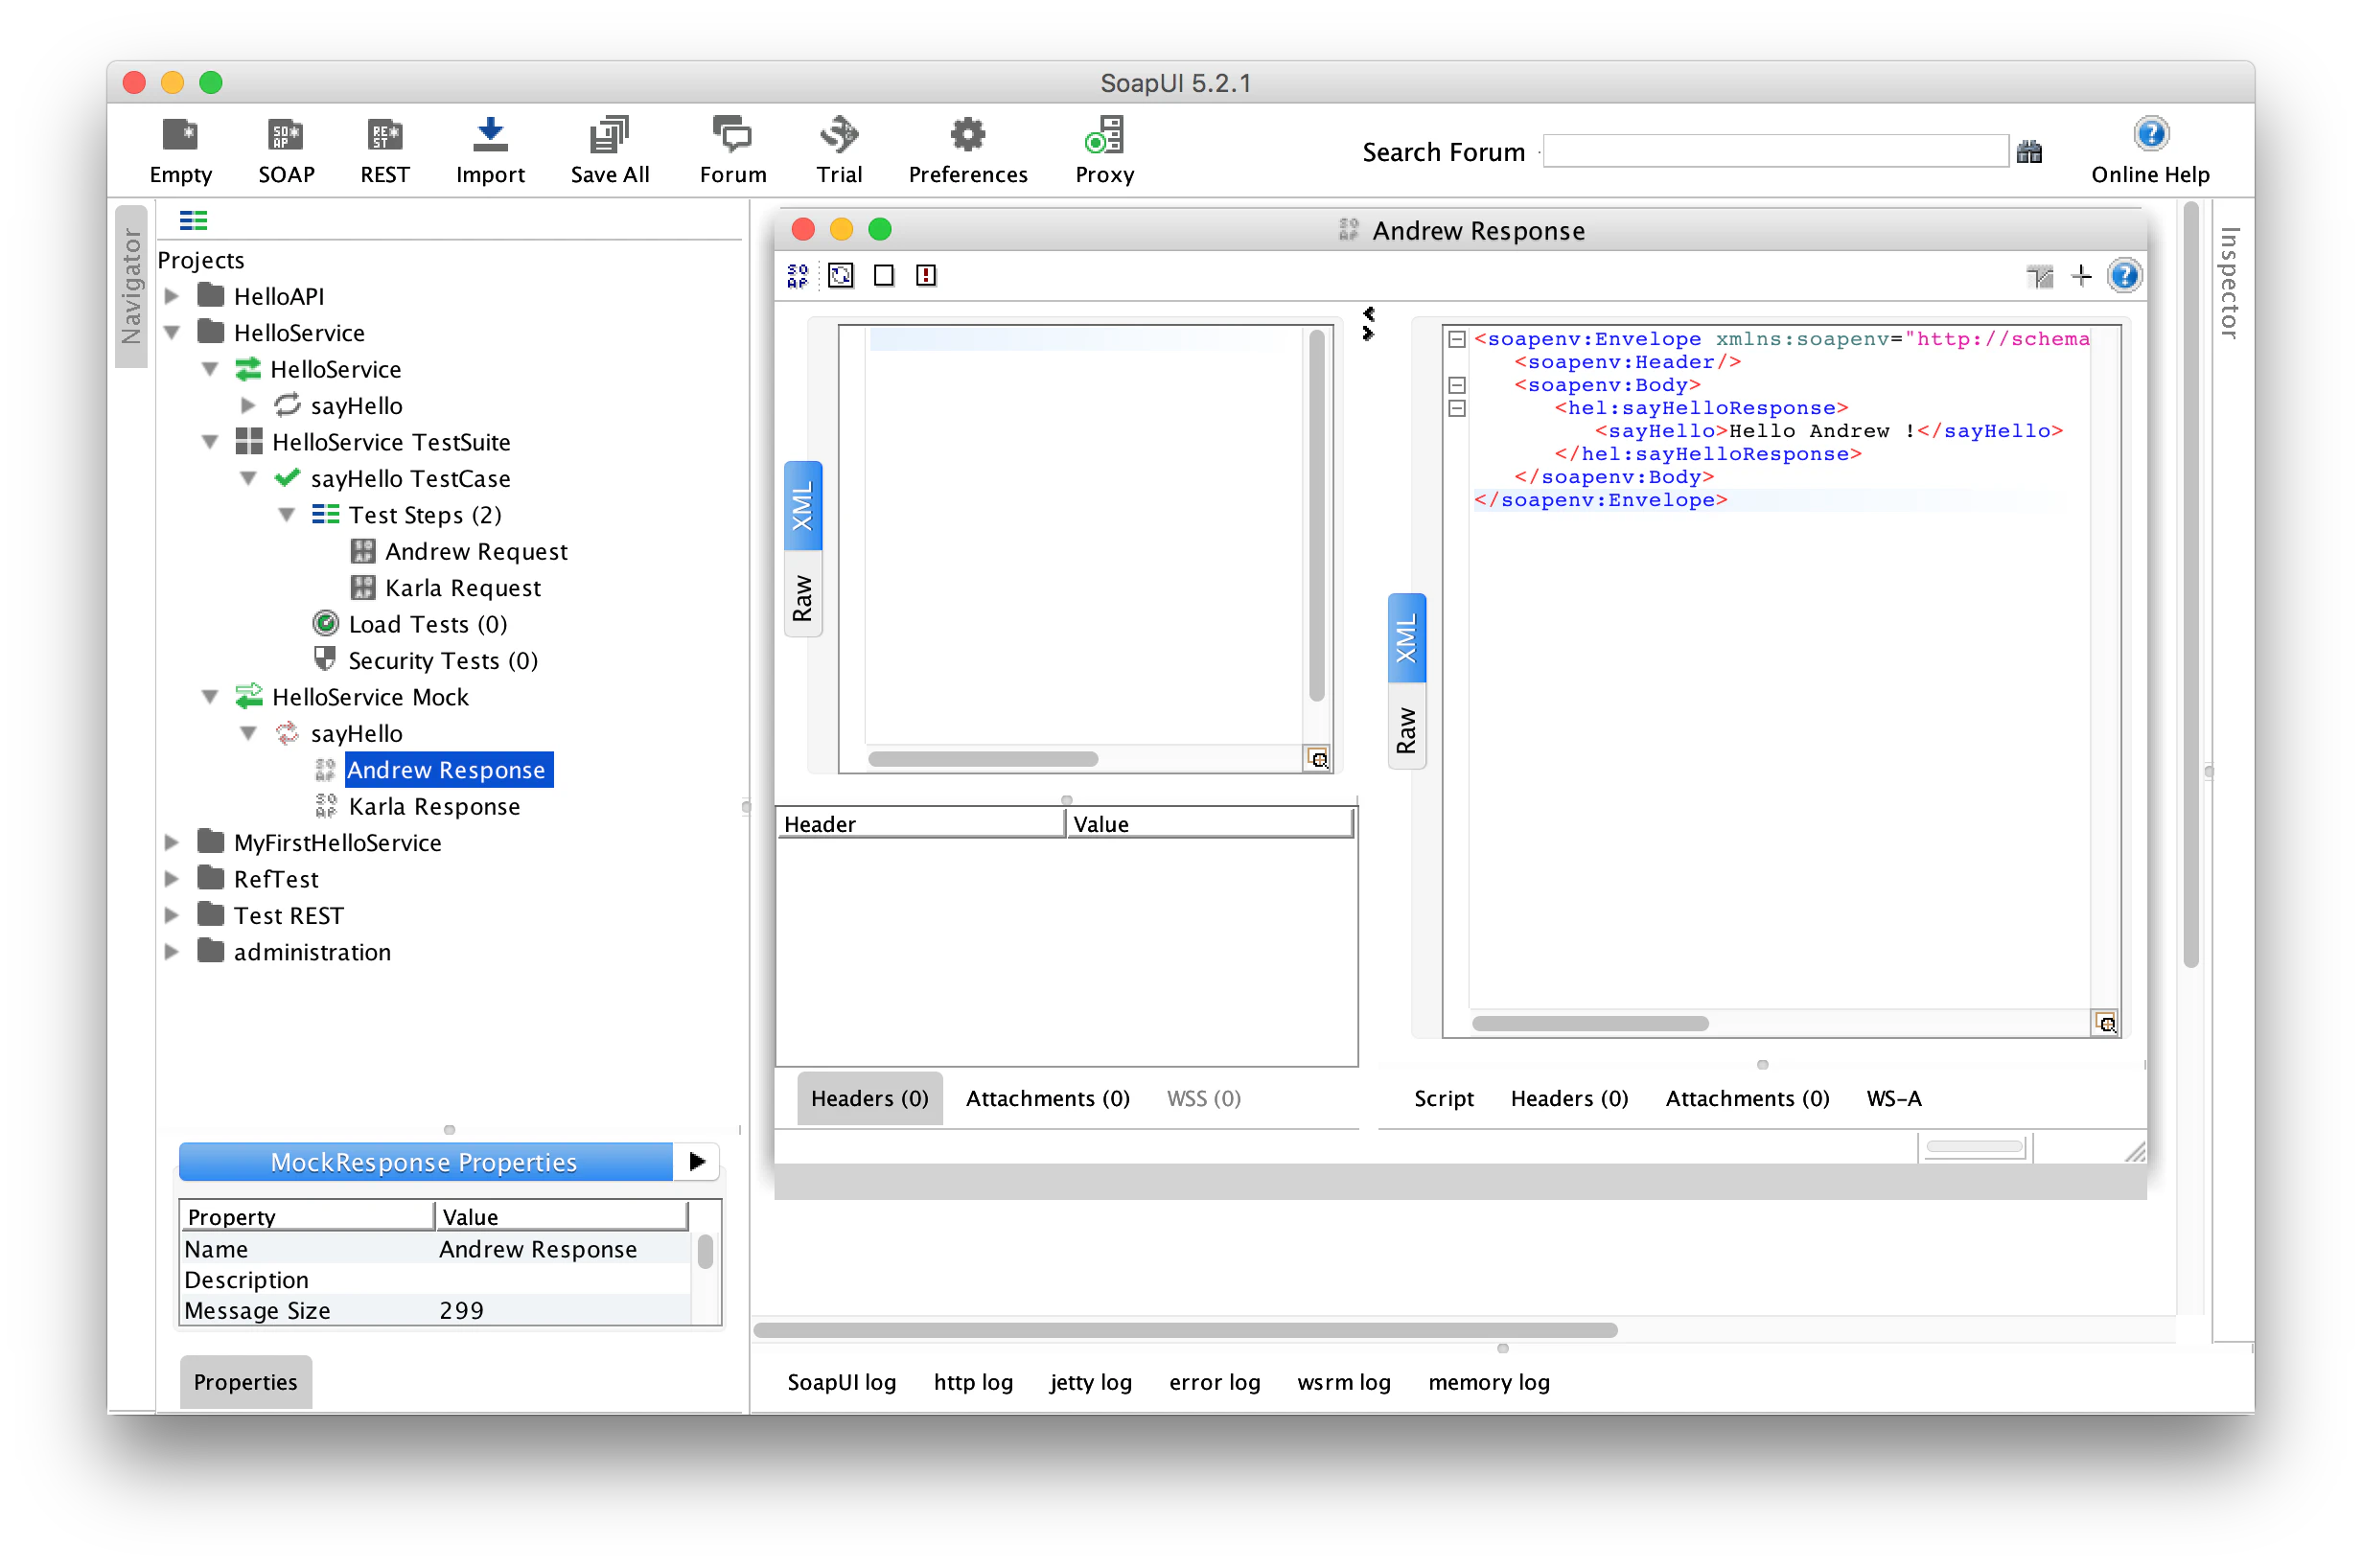
The screenshot above shows a Mock response corresponding to the Andrew Request. It is simply code Andrew Response. Note that you are free to setup any HTTP Header you want for responses, Microcks will reuse them later to issue real headers in responses.
Note that you can use templating notation into your SOAP responses for better/smarter/more dynamic responses. It brings specific features for XML like XPath expressions or context expressions you may have initialized using a
SCRIPTdispatcher .
Note also that for compatibility purpose, Microcks supports the SoapUI expression notation: SoapUI
${ }notation will be translated into Microcks double-mustaches notation{{ }}internally. You may also of course directly use our{{ }}notation though 😉
Defining dispatch rules
Latest step is now to define a technical mean for Microcks to analyse an incoming requests and find out the corresponding response to return. This is done in Microcks via the concept of Dispatcher that represent a dispatch strategy and Dispatcher Rules that represent the dispatching parameters. Microcks supports 3 strategies for dispatching SOAP requests:
- Via the analysis of SOAP request payload through XPath,
- Via the evaluation of a Groovy script,
- Via the random dispatching strategy.
These three strategies have equivalent in SoapUI via Dispatch configuration on each Operation of your Mock Service.
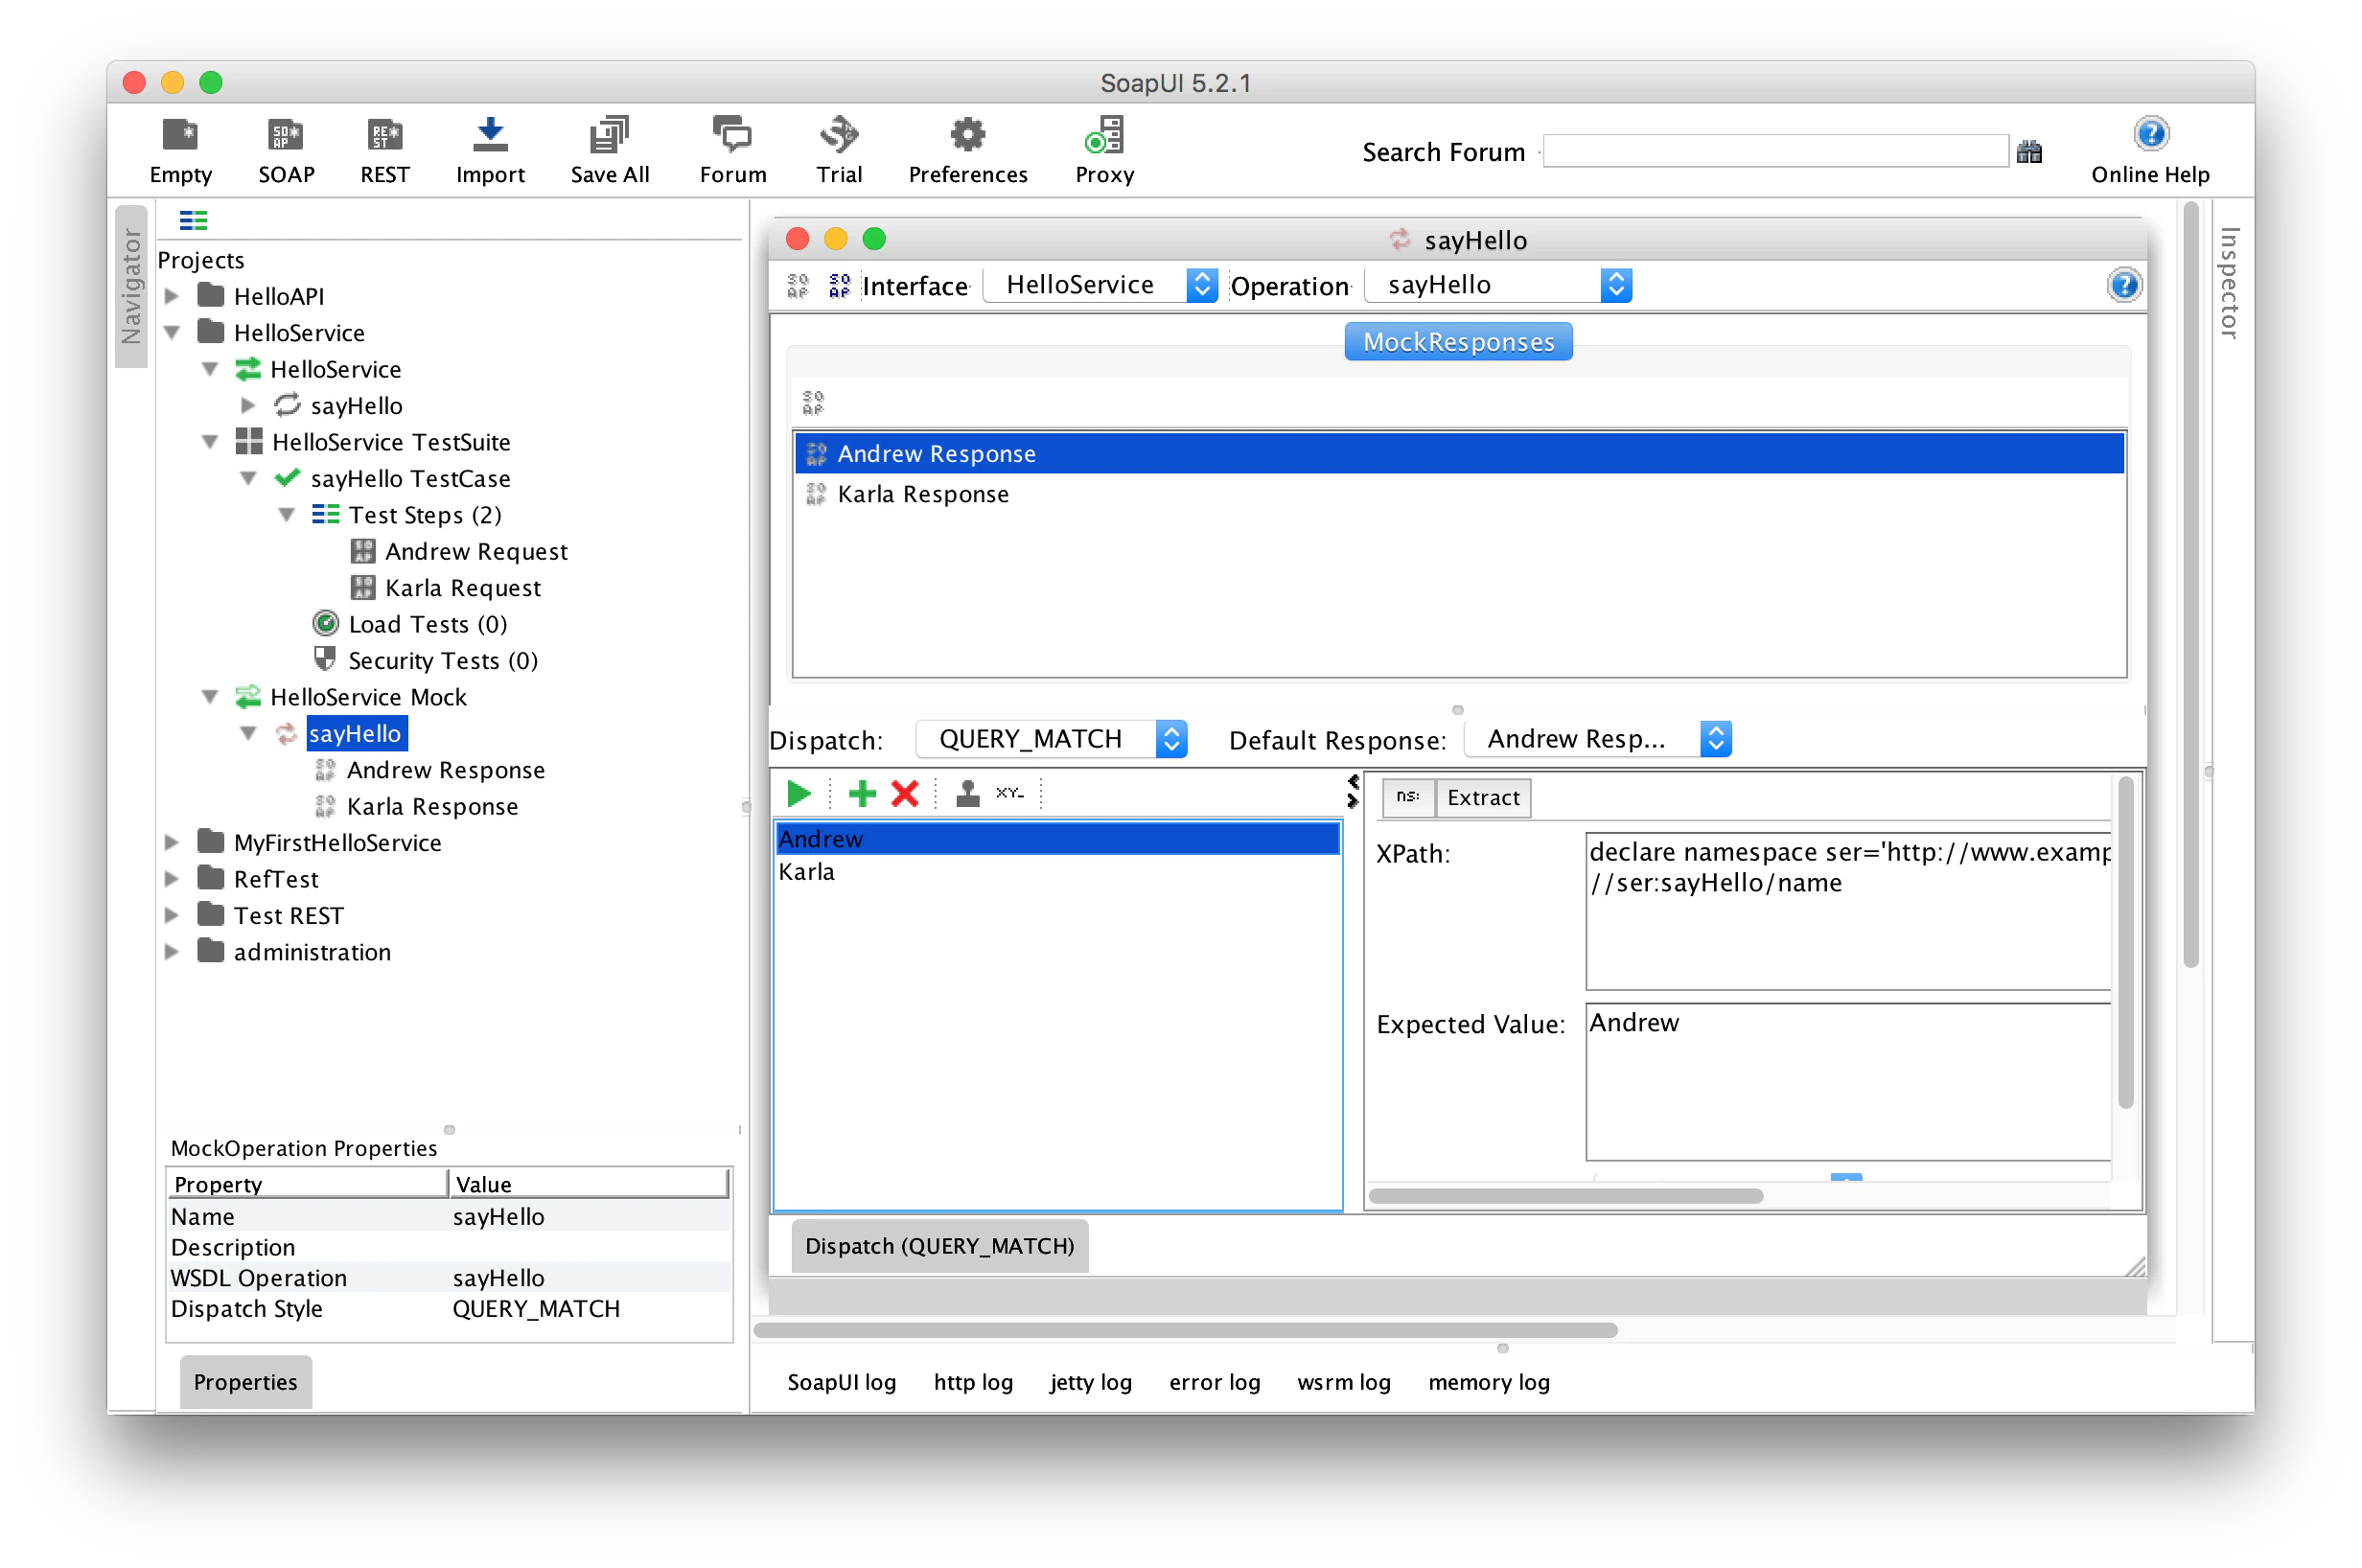
Using XPath expression
After double-clicking on the operation node of your Mock Service, a window as shown in following screenshot should appear. If you want to use XPath for matching, select the QUERY_MATCH Dispatch and associate a Mock Response (upper section) with a new Match Rule (lower left) defining an XPath assertion (lower right). You can use the Extract helper in SoapUI if you’re not familiar to XPath expression.
Warning: The XPath expression used by your different Match Rule must strictly be the same. You cannot used different expression for different rules.
Below the exemple of using the name find in incoming request to find a matching response.
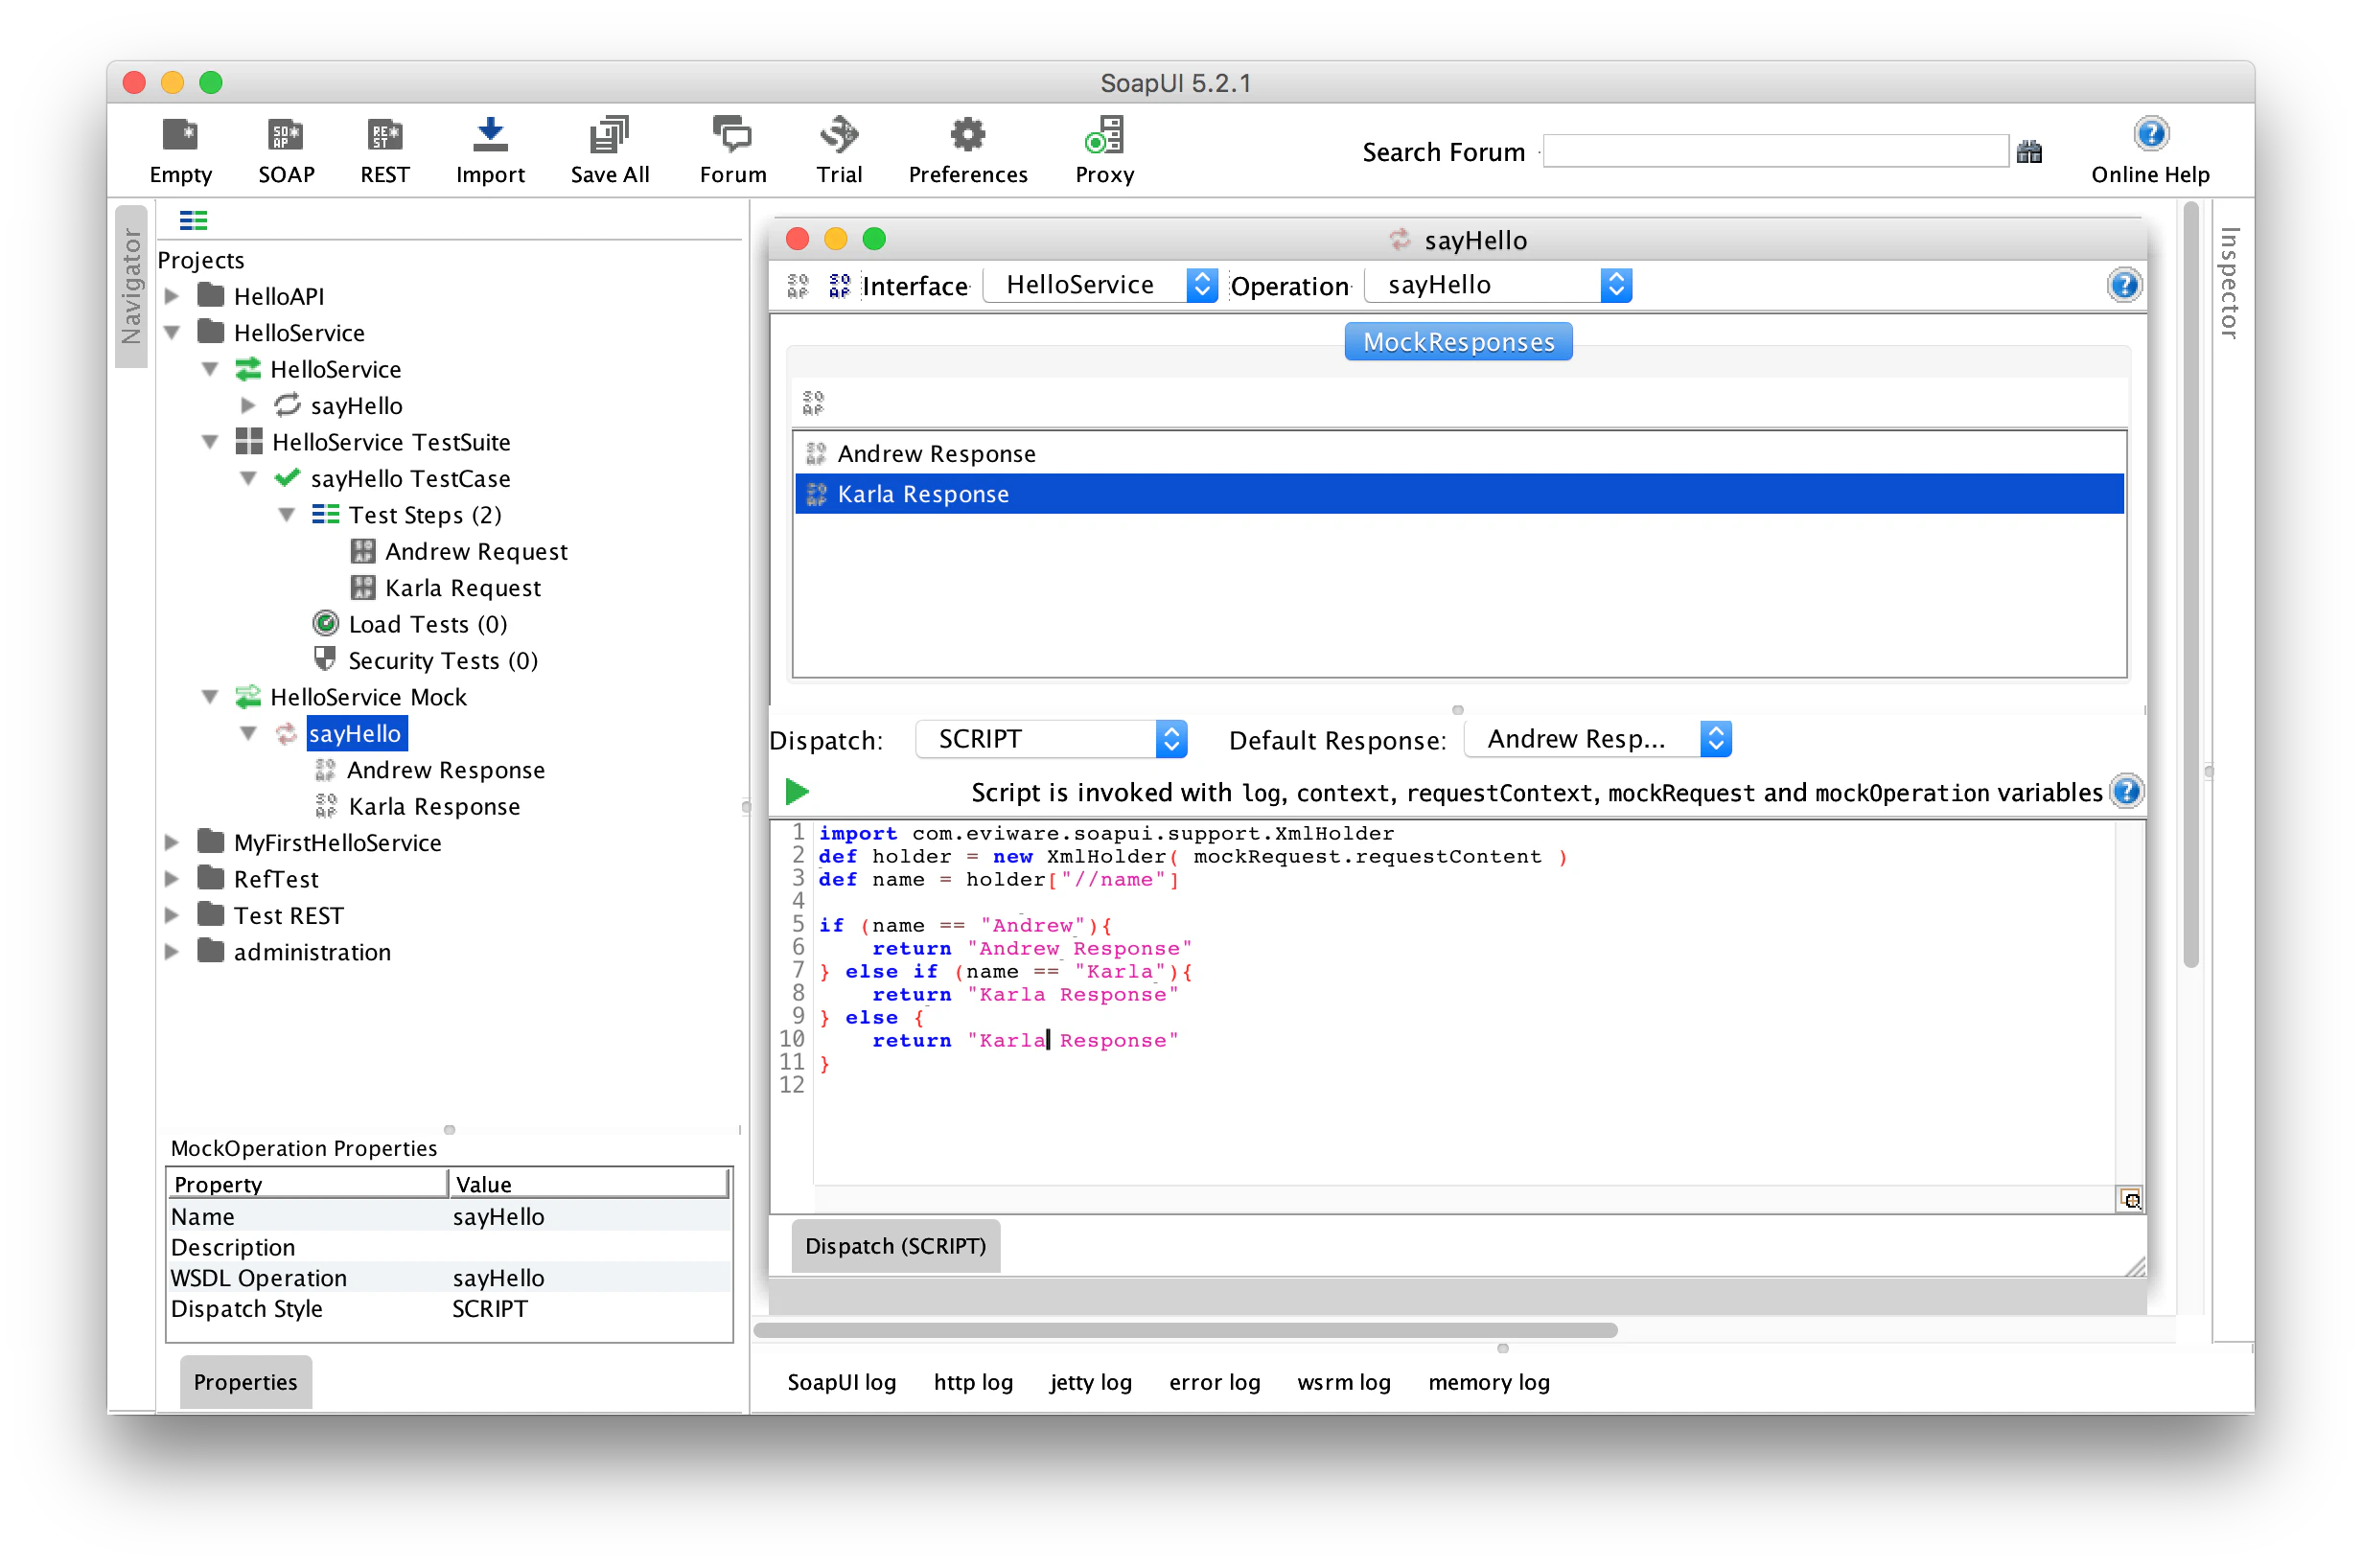
Using a Groovy script
Another mean of defining matching rules is using a Groovy script. Such a script allows to define much more logic for finding a response for an incoming requests. With scripts you can use request payload but also have access to query string, http headers and so on… Groovy script are very powerful when dealing with REST services in SoapUI!
Save SoapUI project
Finally, you just have to save the whole project as a SoapUI XML project file. Just put the result JSON file into your favorite Source Configuration Management tool for an easy integration with Microcks.
Do not forget to add the
versioncustom property on your MockService object, otherwise Microcks will not be able to successfully import your SoapUI project

Still Didn’t Find Your Answer?
Join our community and get the help you need. Engage with other members, ask questions, and share knowledge to resolve your queries and expand your understanding.
Join the community