
-
Using
- Importing Services & APIs
- Comparison to alternatives
- OpenAPI Mocking and Testing
- Swagger Mocking and Testing
- AsyncAPI Mocking and Testing
- Postman usage for Microcks
- gRPC Mocking and Testing
- GraphQL Mocking and Testing
- SoapUI Mocking and Testing
- Http Archive usage for Microcks
- Using exposed mocks
- Getting direct API
- Testing with Microcks
- Advanced topics
- Organizing repository
- Templating mock responses
- Dispatcher & dispatching rules
- Microcks APIMetadata
- Monitoring & Observability
- Installing
- Automating
- Administrating
- Guides
Managing Users
🗓️ Last updated on August 31, 2021 | 4 | Improve this pageIntroduction
Since its inception, Microcks relies on a third party component named Keycloak for managing security related topics like users identification, users authentication and habilitations as well as API endpoints protection. Keycloak is also used for providing service accounts authentication and authorization. This topic is detailed in a dedicated page .
Basic installation of Microcks (through Kubernetes Operator, Helm Chart, OpenShift template or Docker-compose) comes with its own Keycloak instance embedding the definitions of Microcks needed components into what is called a realm. Advanced installation of Microcks can reuse an existing Keycloak instance and will require your administrator to create a new dedicated realm . We provide a sample of such a realm configuration that can be imported into your instance here .
Basically, Microcks own components only need the reference of the Keycloak instance endpoint - the URL with /auth suffix - into an environment variable called KEYCLOAK_URL.
Authentication
Authentication in Microcks is indeed delegated to the configured Keycloak instance using the OpenID Connect Authorization Code Flow . The Keycloak instance can be used as the direct source of user’s Identity or can be used as a broker for one or more configured Identity Providers.
The default installation comes with no default identity provider so it’s mandatory to configure at least: either some directly managed users (see User Management ) OR one Identity Provider attached to the realm Microcks is configured to use.
Technical notes
On the client side (ie. in the browser), Microcks is using a client application called microcks-app-js that is configured to perform redirect to the public endpoint URL of the microcks app.
On the server side, Microcks is using a client application called microcks-app for checking and trusting JWT bearers provided by the frontend application API calls.
All this parameters are set within the application.properties configuration file. This file is usually supplied as a ConfigMap into containerized environments.
See an excerpt below:
# Keycloak configuration properties
keycloak.auth-server-url=${KEYCLOAK_URL:http://localhost:8180/auth}
keycloak.realm=microcks
keycloak.resource=microcks-app
keycloak.bearer-only=true
keycloak.ssl-required=external
Authorization
Microcks realm typically defines 3 application roles that are defined as client roles
on the Keycloak side. Theses roles are attached to the microcks-app client application.
These roles are:
user: a regular authenticated user of the Microcks application. This is the default role that is automatically attached the first time a user succeed authenticating into the Microcks app,manager: a user identified as having management roles on the Microcks repository content. Managers should be allowed of adding and removing Services mocks into the repository as well as configuring mocks operation properties. In a near future, this role should be scoped by a classifier allowing to organize services into coherent groups,admin: a user identified as having administration role on the Microcks instance. Admin should be able to manage users, configure external repositories secrets or realize backup/restore operations.
Whether a connected user has these roles is checked both on the client and the server sides using Keycloak adapters .
Technical notes
Whilst checks on the client side is disseminated into the pages code, endpoints authorization on the server side is centralized into the application.properties configuration file. This file is usually supplied as a ConfigMap into containerized environments.
See an excerpt below:
keycloak.resource=microcks-app
keycloak.use-resource-role-mappings=true

# Keycloak access configuration properties
keycloak.security-constraints[0].authRoles[0]=admin
keycloak.security-constraints[0].authRoles[1]=manager
keycloak.security-constraints[0].authRoles[2]=user
keycloak.security-constraints[0].securityCollections[0].name=Insecure stuffs
keycloak.security-constraints[0].securityCollections[0].patterns[0]=/api/services
keycloak.security-constraints[0].securityCollections[0].patterns[1]=/api/services/*
keycloak.security-constraints[0].securityCollections[0].patterns[2]=/api/jobs
keycloak.security-constraints[0].securityCollections[0].patterns[3]=/api/jobs/*
keycloak.security-constraints[0].securityCollections[0].patterns[4]=/api/tests
Users management
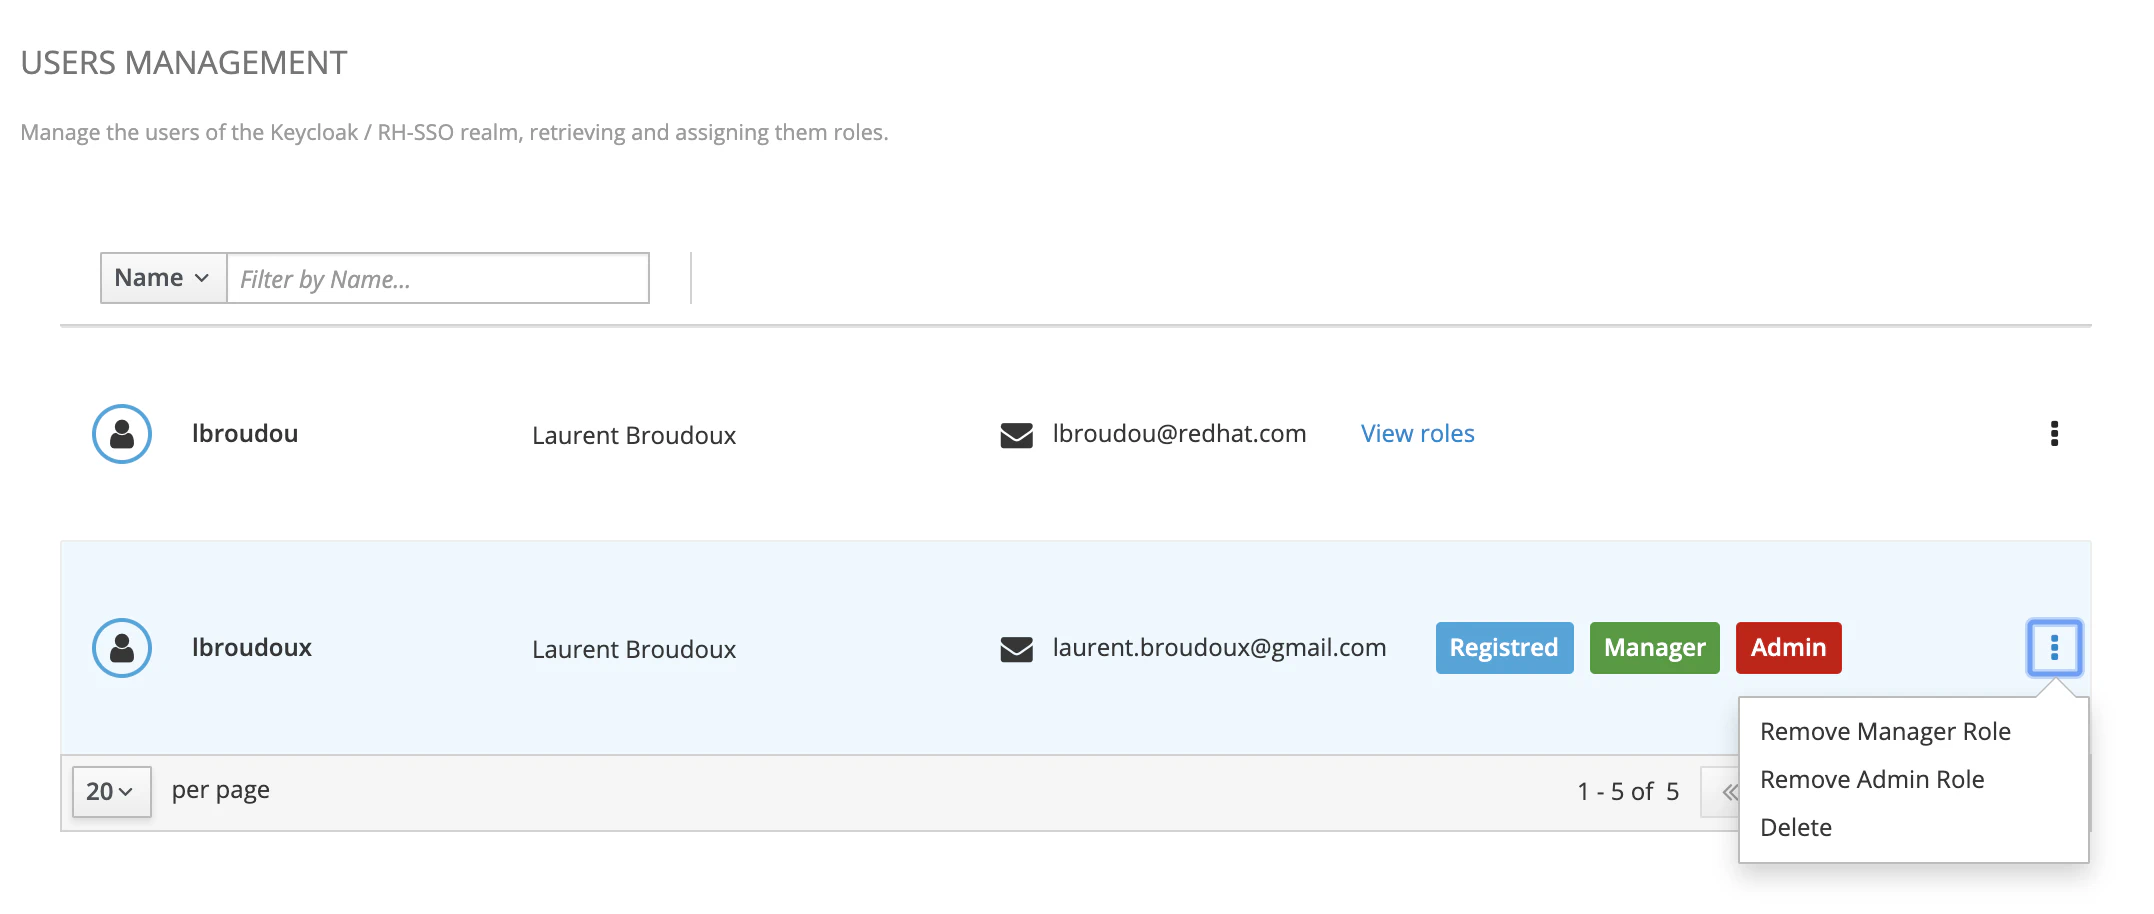
Your can partially manage users directly from the Microcks GUI. “Partially” means that you are able to manage a user’s roles within Microcks application but not able to create a new user. This action is reserved to your Identity Provider used through Keycloak configuration or to Keycloak itself if you choose to use it as a provider.
Users can only be managed by Microcks admin - we mean people having the admin role assigned. Users management is simply a thumbnail with the Administration page that is available from the vertical menu on the left once logged in as administrator. In order to be able to retrieve the list of users and operate changes, the user should also have manage-users and manage-clients role from realm-management Keycloak internal client. See Keycloak documentation
for more on this point.
Group membership
From Microcks 1.4.0, you have the ability to segment the role attribution depending on the master label you have chosen for organizing your repository. See Organizing repository
for details on this feature.
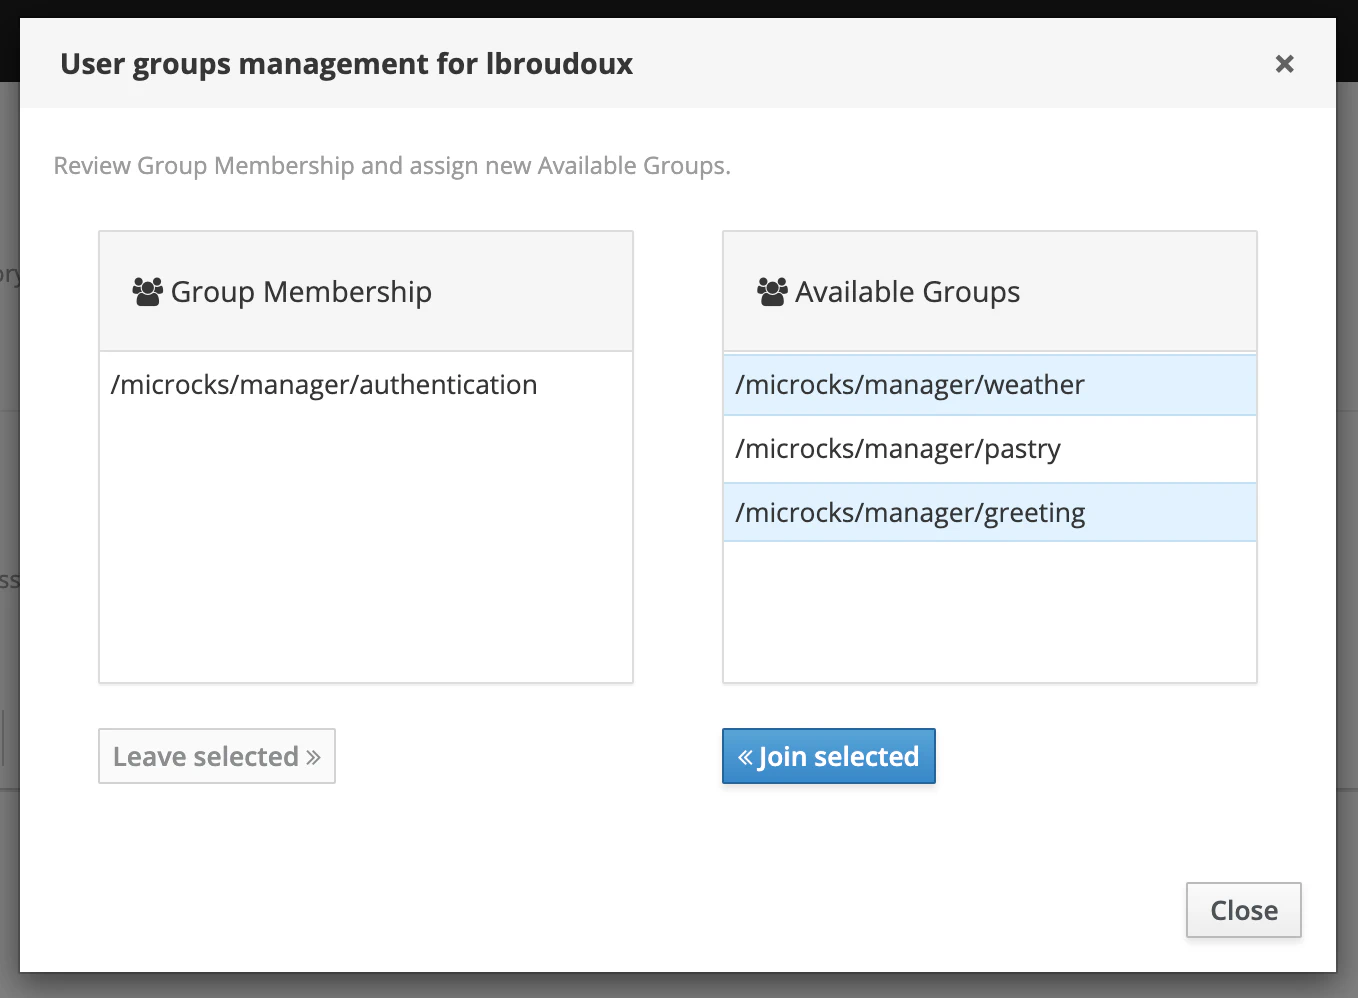
When this feature is enabled, Microcks will create as many groups in Keycloak as we have different values for this master label. These groups are organized in a hierarchy so that you’ll have groups with such names /microcks/manager/<label> those members represents the manager of the resources labeled with <label> value.
Also, a new Manage Groups options appears in the option menu for each user. From this new modal window, you can easily manage group membership for a specified user as shown below:

Still Didn’t Find Your Answer?
Join our community and get the help you need. Engage with other members, ask questions, and share knowledge to resolve your queries and expand your understanding.
Join the community