
Simulating OpenAPI Webhooks
🗓️ Last updated on March 5, 2026 | 6 | Improve this pageOverview
In OpenAPI v3 specs, you can define webhooks - even if closely related to or confused with the callbacks feature those are different beasts. Webhooks are still asynchronous, out-of-band requests that your service will send to some other service but the difference is that webhooks are not related to an initial API interaction. As a webhook consumer you may not even never interact with other API operation.
Webhooks are useful when a consumer may be interested in a stream of events that may not be necessarily subsequent to an initial API interaction. Typical examples are:
- Change events stream: the API provider sends to the webhook registrars all the events for an entity (ie: git commits, new messages in a thread),
- Important steps of business process: at certain points, the service advertise via webhooks the creation or finalization of a new user, a new contract, a new page in the CMS, …
💡 OpenAPI Webhooks support is available starting with Microcks
1.14.0.
This guide will walk-through an example of simulating OpenAPI Webhooks in Microcks. We’ll go through an OpenAPI specifiation, explain how webhooks are specified, then explore how the Microcks UI displays these information, and allows registration of webhhoks, and finally test our simulation.
Let’s take the example of a Petstore event stream for new pets registration! 🛎️
1. An Example
The Petstore Webhooks API declares a single webhook to allow consumers to receive information about new pets avaialble into our store. A pet definition is simplictic here: it has an id, a name and a tag (either a cat or a dog).
Bolow is an example on how you would define this with OpenAPI Spec. You can get our full Petstore-webhooks-openapi.yaml file from our samples.
openapi: 3.1.0
info:
  title: Petstore Webhooks
  version: 2.0.0
  # [...]
webhooks:
  newPet:
    post:
      requestBody:
        description: Information about a new pet in the system
        content:
          application/json:
            schema:
              $ref: "#/components/schemas/Pet"
            examples:
              Rusty:
                value: |-
                  {
                    "id": {{ randomInt(1,10) }},
                    "name": "Rusty",
                    "tag": "{{ randomValue(cat, dog) }}"
                  }
      responses:
        "200":
          description: Return a 200 status to indicate that the data was received successfully
          x-microcks-refs:
            - Rusty
components:
  schemas:
    Pet:
      type: object
      required:
        - id
        - name
      properties:
        id:
          type: integer
          format: int64
        name:
          type: string
        tag:
          type: string
The important things to notice here:
- Contrary to a callback, there is no way to specify an endpoint url - because webhooks don’t suppose an initial API interaction where this url may have been provided.
- As a consequence, you can use Microcks functions like
{{ randomInt(1, 10) }}or others to provide dynamic content but you will not be able to use expression based on request content like{{ request.body/name }}. Incoming request does not exist!
- As a consequence, you can use Microcks functions like
- You may have different webhooks examples defined and they can be associated with different response types to illustrate success or failure expectations. We’re following the same convention than for other style of interaction: assembling request and responase having the same name, here
Rusty.- For webhooks where no response body is expected, we used the
x-microcks-refsextension to explicitly attach the response with matching request.
- For webhooks where no response body is expected, we used the
2. Exploring the UI
If you haven’t started a Microcks instance yet, you can do so using the following command - maybe replacing 8585 by another port of your choice if this one is not free:
docker run -p 8585:8080 -it --rm quay.io/microcks/microcks-uber:nightly
You can then import our sample Petstore-webhooks-openapi.yaml file after having downloaded it.
Once imported, you should get access to its details in Microcks UI. Let explore together what it looks like:
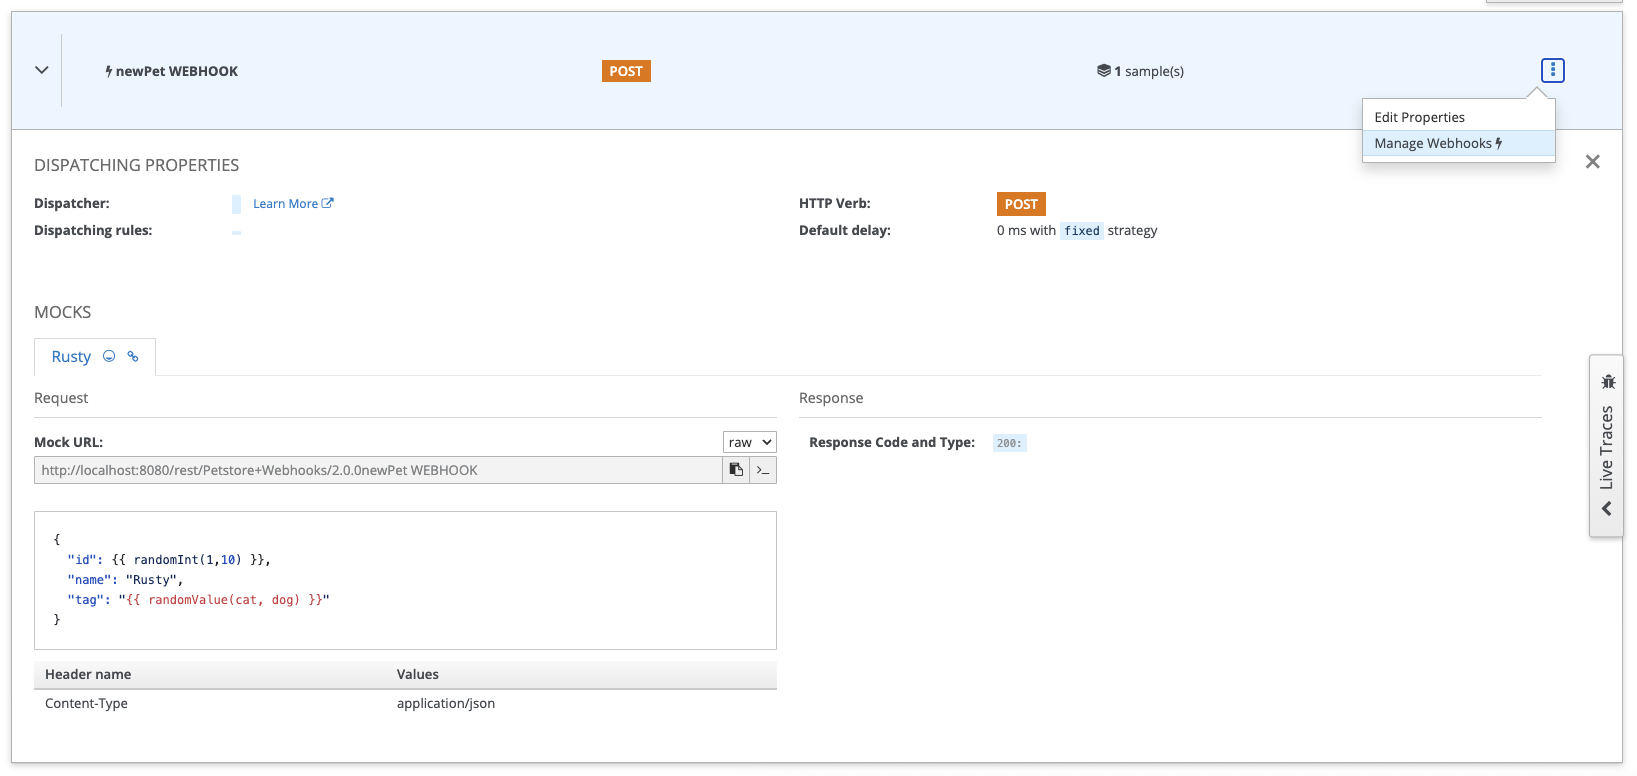
On the above screenshot, we can see that a webhook is considered as a “regular” operation, with the POST HTTP method associated. The first visible different here is that the operation name is decorated with a bolt icon, meaning that this is actually an evnt that will happen at some point - you cannot directly invoke this operation.
The second difference is on top right corner of the screeenshot when you click the operation menu. In the case of webhooks operation, you’ll now have access to a new Manage Webhooks dialog that will allow you to manage consumer registrations for this webhook operation. We’ll use it in a minute.
3. Testing Webhooks
It’s time to test and illustrate how all of this is working!
To test the webhooks, you’ll need a local HTTP server. Of course, if you’re developing an application and directly pluging this into your app, you may use the built-in app server. Here, for a quick and loca test, you may want to use a simple Echo web server like the one below:
const http = require("http");
const port = 3000;

http
  .createServer((req, res) => {
    const headers = {
      "Access-Control-Allow-Origin": "*",
      "Access-Control-Allow-Methods": "OPTIONS, POST, GET, PUT",
      "Access-Control-Max-Age": 2592000, // 30 days
      "Access-Control-Allow-Headers": "*",
      /** add other headers as per requirement */
    };

    if (req.method === "OPTIONS") {
      res.writeHead(204, headers);
      res.end();
      return;
    }

    if (["GET", "POST", "PUT"].indexOf(req.method) > -1) {
      res.writeHead(200, headers);
      let body = [];
      req.on('data', (chunk) => {
        body.push(chunk);
      }).on('end', () => {
        body = Buffer.concat(body).toString();
        console.log(`==== ${req.method} ${req.url}`);
        console.log('> Headers');
        console.log(req.headers);

        console.log('> Body');
        console.log(body);

        res.write(body);
        res.end();
      });
      return;
    }

    res.writeHead(405, headers);
    res.end(`${req.method} is not allowed for the request.`);
  })
  .listen(port);
console.log("listening on port " + port)
Basically, you can copy/paste the code above into a file like node-http-server.js and then run node node-http-server.js to have a server running in a terminal window like this:
node node-http-server.js
listening on port 3000
💡 As our Http server is running on port 3000, it will be accessible at
http://localhost:3000from our machine network. However, from the Microcks container perspective it will be accessible using thehttp://host.docker.internal:3000alias that allow accessing the machine network from inside a container.
Now, back to the Microcks UI, let’s use the new Manage Webhooks dialog to register a new webhook subscriber. Hit the + Create button and in the simple form behind the list (empty for now), enter the target URL, the desired frequency, the expiration delay and the errors threshold. The above values are the default one. The hit the + Add button to submit the form values.

Now, let quickly switch to the terminal where you started the Http server, wait for about 6 seconds and you should get the following output:
==== POST /
> Headers
{
  'content-length': '48',
  host: 'localhost:3000',
  'user-agent': 'Java-http-client/21.0.9',
  accept: '*/*',
  'content-type': 'application/json'
}
> Body
{
  "id": 6,
  "name": "Rusty",
  "tag": "dog"
}
==== POST /
> Headers
{
  'content-length': '48',
  host: 'localhost:3000',
  'user-agent': 'Java-http-client/21.0.9',
  accept: '*/*',
  'content-type': 'application/json'
}
> Body
{
  "id": 7,
  "name": "Rusty",
  "tag": "cat"
}
You just received, asynchronously, some pseudo-random events about new pets being available in our store. You should have notived a small delay (~3sec) between each message - this is the default configured frequency you submitted before. If you keep your terminal and the connection open, you’ll endlessly receive new events with changing values.
Wondering when this will stop? There are two exit conditions here, and the delivery of events stops when one of them is reached:
- The expiration delay of the registration (rememeber, the above 2 days value),
- The number of delivery errors (remember, the above 5 errors threshold value)
Getting back to the new Manage Webhooks dialog will allow you to track expiration of registrations with the current number of delivery errors.
You have run your first OpenAPI Webhook simulation! 🎉
Wrap-up
Starting with 1.14.0 release, Microcks can now simulate asynchronous, stream of events via OpenAPI webhooks. Webhooks support offer richer simulations capabilities that allows you to represent more complex interaction scenarios between an API provider and its consumers.
Happy mocking! 🤡

Still Didn’t Find Your Answer?
Join our community and get the help you need. Engage with other members, ask questions, and share knowledge to resolve your queries and expand your understanding.
Join the community