
Importing Services & APIs
🗓️ Last updated on June 7, 2024 | 6 | Improve this pageOverview
This guide will show you and discuss the different options for importing Services and APIs into Microcks. There are basically two different ways of putting new content into Microcks:
- Pushing content to Microcks via Upload,
- Having Microcks pulling content via Importer.
We will consider the pros and cons of the different methods.
1. Import content via Upload
Via the UI
The simplest and fastest way to add new Services or API mocks is to use the UI Quick Import. Click the Quick Import button in the top-right corner of the screen, or simply drag-and-drop a file anywhere on the UI — either action will start the upload and import flow. A dialog will appear where you can adjust options and confirm the upload.
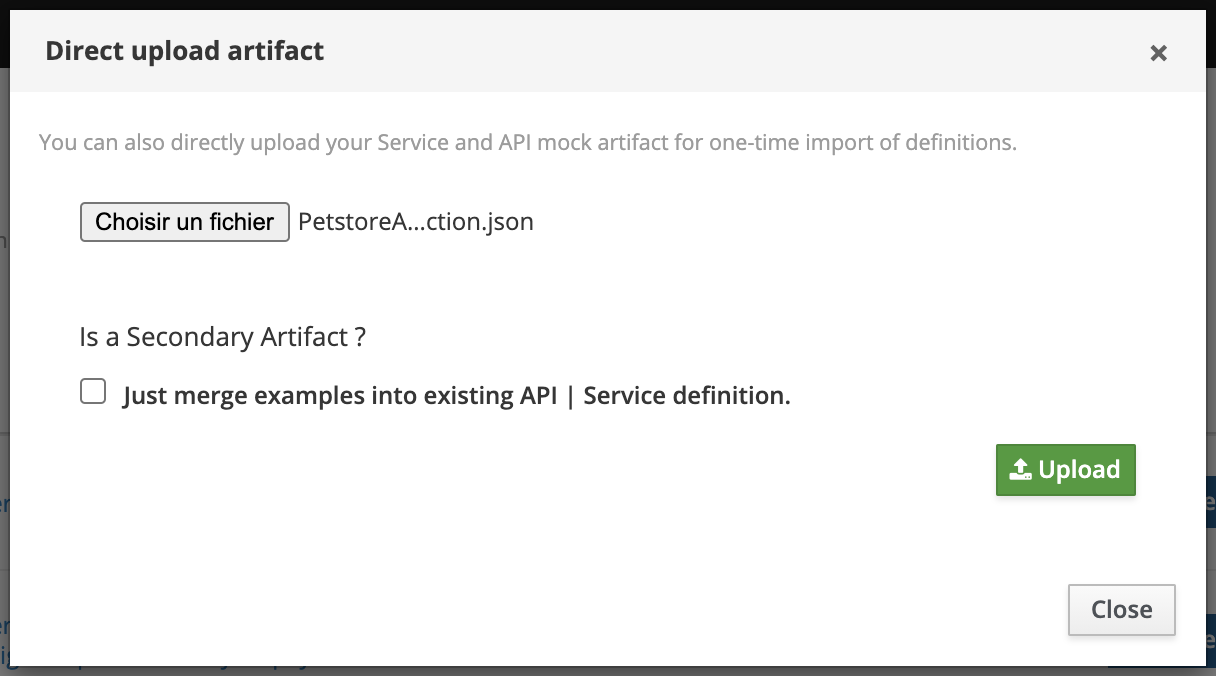
💡 You can also specify whether this artifact should be considered as
primaryorsecondaryper the Multi Artifacts support. In the case of asecondaryartifact, you may check the Secondary Artifact box.
After choosing your artifacts, click the green Upload button to send them to Microcks. Notification messages will appear in the top-right corner to inform you of the process. Newly discovered Services and APIs can be found in the APIs | Services repository.
While this method is very convenient for a quick test, you’ll have to re-import your artifact file on every new change. To watch the changes of local files, you can check out the Microcks CLI Import
Via the API
The same thing can be done via Microcks’ own API. Be sure to start by reading the Connecting to Microcks API guide, and to retrieve a token by running the authentication flow. The Service Account you use for this operation is required to have the manager role, which is not the case with the default one, as explained in Inspecting default Service Account.
Once you have the $TOKEN issued for the correct account, uploading a new Artifact is just a matter of executing this curl command:
# Uploading a local artifact.
curl 'https://microcks.example.com/api/artifact/upload?mainArtifact=true' -H "Authorization: Bearer $TOKEN" -F 'file=@samples/films.graphql' -k
Configure dependency resolution
Direct upload is straightforward and quick to implement, but it has one caveat: it does not automatically resolve dependencies. For example, if your artifact file uses external references with relative paths, Microcks cannot resolve them by default.
As a workaround to this limitation, and since Microcks 1.10.1, we introduced a new default-artifacts-repository.url property that takes the value of DEFAULT_ARTIFACTS_REPOSITORY_URL environment variable when defined. It can be set to either an HTTP endpoint (starting with http[s]://) or a file endpoint (starting with file://). This default repository for artifacts will be used as the default location for Microcks to resolve relative dependencies.
default-artifacts-repository.url=${DEFAULT_ARTIFACTS_REPOSITORY_URL:#{null}}
💡 For local development, it is super convenient to use a very small HTTP server running on your laptop or a common folder mounted into the Microcks container as the default artifacts repository.
2. Import content via Importer
Another way to add new Services or API mocks is to schedule an Importer Job in Microcks. We think it’s actually the best way to achieve continuous, iterative and incremental discovery of your Services and APIs. The principle is very simple: you save your artifact file to the Git repository of your choice (public or private), and Microcks will periodically check whether changes have been applied and whether new mock or service definitions are present in your artifact. The nice thing about using Importer is that external files referenced in the target artifact will be automatically resolved for you.
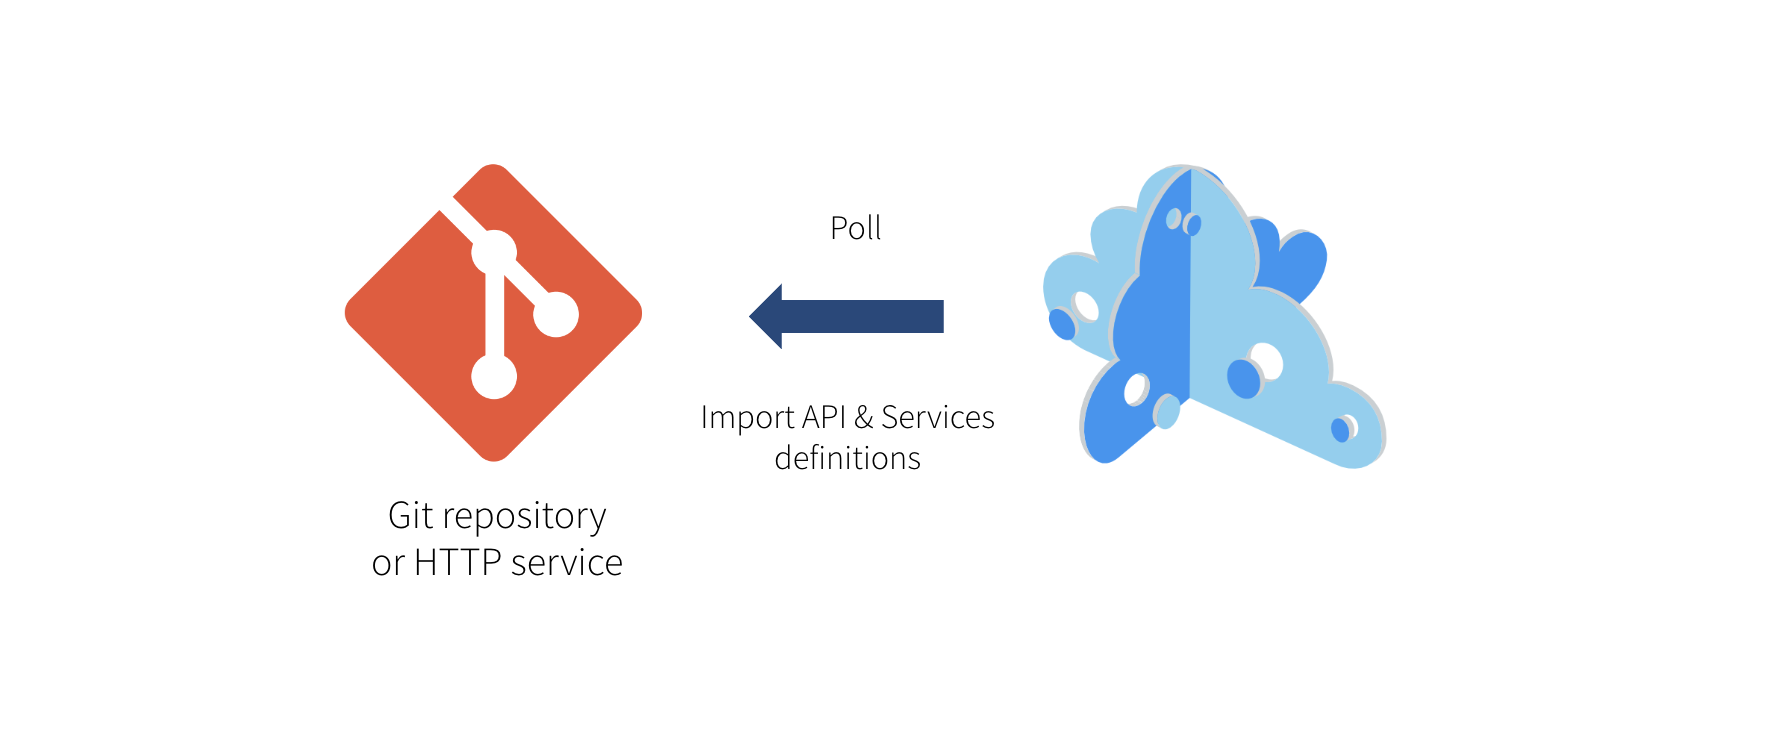
💡 Though we think that Git repositories (or other version control systems) are the best place to keep such artifacts, Microcks only requires a simple HTTP service. So you may store your artifact on a simple filesystem as long as it is reachable using HTTP.
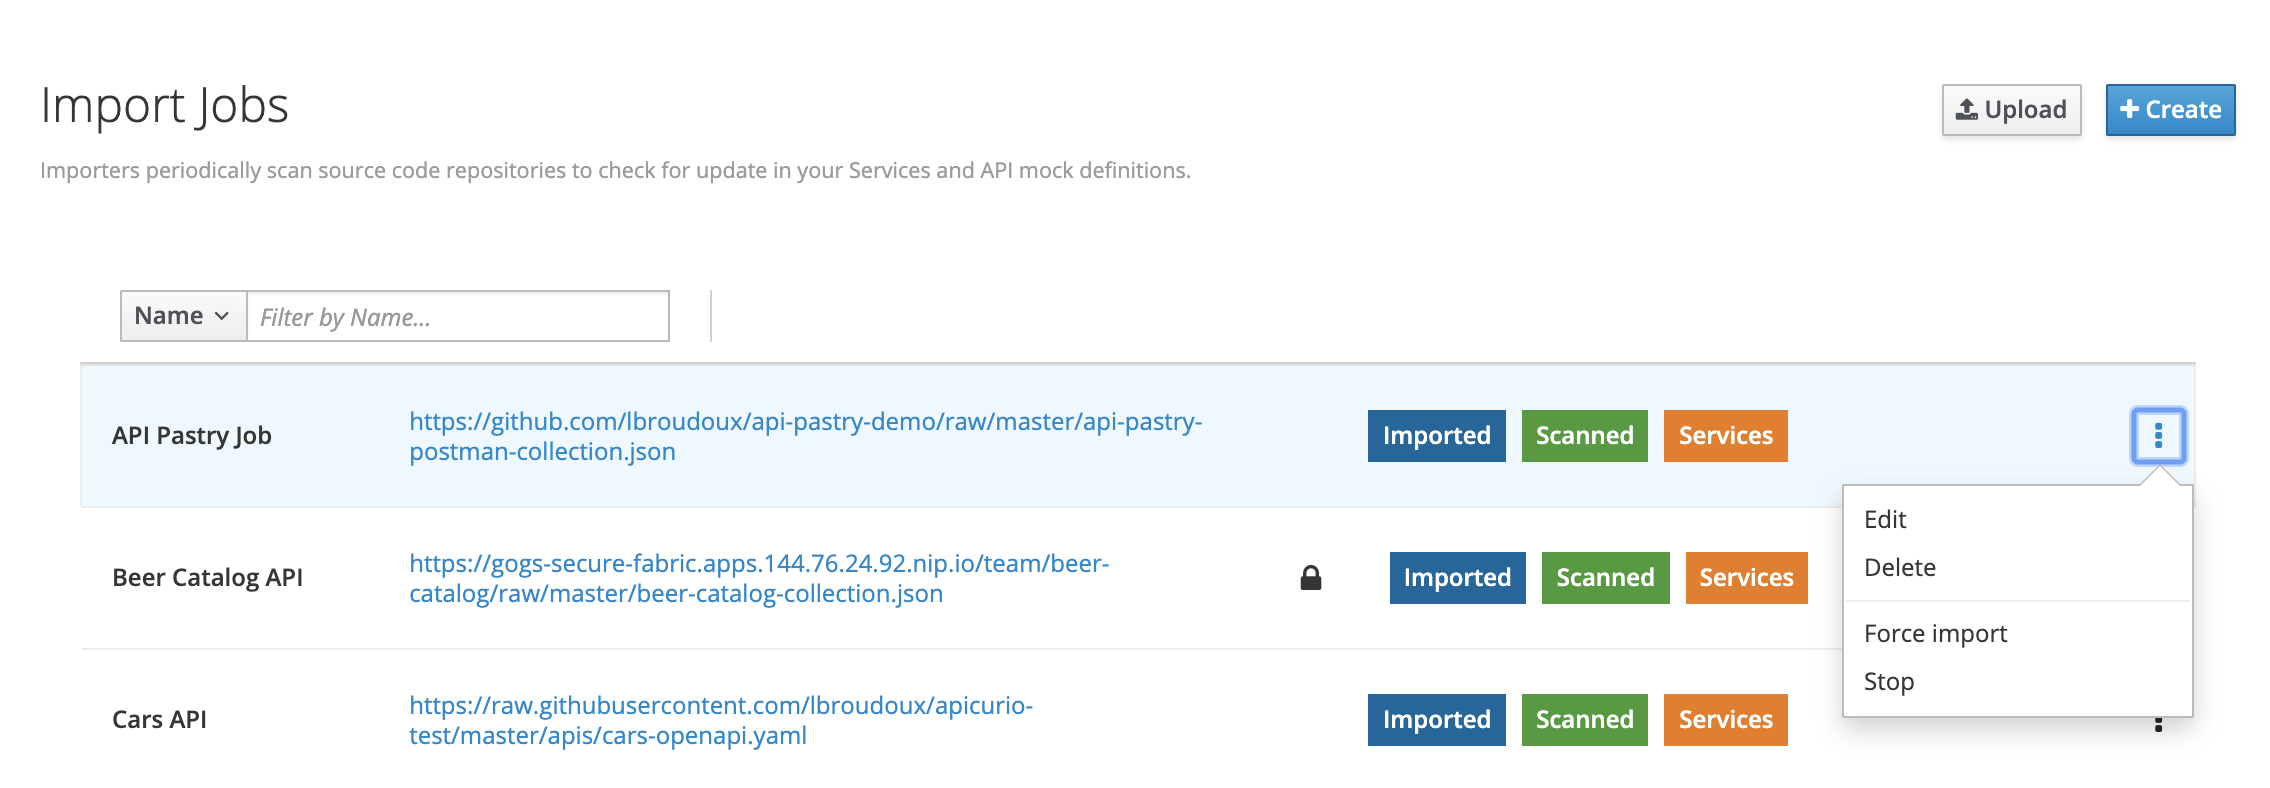
Still from the left vertical navigation bar, just select the Importers menu entry to see the list of existing importers.
Creating a new scheduled import
You may declare a new Importer job by hitting the Create button.
A wizard modal then appears, as creating an Importer is a three-step process. The first step concerns mandatory basic properties, such as your Importer’s name and the repository URL it will use to discover API mocks.

💡 You can also specify whether this artifact should be considered as
primaryorsecondaryper the Multi Artifacts support. In the case of asecondaryartifact, you may check the Just merge examples into existing API | Service definition box.
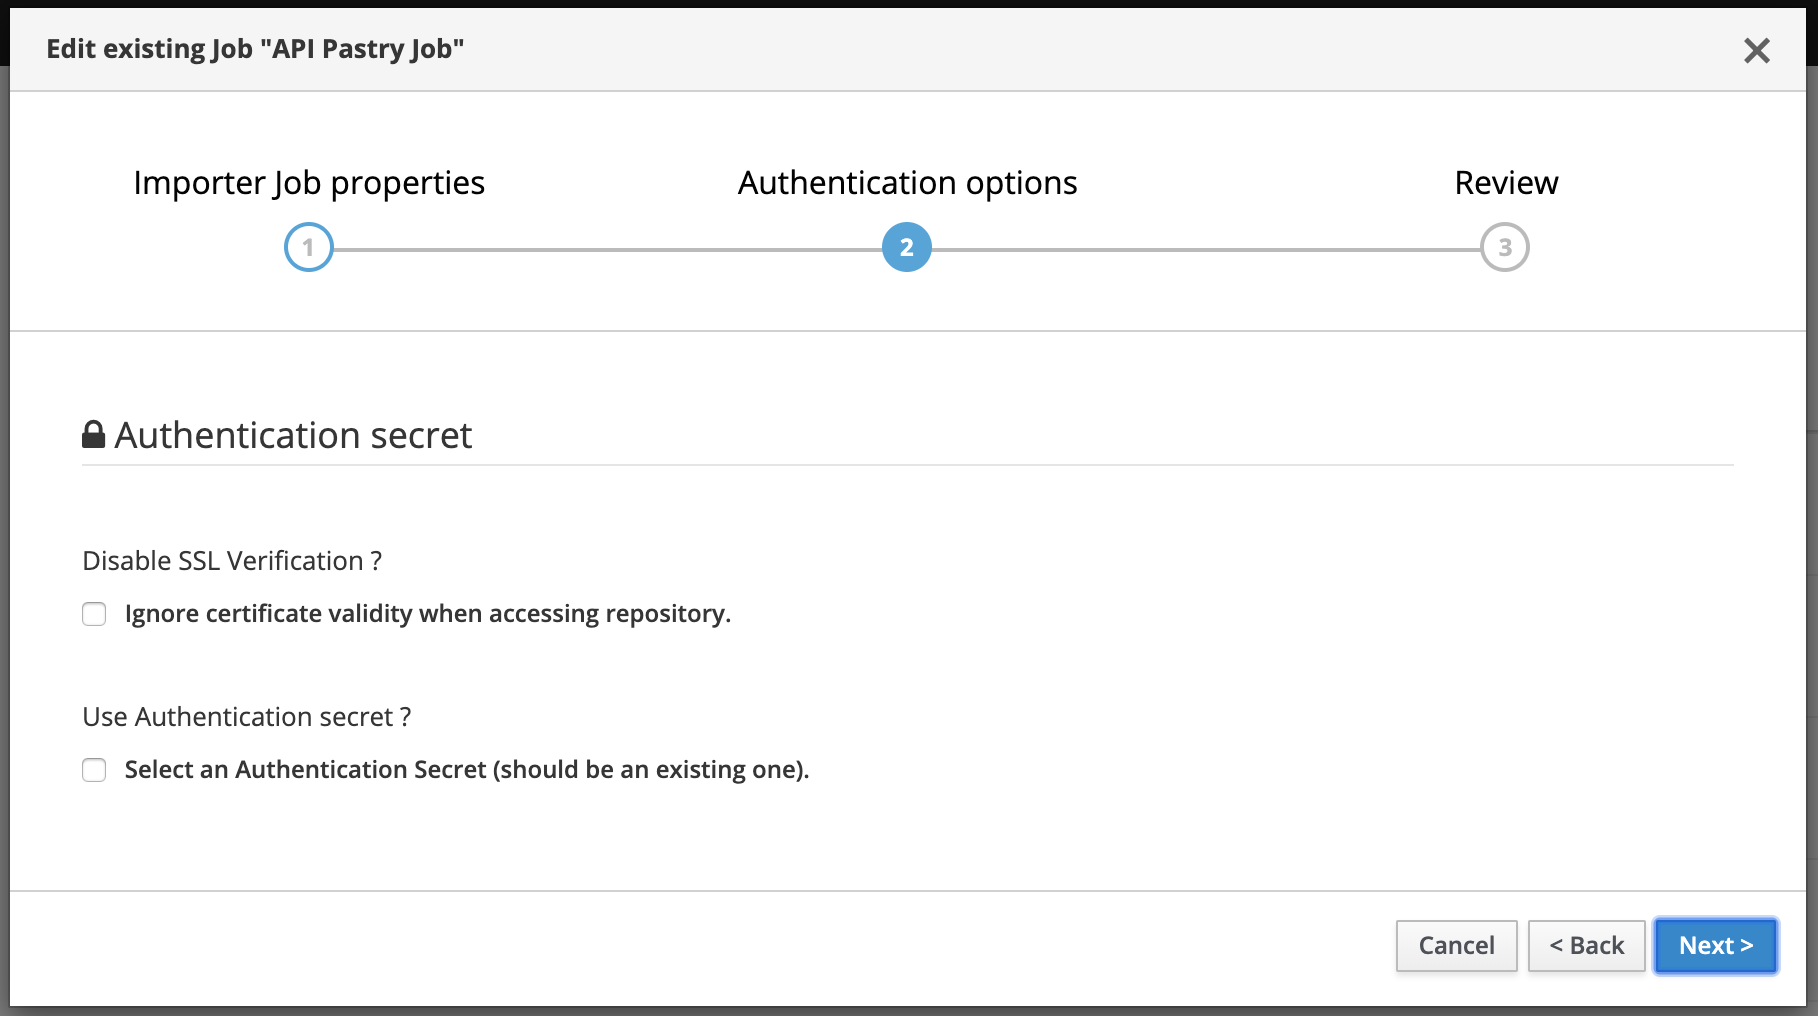
The second step concerns authentication options for accessing the repository. Depending on the type of repository (public or private), you may need to enable/disable certificate validation and manage authentication using a Secret. For more info, check the External Secrets guide.
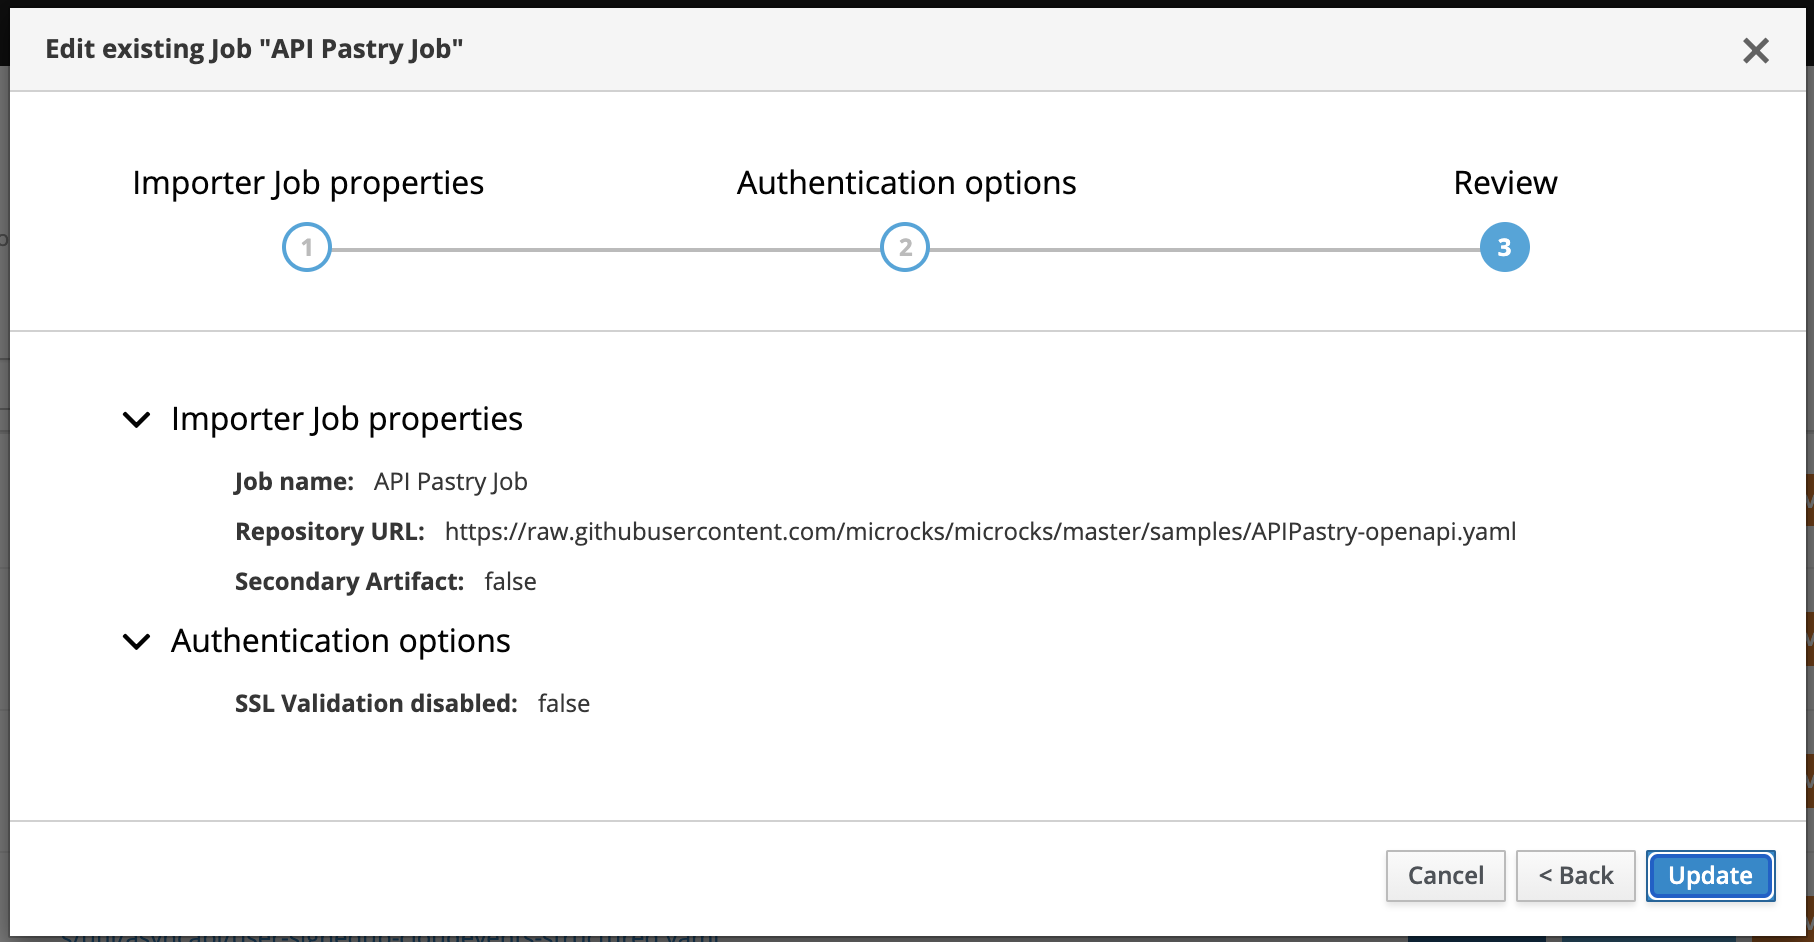
Finally, the review displays a summary before creating the Importer Job.
Managing scheduled importers
At creation time, the importer job is automatically Scanned and Imported.
Once created, importer jobs can be managed, activated or forced through this screen. You’ll see a colored marker for each job line:
Scannedmeans that the job is actually scheduled for the next importation run. Otherwise,Inactivewill be displayed.Importedmeans that the job has been successfully imported on a previous run. Otherwise,Last import errorswill be displayed with a pop-up showing the last error,Servicesis a shortcut to access the service definitions discovered by this job.
Using the 3-dotted menu, you can easily enable/disable or force the job.
Configure scheduling interval
The scheduling interval can be globally configured for all Jobs. It is a global setting and not a per-job one. This is achieved through the services.update.interval property in the application.properties configuration file, which takes the value of the SERVICES_UPDATE_INTERVAL environment variable. The value should be set to a valid CRON expression; the default is every 2 hours.
services.update.interval=${SERVICES_UPDATE_INTERVAL:0 0 0/2 * * *}
Wrap-up
Importing new content into Microcks can be done in several ways: via the UI, the CLI, or the API.
While pushing local content is very convenient for immediate definition and local development updates, setting up an importer job is the best way to achieve continuous, iterative and incremental discovery of your Services and APIs.
Making Microcks pull your artifacts also enables advanced dependency resolution, which can be mandatory when your OpenAPI or AsyncAPI artifacts use $ref.
Since an import can be scheduled and may take a little time, it is done asynchronously with respect to the human interaction that triggered it. We choose not to use a blocking process for error management: Microcks importers will try to discover and import services, but will die silently in the event of any failure. We also think this promotes an iterative, incremental way of working: you know your job will gracefully fail if your new samples are not yet complete.
Some of the error messages will be reported through the Last import errors status, but some will not… To help you in checking your artifacts for compliance with recommended practices and conventions, we’re developing the Microcks Linter Ruleset.

Still Didn’t Find Your Answer?
Join our community and get the help you need. Engage with other members, ask questions, and share knowledge to resolve your queries and expand your understanding.
Join the community