
Defining delays for mocks
🗓️ Last updated on May 6, 2025 | 4 | Improve this pageOverview
When using mocks to simulate a backend dependency, it may be more realistic to have responses that do not come immediately but reproduce the dependency response time and latency. Microcks allows you to specify such delays in different ways.
This guide shows you how to use Microcks to configure and simulate delays, or response time, for your mocks. You’ll learn through a simple example how to do so on a REST API, but the principles remain the same for the other protocols and API styles.
1. Concepts
In Microcks, response time can be defined at three different levels:
- A default delay can be set at the API operation level; this one applies to all incoming requests if no delay overrides this value,
- A delay can be defined at the API endpoint level. This allows consumers to specify the delay they’d like to see applied depending on their usage of the mock. This value overrides the API operation default delay when specified,
- Delays can also be defined at the API request level, allowing consumers to dynamically change the mock response time for each request. This approach is particularly convenient if you are using a load injection tool and your application is propagating headers to the mocks.
Let’s dive in and use them in action! 🤿 🐠
2. Practice
To practice setting up delays, you can reuse the API Pastry sample described in our Getting Started tutorial. Once the API is loaded in Microcks, access the GET /pastry operation Edit Properties page from the 3-dots menu.
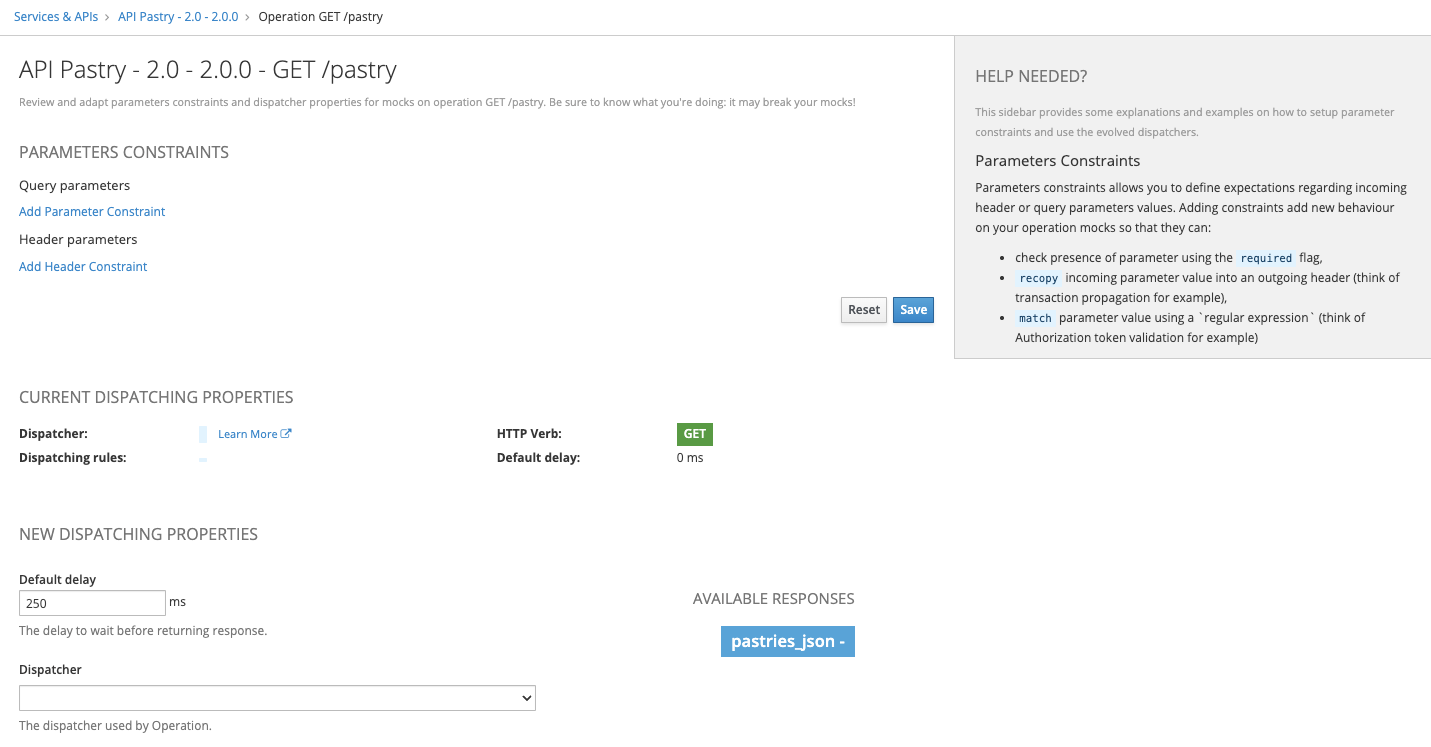
The Default delay in the dispatching properties has not been set, so it should be 0 ms. You can change this value to one of your choice, let’s say 250 ms for our experiment. Do not forget to Save!
Now let’s do some tests to check Microcks’ behavior regarding response time, chaining the time and curl commands to call the operation:
time curl -X GET 'http://localhost:8585/rest/API+Pastry+-+2.0/2.0.0/pastry' -H 'Accept: application/json'
will produce the following output:
[...]
0,01s user
0,01s system
2% cpu
0,284 total
So, our 250 ms delay has been applied correctly! The difference is just a matter of the network transmission and processing time on the client side.
Ok. We just saw the API operation level, what about the API endpoint level? Well, this one is easy: you just need to add a delay parameter to your endpoint URL. Let’s try it without further ado:
time curl -X GET 'http://localhost:8585/rest/API+Pastry+-+2.0/2.0.0/pastry?delay=500' -H 'Accept: application/json'
will produce the following output:
[...]
0,00s user
0,01s system
1% cpu
0,524 total
The 500 ms delay has overridden the default delay set at the operation level! 🎉
Now, finally, let’s see how to override things at the request level. This is as simple as setting an x-microcks-delay HTTP header! To demonstrate that it supersedes all other delay definitions, we will keep the previous one and issue the following command:
time curl -X GET 'http://localhost:8585/rest/API+Pastry+-+2.0/2.0.0/pastry?delay=500' -H 'x-microcks-delay: 800' -H 'Accept: application/json'
That will produce the following output:
[...]
0,00s user
0,00s system
0% cpu
0,826 total
We have now waited 800 ms before receiving the response as specified in the header.
So cool! 🙌 You have now defined a per-request delay that will change with the header value. And remember that these mechanisms are exactly the same for all the API kinds and protocols supported by Microcks!
3. Other ways of proceeding
Defining the Default delay view in the Microcks UI can be cumbersome. You have plenty of other ways to do so:
- Using our OpenAPI extensions if you’re dealing with REST APIs,
- Using an additional APIMetadata artifact if you don’t want this information to be mixed with your API definition or if you’re dealing with GraphQL or gRPC services,
- Via the Microcks API using the
PUT /services/{id}/operationdirectly.
Wrap-up
Response delays are an easy-to-use and powerful mechanism for even more realistic simulation of your dependencies. As a developer, you can now bootstrap your project with these response time constraints directly simulated during your development iterations!

Still Didn’t Find Your Answer?
Join our community and get the help you need. Engage with other members, ask questions, and share knowledge to resolve your queries and expand your understanding.
Join the community