
Using Jenkins Pipeline
🗓️ Last updated on April 28, 2025 | 6 | Improve this pageOverview
This guide illustrates how you can integrate the Microcks Jenkins plugin to keep Microcks in sync with your API specifications and integrate test stages within your Jenkins CI/CD pipelines. This plugin allows your Jenkins builds and jobs to import API Artifacts into a Microcks instance and to launch new Tests. It uses Service Account and so it’s definitely worth the read 😉
The Microcks Jenkins plugin has its own GitHub repository and its own lifecycle.
1. Download the Jenkins plugin
Microcks Jenkins plugin is available and can be downloaded from Central Maven repository. Just get the HPI file and install it on your Jenkins master your preferred way.
2. Set up the Jenkins plugin
This plugin uses the identified Service Account when connecting to Microcks API. It can also manage multiple Microcks instances and hide the technical details from your Jobs using Microcks plugins.
As a Jenkins administrator, go to the Manage Jenkins page and find the Microcks section. You should be able to add and configure as many instances of Microcks installation as you want, like the 2 configured in the screenshot below:

A Microcks installation configuration needs 5 parameters:
- A
Namewill be used by your Jobs or Pipelines as a reference to an environment, - The
API URLis the endpoint of your Microcks server receiving API calls, - The
Credentialsto use for authenticating the Service Account and allowing it to retrieve an OAuth token. These areCredentialsthat should be registered in Jenkins, - The
Disable Cert Validationcan be checked if you are using auto-signed certificates, for example.
You should then be able to test the connection to endpoints and save your configuration. Later, your Jobs and Pipelines will just use the installation Name to refer to it from their build steps.
3. Using the Jenkins plugin
Jenkins plugin may be used in 2 ways:
- As a simple
Build Stepusing a form to define what service to test, - As an action defined using Domain Specific Language within a
Pipeline stage
It provides two different actions or build steps: the Import API specification files in Microcks step and the Launch Microcks Test Runner step.
Import API
Build step usage
When defining a new project in the Jenkins GUI, you may want to add a new step, `Import API specification files in Microcks, ’ as shown in the capture below.
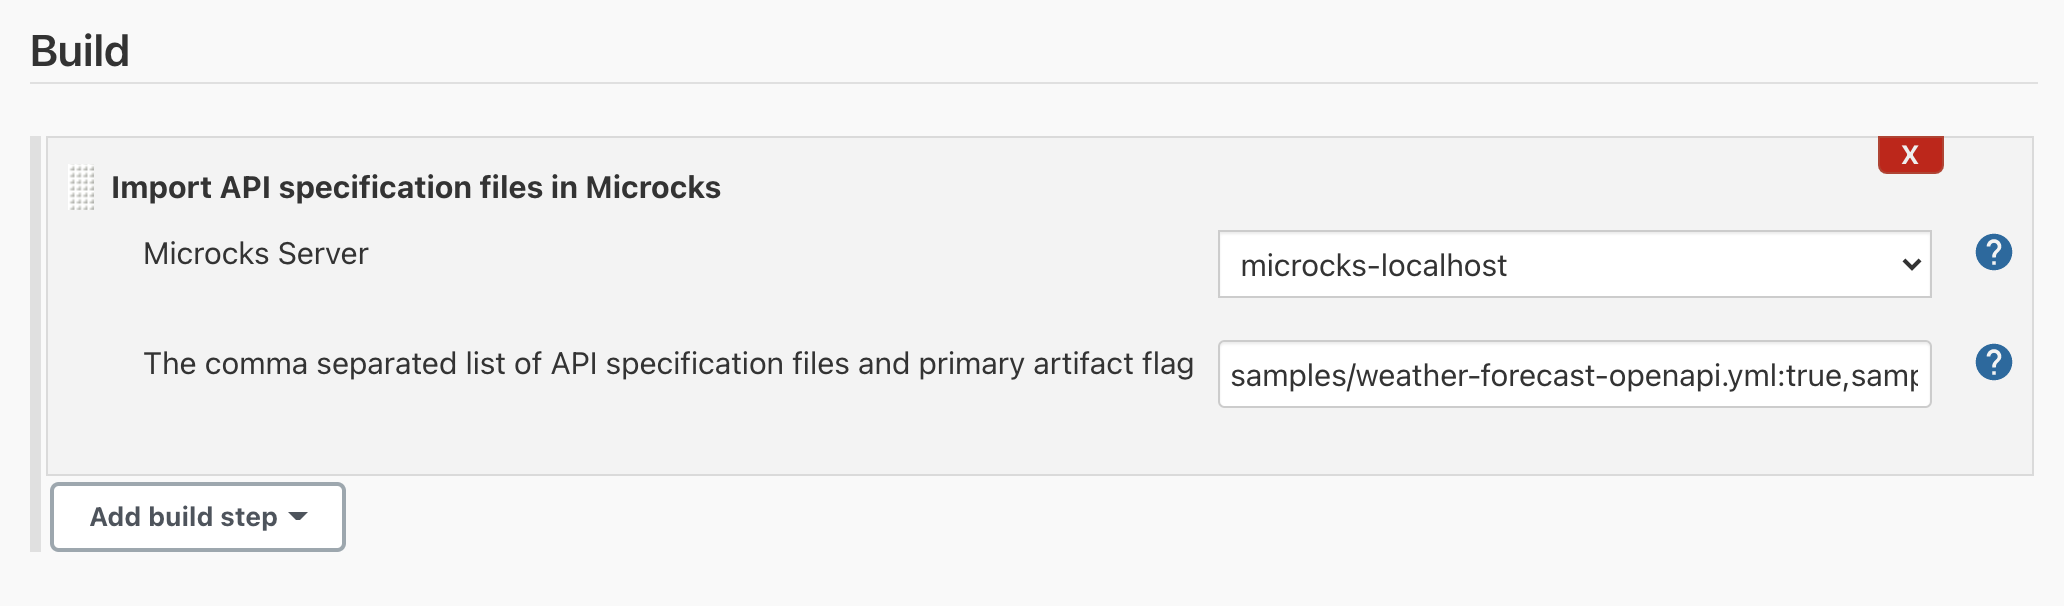
The parameters that can be set here are:
- The
Server: this is theNameof your running instance of Microcks that is registered into Jenkins (see the previous setup step), - The
Comma separated list of API specificationto import: this is simply a/my/file/path[:is_primary],/my/file/path2[:is_primary]expression. You should point to local files in your job workspace, typically those coming from a checkout or clone from the source repository. Optionally, you can specify if they should be considered asmainorprimaryartifact (truevalue) orsecondaryartifact (falsevalue). See Multi-artifacts explanations documentation. The default istrue, so it is considered primary.
DSL plugin usage
When defining a new CI/CD pipeline - even through the Jenkins or OpenShift GUI or through a Jenkinsfile within your source repository - you may want to add a specific microcksImport within your pipeline script as the example below:
node('master') {
  stage ('build') {
    // Clone sources from repo.
    git 'https://github.com/microcks/microcks-cli'
  }
  stage ('importAPISpecs') {
    // Add Microcks import here.
    microcksImport(server: 'microcks-localhost',
      specificationFiles: 'samples/weather-forecast-openapi.yml:true,samples/weather-forecast-postman.json:false')
  }
  stage ('promoteToProd') {
    // ...
  }
  stage ('deployToProd') {
    // ...
  }
}
The parameters that can be set here are the same as those in Build Step usage, but take care of cases and typos:
- The
server: this is theNameof your running instance of Microcks that is registered into Jenkins (see the previous setup step), - The
specificationFiles: this is simply a/my/file/path[:is_primary],/my/file/path2[:is_primary]expression.
Launch Test
Build step usage
When defining a new project in Jenkins GUI, you may want to add a new Launch Microcks Test Runner step as shown in the capture below.
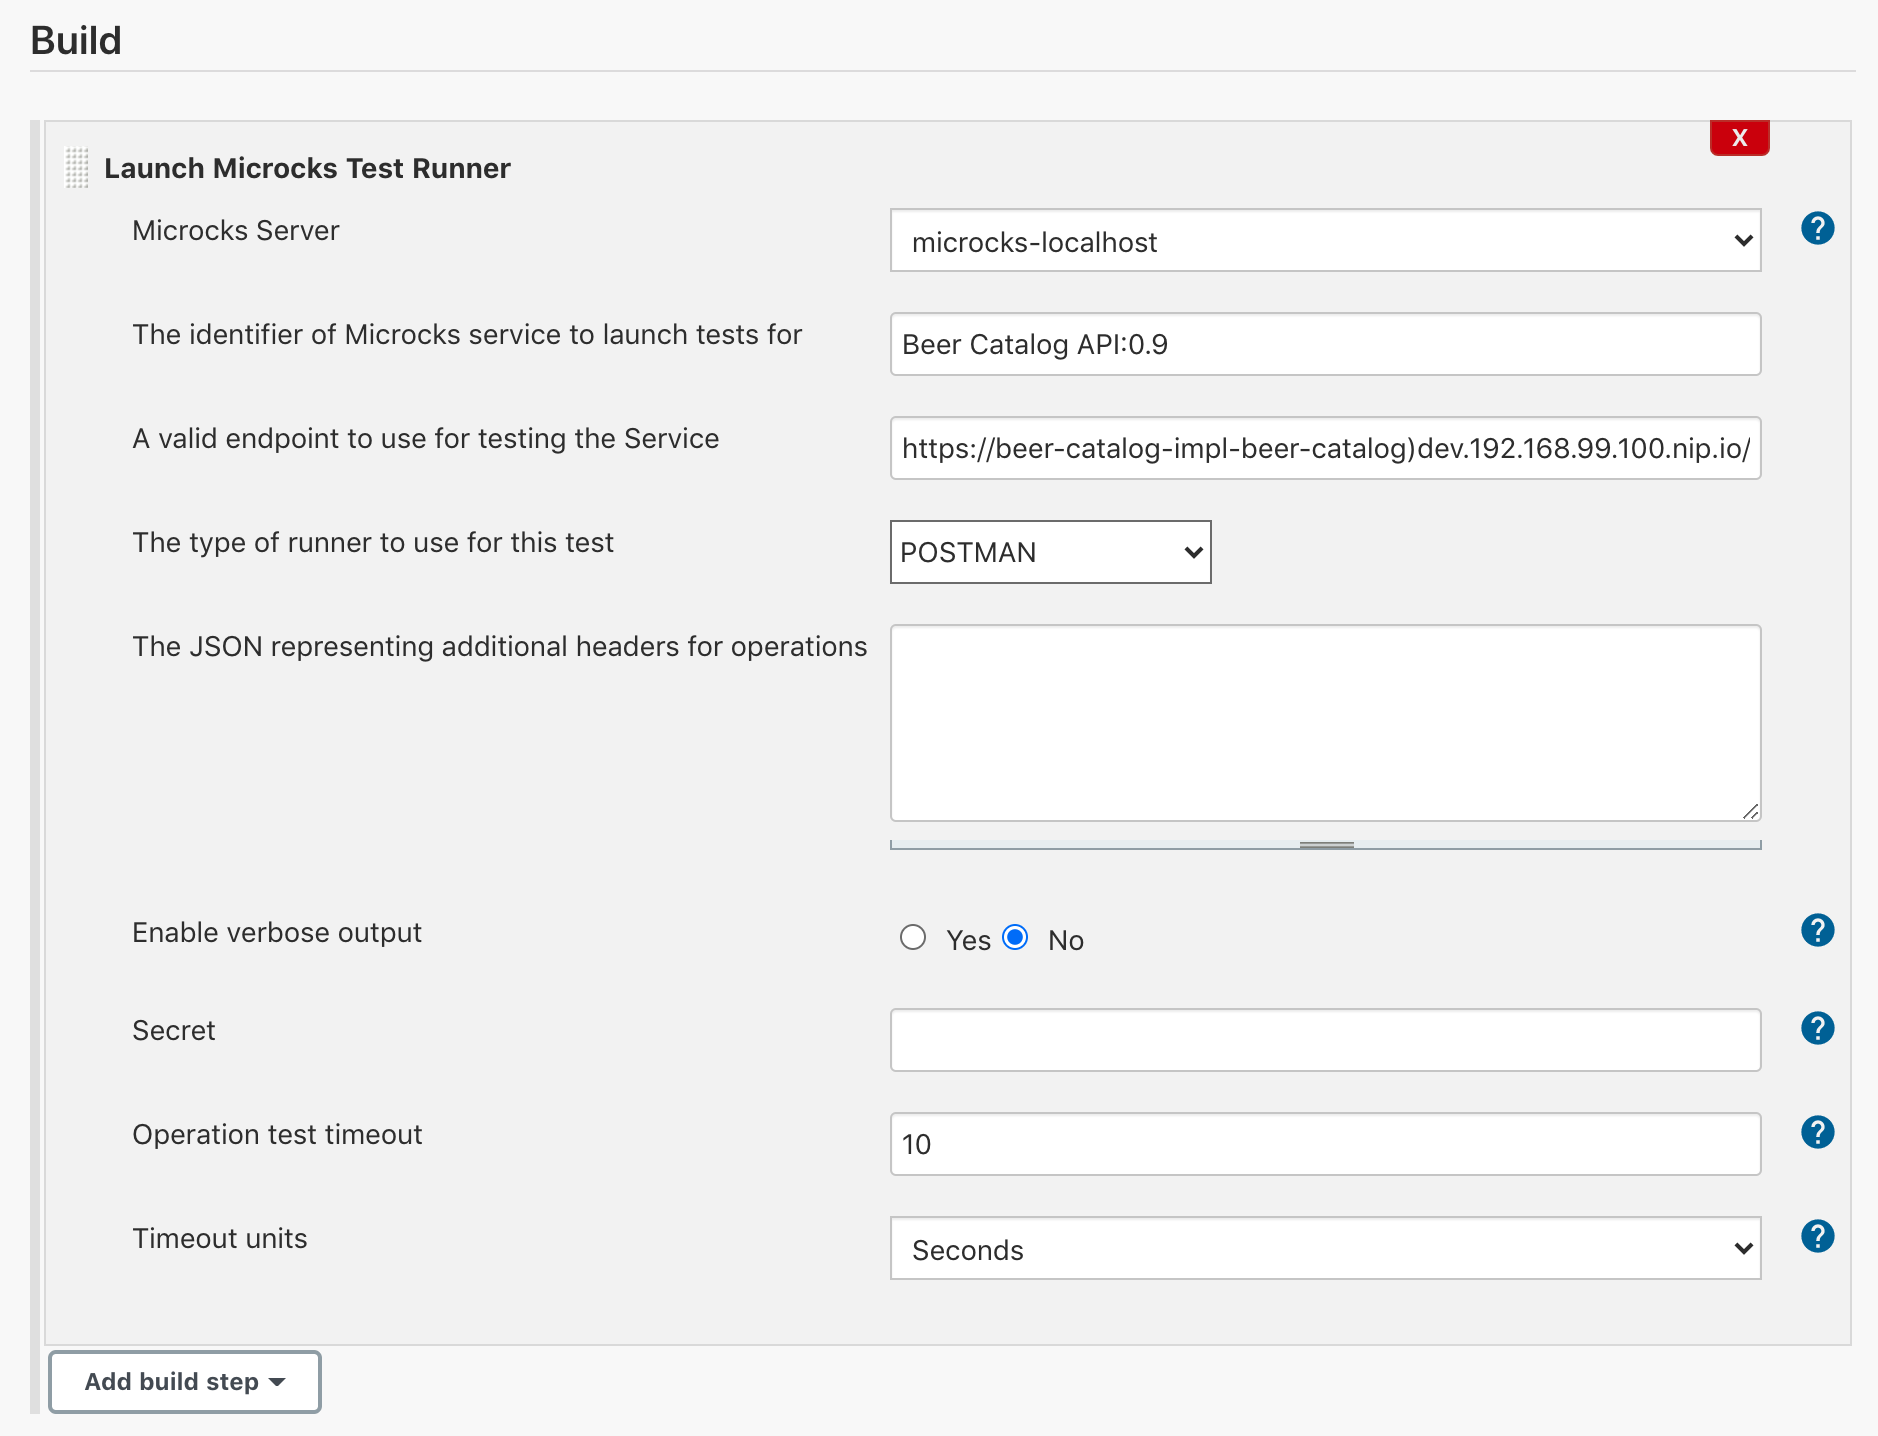
The parameters that can be set here are:
- The
Server: this is theNameof your running instance of Microcks that is registered into Jenkins (see the previous setup step), - The
Service Identifierto launch tests for: this is simply aservice_name:service_versionexpression, - The
Test Endpointto test: this is a valid endpoint where your service or API implementation has been deployed, - The
Runner Typeto use: this is the test strategy you may want to have regarding the endpoint, - The
Verboseflag: allows for collecting detailed logs on Microcks plugin execution, - The
Timeoutconfiguration: allows you to override the default timeout for these tests.
You can also set additional advanced parameters like:
- The
Filtered Operationsto consider: this is a JSON array containing the names of the chosen operations. Example:["GET /beer", "GET /beer/{name}"]. - The
Operations Headersto add to requests: this is a JSON object that specifies these headers globally or per-operation. Example:{"globals": [{"name": "x-api-key", "values": "my-values"}], "GET /beer": [{"name": "x-trace-id", "values": "xcvbnsdfghjklm"}]}
DSL plugin usage
When defining a new CI/CD pipeline - even through the Jenkins or OpenShift GUI or through a Jenkinsfile within your source repository - you may want to add a specific microcksTest within your pipeline script as the example below:
node('maven') {
  stage ('build') {
    // ...
  }
  stage ('deployInDev') {
    // ...
  }
  stage ('testInDev') {
    // Add Microcks test here.
    microcksTest(server: 'microcks-minishift',
      serviceId: 'Beer Catalog API:0.9',
      testEndpoint: 'http://beer-catalog-impl-beer-catalog-dev.52.174.149.59.nip.io/api/',
      runnerType: 'POSTMAN', verbose: 'true', waitTime: 5, waitUnit: 'sec')
  }
  stage ('promoteToProd') {
    // ...
  }
  stage ('deployToProd') {
    // ...
  }
}
The parameters that can be set here are the same as those in Build Step usage, but take care of cases and typos:
- The
server: this is theNameof your running instance of Microcks that is registered into Jenkins (see the previous setup step), - The
serviceIdto launch tests for: this is simply aservice_name:service_versionexpression, - The
testEndpointto test: this is a valid endpoint where your service or API implementation has been deployed, - The
runnerTypeto use: this is the test strategy you may want to have regarding the endpoint, - The
verboseflag: allows for collecting detailed logs on Microcks plugin execution, - The
waitTimeconfiguration: allows you to override the default time quantity for these tests. - The
waitUnitconfiguration: allows you to override the default time unit for these tests (values in milli, sec or min).
You can also set additional advanced parameters like:
- The
filteredOperationsto consider: this is a list of the names of the chosen operations. Example:filteredOperations: ["GET /beer", "GET /beer/{name}"]. - The
operationHeadersto add to requests: this is a map that specifies these headers globally or per-operation. Example:operationHeaders: ["globals": ["name": "x-api-key", "values": "my-values"], "GET /beer": ["name": "x-trace-id", "values": "xcvbnsdfghjklm"]]
Wrap-up
Following this guide, you have learned how to get and use the Microcks GitHub Actions. The GitHub actions reuse the Microcks CLI and the Service Account and so it’s definitely worth the read 😉
Using Microcks and its Jenkins plugin, you may achieve some clean CI/CD pipelines that ensure your developed API implementation is fully aligned to expectations.
The most up-to-date information and reference documentation can be found in the repository README.

Still Didn’t Find Your Answer?
Join our community and get the help you need. Engage with other members, ask questions, and share knowledge to resolve your queries and expand your understanding.
Join the community