

Co-founder of Microcks | Director of Engineering at Postman Open Technologies
Install Microcks on AWS for a test drive 🧪
Whilst we recommend installing Microcks on Kubernetes for easy management and enhanced capabilities, it can also be deployed onto a regular Virtual Machine. This post details how you can setup Microcks onto an AWS EC2 instance if you’re familiar with this environment and want a quick test drive. It takes something like 6–7 minutes to complete from end-to-end. It’s an illustration of setup documentation using Docker Compose.

This will give you a Microcks installation on an AWS EC2 instance running Ubuntu 18.04 LTS :
- all-in-one install : Microcks, Keycloak and MongoDB on the same box,
- local storage mounted through Docker volumes,
- self-signed certificates for rapid testing.
EC2 instance launch
First step is— of course — to order a new EC2 instance at Amazon. We will use a t2.small instance running Ubuntu Server 18.04 LTS as shown below but Microcks will work with any Linux distro, so feel free to use the one that suits you best. One requirement is to add new custom TCP rules into network security group:
- Port
8080should be reachable as it is the main port used by Microcks, - Port
8543should also be reachable as it is used by Keycloak.
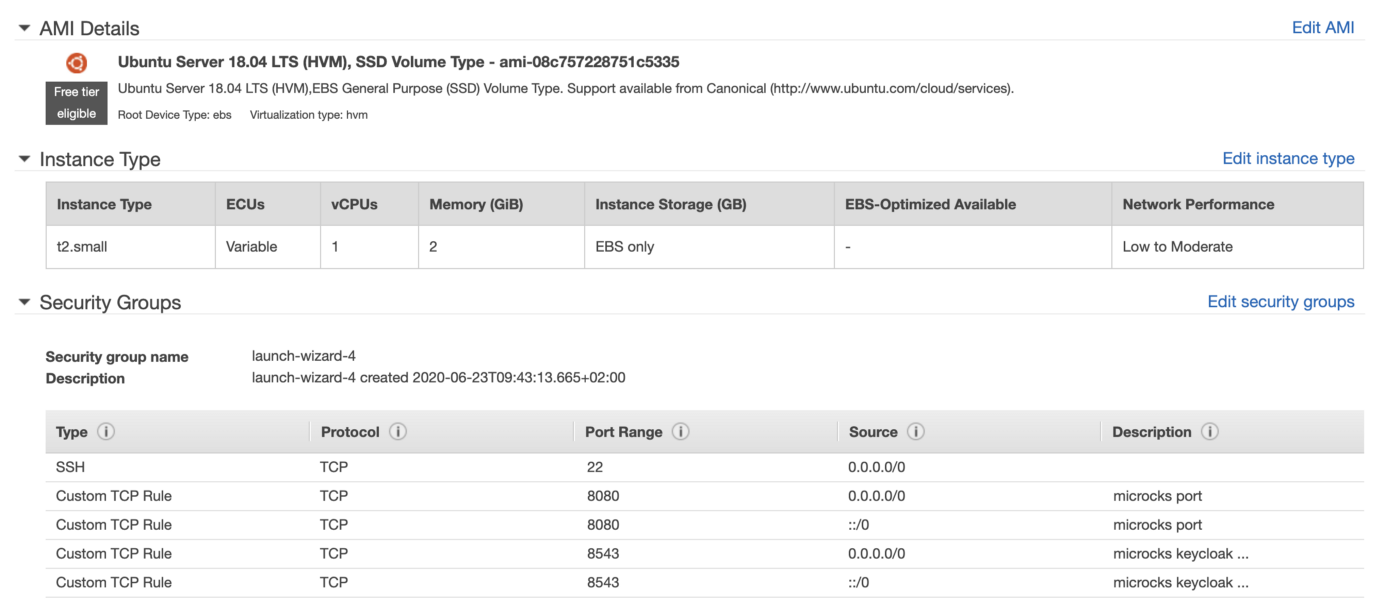
The above screenshot highlights our test configuration elements. Configure your access method with your favorite SSH key and launch your instance!
Microcks setup
Once your instance is up and running, you will need its public hostname at hand for setup. Just SSH into the running VM, clone the https://github.com/microcks/microcks repository and use the setup-microcks-apt.sh script we provide.

The terminal session above details all these commands and steps. Instance is first updated with docker tooling, self-signed certificates are generated and configuration files are tuned. Microcks is finally launched using docker-compose.
Microcks first startup
Once Microcks is running on the EC2 instance, you just have to open your favorite browser and finish the application first login. The video below illustrates this using the default admin user with 123 password (that you should immediately change).
And here we are! In no time! Ready to go and to import some OpenAPI contracts, Postman Collection or SoapUI Projects within the installation. And pretty soon AsyncAPI! Have a look at Getting Started using Microcks for importing samples.
Do you think Microcks as a Service directly from AWS Marketplace would be of great help for you or your team? Please let us know what you think voting and commenting on this issue.
Happy mocking ;-)